Android 4
12. Activity Testing - Part A

This chapter
- 12.0 Activity Testing
- 12.1 Sample Code
- 12.2 Setting Up the Emulator
- 12.3 Setting Up the Project
- 12.4 Creating Test Case Class
- 12.5 Running the Test
Android includes powerful tools for testing applications.
The tools extend JUnit with additional features, provide convenience classes for mock Android system objects, and use instrumentation to give us control over our main application while we are testing it.
This chapter demonstrates the Android testing tools by presenting a simple Android application and then leading us step-by-step through the creation of a test application for it. The test application demonstrates these key points:
- An Android test is itself an Android application that is linked to the application under test by entries in its AndroidManifest.xml file.
- Instead of Android components, an Android test application contains one or more test cases. Each of these is a separate class definition.
- Android test case classes extend the JUnit TestCase class.
- Android test case classes for activities extend JUnit and also connect us to the application under test with instrumentation. We can send keystroke or touch events directly to the UI.
- We choose an Android test case class based on the type of component (application, activity, content provider, or service) we are testing.
- Additional test tools in Eclipse/ADT provide integrated support for creating test applications, running them, and viewing the results.
The test application contains methods that perform the following tests:
- Initial conditions test. Tests that the application under test initializes correctly. This is also a unit test of the application's onCreate() method. Testing initial conditions also provides a confidence measure for subsequent tests.
- UI test. Tests that the main UI operation works correctly. This test demonstrates the instrumentation features available in activity testing. It shows that you can automate UI tests by sending key events from the test application to the main application.
- State management tests. Test the application's code for saving state. This test demonstrates the instrumentation features of the test runner, which are available for testing any component.
During this tutorial, we will be working with sample code that is provided as part of the downloadable Samples component of the SDK. Specifically, we will be working with a pair of related sample applications - an application under test and a test application:
- Spinner is the application under test. This tutorial focuses on the common situation of writing tests for an application that already exists, so the main application is provided to us.
- SpinnerTest is the test application. In the tutorial, we create this application step-by-step.
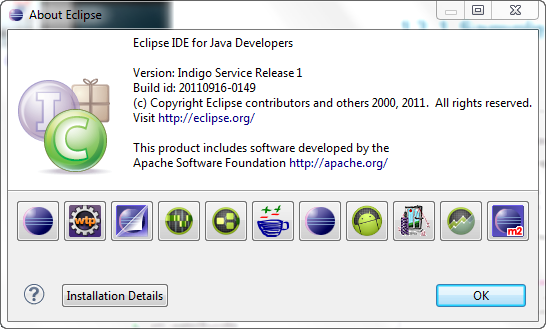
In this tutorial, I'm using Eclipse Indigo;
The sample applications are provided in the SDK component named "Samples for SDK API 8" and in later versions of the Samples.
To get started with the tutorial, first use the Android SDK and AVD manager to install an appropriate version of the Samples:
- In Eclipse, select Window > Android SDK Manager.
- Check whether "Samples for SDK API 8" (or higher version) is listed.
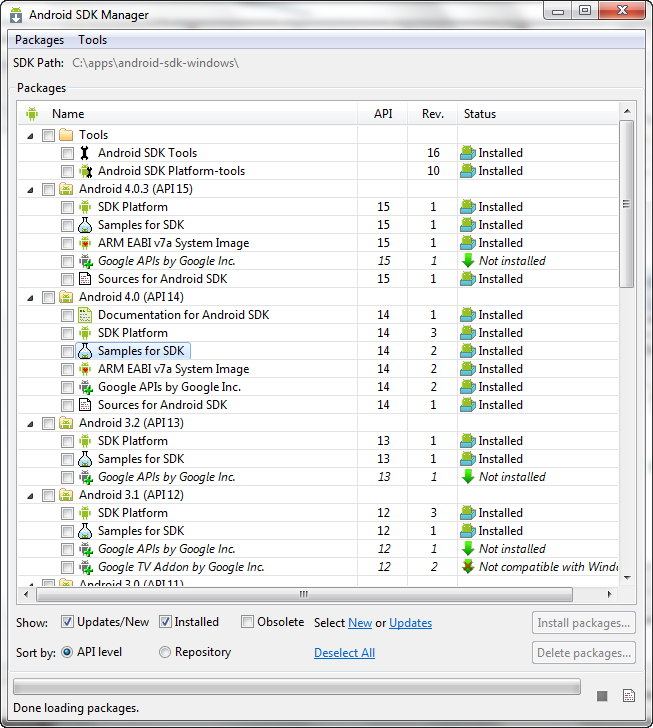
If so, skip to the next section, Setting Up the Projects, to get started with the tutorial. Otherwise, continue with the next step. - Open the Available Packages panel.
- Select the "Samples for SDK API 14" component and click
Install Selected. - Verify and accept the component and then click Install Accepted. The Samples component will now be installed into our SDK.
When the installation is complete, the applications in the Samples component are stored at this location on our computer:
<sdk>/samples/android-14/
In my system, it looks like this:

Although the sample code for this tutorial is provided in the "Samples for SDK API 14" component, that does not imply that we need to build or run the application against the corresponding platform (Android 4.0). The API level referenced in the Samples component name indicates only the origin branch from which the samples were built.
In this tutorial, we will use the Android emulator to run applications. The emulator needs an Android Virtual Device (AVD) with an API level equal to or higher than the one we set for the projects in the previous step.
As a test of the AVD and emulator, run the SpinnerActivity application in Eclipse with ADT:
File->New->Android Project->Create project from existing sample->Select Build Target->Select Spinner sample.
When it starts, click the large downward-pointing arrow to the right of the spinner text. We see the spinner expand and display the title "Select a planet" at the top. Click one of the other planets. The spinner closes, and our selection appears below it on the screen.
When we are ready to get started with the tutorial, begin by setting up Eclipse projects for both Spinner (the application under test) and SpinnerTest (the test application).
We'll be using the Spinner application as-is, without modification, so we'll be loading it into Eclipse as a new Android project from existing source. In the process, we'll be creating a new test project associated with Spinner that will contain the SpinnerTest application. The SpinnerTest application will be completely new and we'll be using the code examples in this tutorial to add test classes and tests to it.
To install the Spinner app in a new Android project from existing source, following these steps:
- In Eclipse, select File -> New -> Project..., then click Next. The New Project dialog appears.
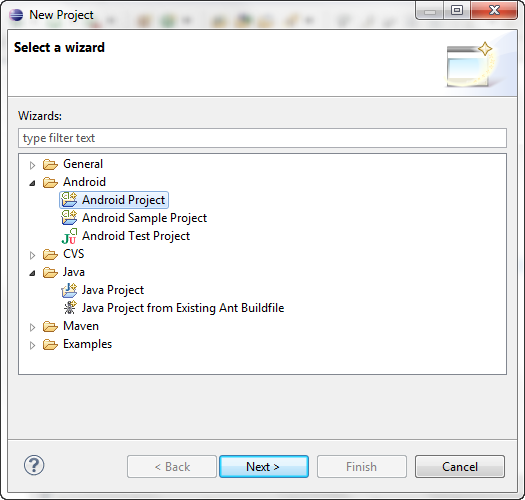
Next. - In the Project name text box, enter "SpinnerActivity". The Properties area is filled in automatically.
- In the Contents area, set "Create project from existing source".
- For Location, click Browse, navigate to the directory <SDK_path>/samples/android-14/Spinner, then click Open. The directory name <SDK_path>/samples/android-14/Spinner now appears in the Location text box.
- In the Build Target area, set a API level of 8 or higher. If we are already developing with a particular target, and it is API level 8 or higher, then use that target.
- In the Properties area, in the Min SDK Version: enter "8".
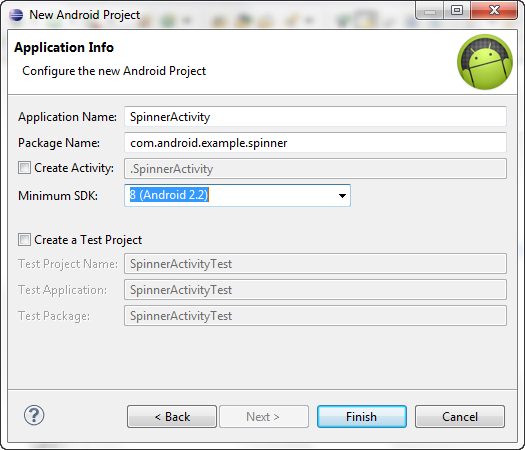
- We've set the project as below:
- Project Name: "SpinnerActivity"
- Create project from existing source: set
- Location: "
/samples/android-14/Spinner" - Build Target: "API level of 8 or higher" (Target Name "Android 2.2 or higher")
- Package name: (set to "com.android.example.spinner")
- Create Activity: (disabled, set to ".SpinnerActivity")
- Min SDK Version: "8"
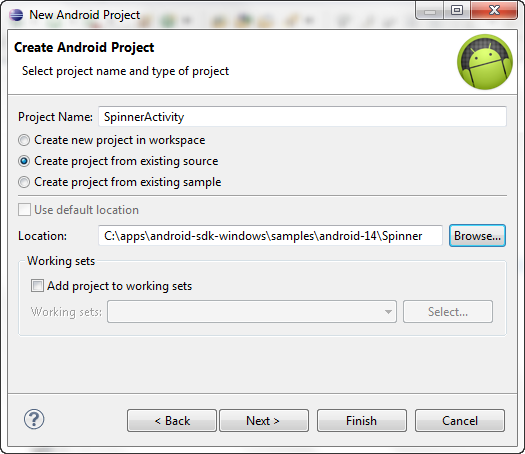
To create a new test project for the SpinnerTest application, follow these steps:
- Click Next. The New Android Test Project dialog appears.
- Set "Create a Test Project".
- Leave the other values unchanged. The result should be:
- Create a Test Project: checked
- Test Project Name: "SpinnerActivityTest"
- Use default location: checked (this should contain the directory name "workspace/SpinnerActivityTest").
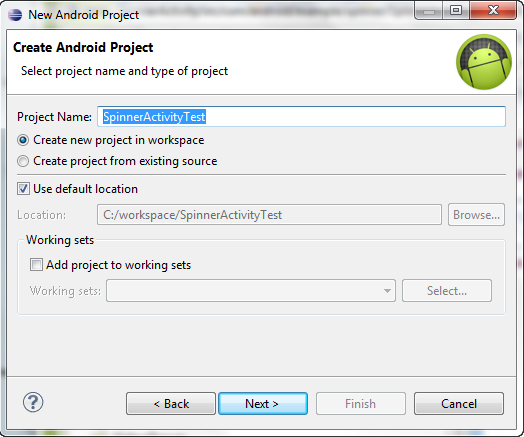
- Build Target: Use the same API level we used in the previous step.
- Application name: "SpinnerActivityTest"
- Package name: "com.android.example.spinner.test"
- Min SDK Version: "8"
- Click Finish. Entries for SpinnerActivity and SpinnerActivityTest should appear in the Package Explorer.
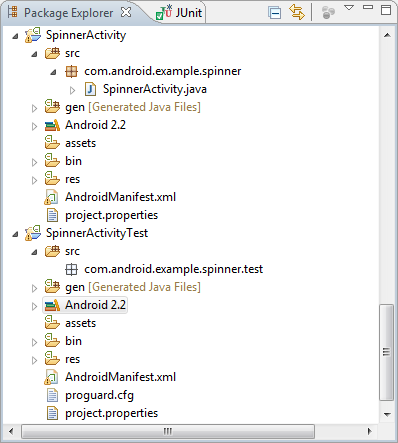
If we set Build Target to an API level higher than "8", we will see the warning "The API level for the selected SDK target does not match the Min SDK version". We do not need to change the API level or the Min SDK version. The message tells us that we are building the projects with one particular API level, but specifying that a lower API level is required. This may occur if we have chosen not to install the optional earlier API levels.
If we see errors listed in the Problems pane at the bottom of the Eclipse window, or if a red error marker appears next to the entry for SpinnerActivity in the Package Explorer, highlight the SpinnerActivity entry and then select Project > Clean. This should fix any errors.
We now have the application under test in the SpinnerActivity project, and an empty test project in SpinnerActivityTest. We may notice that the two projects are in different directories, but Eclipse with ADT handles this automatically. We should have no problem in either building or running them.
Notice that Eclipse and ADT have already done some initial setup for our test application. Expand the SpinnerActivityTest project, and notice that it already has an Android manifest file AndroidManifest.xml. Eclipse with ADT created this when we added the test project.
Also, the test application is already set up to use instrumentation. We can see this by examining AndroidManifest.xml. Open it, then at the bottom of the center pane click AndroidManifest.xml to display the XML contents:
<?xml version="1.0" encoding="utf-8"?>
<manifest xmlns:android="http://schemas.android.com/apk/res/android"
    package="com.android.example.spinner.test"
    android:versionCode="1"
    android:versionName="1.0" >

    <uses-sdk android:minSdkVersion="3" />

    <instrumentation
        android:name="android.test.InstrumentationTestRunner"
        android:targetPackage="com.android.example.spinner" />

    <application
        android:icon="@drawable/ic_launcher"
        android:label="@string/app_name" >
        <uses-library android:name="android.test.runner" />
    </application>

</manifest>
Notice the <instrumentation> element. The attribute android:targetPackage="com.android.example.spinner" tells Android that the application under test is defined in the Android package com.android.example.spinner. Android now knows to use that package's AndroidManifest.xml file to launch the application under test. The <instrumentation> element also contains the attribute android:name="android.test.InstrumentationTestRunner", which tells Android instrumentation to run the test application with Android's instrumentation-enabled test runner.
Next sections:
Ph.D. / Golden Gate Ave, San Francisco / Seoul National Univ / Carnegie Mellon / UC Berkeley / DevOps / Deep Learning / Visualization