Android 4
19. Animation - Frame By Frame, Layout, and View : Part A

- 19.0 Animation
- 19.1 Frame By Frame Animation
- 19.2 Layout Animation
- 19.3 View Animation
- 19.4 View - 3D Transition
Android supports three types of animation:
- Frame-by-frame animation
A series of frames is drawn one after the other at regular intervals by loading a series of Drawable resources one after the other. - Layout animation
Animate views inside a container view such as lists and tables. - View animation
Animate any general-purpose view.
The types #2 and #3 are a type of tweening animation which involves the drawing in between the key drawings. The idea is that knowing the beginning state and ending state of a drawing allows us to vary certain aspect of the drawing in time. This varying aspect could be color, position, size, rotation, and so on. In other words, we tell Android to perform a series of simple transformations to the content of a View.
Both animation types can be used in any View object to provide simple rotating timers, activity icons, and other useful UI elements. Tweened animation is handled by android.view.animation. Frame-by-frame animation is handled by the AnimationDrawable class.
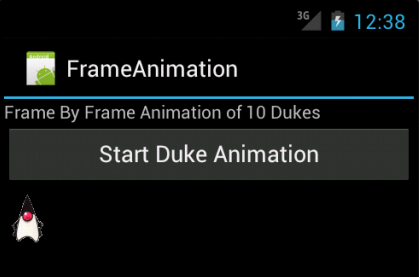
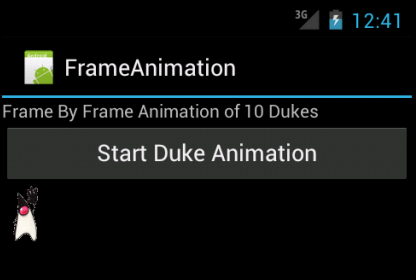
I used the following Duke files to make the each frame of animation.
d1.gif:d2.gif:
d3.gif:
d4.gif:
d5.gif:

d6.gif:d7.gif:
d8.gif:
d9.gif:
d10.gif:

Let's look at the basic XML layout file,/res/layout/frame_animations_layout.xml.
<?xml version="1.0" encoding="utf-8"?>
<LinearLayout xmlns:android=
	"http://schemas.android.com/apk/res/android"
   android:orientation="vertical"
   android:layout_width="fill_parent"
   android:layout_height="fill_parent">
   <TextView android:id="@+id/textViewId1"
      android:layout_width="fill_parent"
      android:layout_height="wrap_content"
      android:text="@string/frame"/>
   <Button
      android:id="@+id/startFAButtonId"
      android:layout_width="fill_parent"
      android:layout_height="wrap_content"
      android:text="@string/start"
      />
   <ImageView
      android:contentDescription="@string/desc"
      android:id="@+id/animationImage"
      android:layout_width="wrap_content"
      android:layout_height="wrap_content"/>
</LinearLayout>
The first control is the text control which is a simple TextView. Then the next control is a Button to start and stop the animation. The last view is the ImageView, where we will do the animation. So, now we have the layout.
In Android, we accomplish frame-by-frame animation through a class in the graphics package called AnimationDrawable. We can tell from its name that it is like any other drawable that can work as background for any view. For example the background bitmaps are represented as Drawables. The class AnimationDrawable, in addition to being a Drawable, can take a list of other Drawable resources like images and render them at specified intervals. This class is really a thin wrapper around the animation support provided by the basic Drawable class.
To make use of the AnimationDrawable class, let's start with a set of Drawable resources in the /res/drawable subdirectory. Keep in mind that we need to put all the images into the same drawable directory as well as the xml file below.
/res/drawable/frame_animation.xml.
<animation-list xmlns:
   android="http://schemas.android.com/apk/res/android"
   android:oneshot="false">
   <item android:drawable="@drawable/d1" android:duration="50" />
   <item android:drawable="@drawable/d2" android:duration="50" />
   <item android:drawable="@drawable/d3" android:duration="50" />
   <item android:drawable="@drawable/d4" android:duration="50" />
   <item android:drawable="@drawable/d5" android:duration="50" />
   <item android:drawable="@drawable/d6" android:duration="50" />
   <item android:drawable="@drawable/d7" android:duration="50" />
   <item android:drawable="@drawable/d8" android:duration="50" />
   <item android:drawable="@drawable/d9" android:duration="50" />
   <item android:drawable="@drawable/d10" android:duration="50" />
</animation-list>
strings.xml:
<?xml version="1.0" encoding="utf-8"?>
<resources>
    <string name="hello">Hello World, FrameAnimation!</string>
    <string name="app_name">FrameAnimation</string>
    <string name="frame">Frame By Frame Animation of 10 Dukes</string>
    <string name="start">Start Duke Animation</string>
    <string name="desc">Animation Image</string>
</resources>
Let's look at our java code, :
package com.bogotobogo.frameanimation;

import android.app.Activity;
import android.graphics.drawable.AnimationDrawable;
import android.os.Bundle;
import android.view.View;
import android.widget.Button;
import android.widget.ImageView;

public class FrameAnimation extends Activity {

	   @Override
	   public void onCreate(Bundle savedInstanceState) {
	      super.onCreate(savedInstanceState);
	      setContentView(R.layout.frame_animations_layout);
	      this.setupButton();
	   }

	   private void setupButton() {
	   Button b = (Button)this.findViewById(R.id.startFAButtonId);
	   b.setOnClickListener(
	      new Button.OnClickListener() {
	         public void onClick(View v) {
	         parentButtonClicked(v);
	         }
	      });
	   }

	   private void parentButtonClicked(View v) {
	      animate();
	   }

	   private void animate() {
	      ImageView imgView = (ImageView)findViewById(R.id.animationImage);
	      imgView.setVisibility(ImageView.VISIBLE);
	      imgView.setBackgroundResource(R.drawable.frame_animation);

	      AnimationDrawable frameAnimation =
	      (AnimationDrawable) imgView.getBackground();

	      if (frameAnimation.isRunning()) {
	         frameAnimation.stop();
	      }
	      else {
	         frameAnimation.stop();
	         frameAnimation.start();
	      }
	   }
}
Each frame points to one of the duke images we have assembled through their resource IDs. The animation-list tag gets converted into an AnimationDrawable object representing the collection of images. We will then need to set the Drawable as a background resource for out ImageView.
	      ImageView imgView = (ImageView)findViewById(R.id.animationImage);
	      imgView.setBackgroundResource(R.drawable.frame_animation);
With this code, Android knows that the resource ID R.drawable.frame_animation is an XML resource and accordingly constructs a AnimationDrawable Java object for it before setting it as the background. Once this is set, we can access this AnimationDrawable object by doing a "get" on the view object:
	      AnimationDrawable frameAnimation =
	      (AnimationDrawable) imgView.getBackground();
Once we have the AnimationDrawable, we can use start() and stop() methods of this object to start and stop the animation.


Files used in this Frame-By-Frame animation example, FrameAnimation.zip
We'll use layout animation with the ListView and GridView, which are the two most commonly-used controls in Android. Specifically, we'll use layout animation to add visual effects to the way each item in a ListView or GridView is displayed. Actually, we can use this type of animation on all controls derived from a ViewGroup.
Layout animation works by applying tweening to each view that is part of the layout being animated. Here are four types of tweening animation:- Scale animation
We use this type of animation to make a view smaller or larger either on x axis or on the y axis. We can also specify the pivot point around which we want the animation to take place. - Rotate animation
We use this to rotate a view around a pivot point by a certain number of degrees. - Translate animation
We use this to move a view along the x or y axis. - Alpha animation
We use this to change the transparency of a view.
Once we have a ListView, we can attach an animation to it so that each list item will go through that animation.
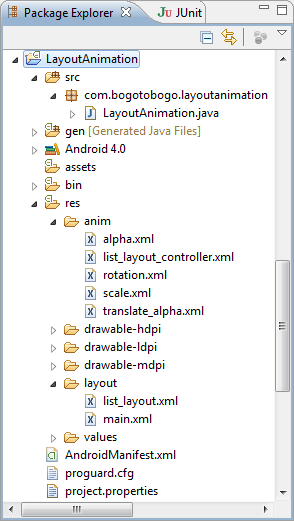
We can define both the individual animation and the mediator in XML files in the /res/anim subdirectory. Once we have the mediator XML file, we can use that file as an input to the ListView in its own XML layout definition.
Let's start by creating XML layout for the ListView so we can load that layout in a basic activity.

The file shows a simple LinearLayout with a single ListView in it. However, we should mention one point about the ListView definition.
Now that we have the layout needed for the activity, we can write the code for the activity to load the layout file so we can generate our UI.
LayoutAnimation.java
package com.bogotobogo.layoutanimation;

import android.app.Activity;
import android.os.Bundle;
import android.widget.ArrayAdapter;
import android.widget.ListView;

public class LayoutAnimation extends Activity
{
		   @Override
		   public void onCreate(Bundle savedInstanceState){
		      super.onCreate(savedInstanceState);
		      setContentView(R.layout.list_layout);
		      setupListView();
		   }

		   private void setupListView(){
		      String[] listItems = new String[] {
		         "Item 1", "Item 2", "Item 3",
		         "Item 4", "Item 5", "Item 6",
		      };

		      ArrayAdapter<String> listItemAdapter =
		      new ArrayAdapter<String>(this
		         ,android.R.layout.simple_list_item_1
		         ,listItems);

		      ListView lv = (ListView)this.findViewById(R.id.list_view_id);
		      lv.setAdapter(listItemAdapter);
		   }
}
First, we loads the view based on the generated layout ID R.layout.list_layout
ListView lv = (ListView)this.findViewById(R.id.list_view_id);
Our goal is to take the ListView from this layout and populate it with six text items. These items are loaded up into an array.
	String[] listItems = new String[] {
		"Item 1", "Item 2", "Item 3",
		"Item 4", "Item 5", "Item 6",
	};
We'll need to set a data adapter into a ListView so that the ListView can show those items.
lv.setAdapter(listItemAdapter);
To create the necessary adapter, we'll need to specify how each item will be laid out when the list is displayed. We specify the layout by using a predefined layout in the base Android framework. This layout is specified as
android.R.layout.simple_list_item_1
However, as with any other activity invocation, we'll need to register the
<?xml version="1.0" encoding="utf-8"?>
<manifest
    xmlns:android="http://schemas.android.com/apk/res/android"
    package="com.bogotobogo.layoutanimation"
    android:versionCode="1"
    android:versionName="1.0">
    <uses-sdk android:minSdkVersion="14" />
    <application android:icon="@drawable/icon" android:label="@string/app_name">
        <activity android:name=".LayoutAnimation"
                  android:label="@string/app_name">
            <intent-filter>
                <action android:name="android.intent.action.MAIN" />
                <category android:name="android.intent.category.LAUNCHER" />
            </intent-filter>
        </activity>
    </application>
</manifest>
We need another XML file that acts as a mediator between itself and the animation set. Here is the mediator XML file:
/res/anim/list_layout_controller.xml
<layoutAnimation xmlns:android="http://schemas.android.com/apk/res/android"
   	android:delay="30%"
   	android:animationOrder="reverse"
   	android:animation="@anim/alpha" />
The mediator file, in this case, is for the transparency animation as we can see it from the line:
android:animation="@anim/alpha" />
Here are the XML files for the animation set:
/res/anim/alpha.xml
<alpha xmlns:android="http://schemas.android.com/apk/res/android"
   	android:interpolator="@android:anim/accelerate_interpolator"
   	android:fromAlpha="0.0" android:toAlpha="1.0" 	android:duration="5000" />
/res/anim/rotation.xml
<rotate xmlns:android="http://schemas.android.com/apk/res/android"
   	android:interpolator="@android:anim/accelerate_interpolator"
   	android:fromDegrees="0.0"
   	android:toDegrees="360"
   	android:pivotX="50%"
   	android:pivotY="50%"
   	android:duration="500" />
/res/anim/scale.xml
<set xmlns:android="http://schemas.android.com/apk/res/android"
      android:interpolator="@android:anim/accelerate_interpolator">
   <scale
      android:fromXScale="1"
      android:toXScale="1"
      android:fromYScale="0.1"
      android:toYScale="1.0"
      android:duration="500"
      android:pivotX="50%"
      android:pivotY="50%"
      android:startOffset="100" />
</set>
/res/anim/translate_alpha.xml
<set xmlns:android="http://schemas.android.com/apk/res/android"
      android:interpolator="@android:anim/accelerate_interpolator">
   <translate android:fromYDelta="-100%" android:toYDelta="0"
      android:duration="500" />
   <alpha android:fromAlpha="0.0" android:toAlpha="1.0"
      android:duration="500" />
</set>
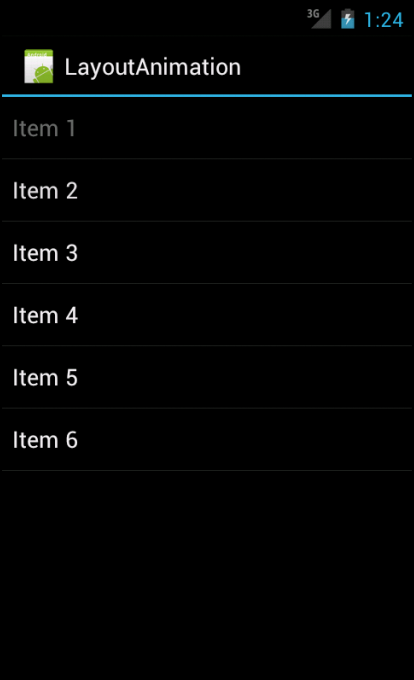
Here is a snapshot during the transparency animation.

Files used in this layout animation example, LayoutAnimation.zip
Next sections:
Ph.D. / Golden Gate Ave, San Francisco / Seoul National Univ / Carnegie Mellon / UC Berkeley / DevOps / Deep Learning / Visualization