Eclipse CDT & JNI (Java Native Interface) with 64 bit MinGW - 2020
Knock, knock.
"Who's there?"
Very long pause.
...
...
"Java."
Following items are needed:
- Eclipse - Kepler 4.3
- We need compiler since CDT (C/C++ Development Tool) does not come with it.
Eclipse C/C++ IDE (CDT) for Kepler. - To make it work (64 dll on 64 machine), we need 64-bit MinGW.
In my case, I put it here: C:\eclipse\MinGW
Also, we need to add the path (C:\eclipse\MinGW\bin) to environment variable
- Put the source code:

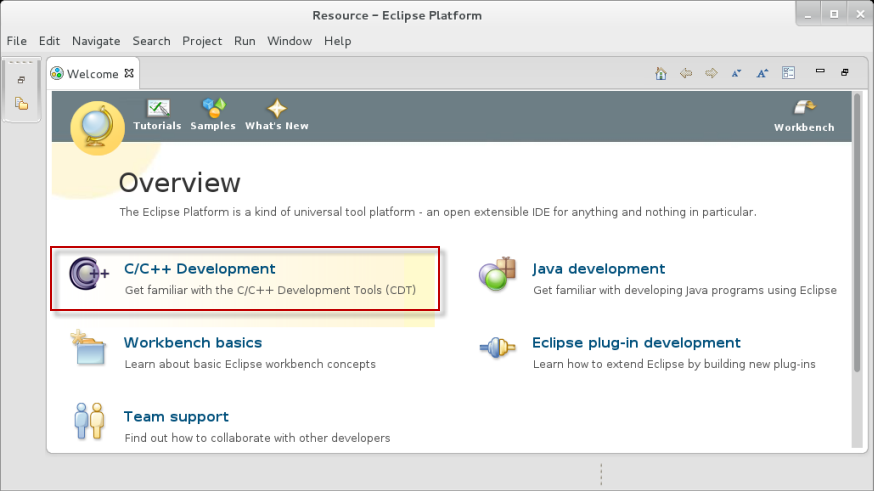
- Window->Open Perspective->Others...->C/C++->OK.
- Project->Properties...
Check items under C/C++ Build.
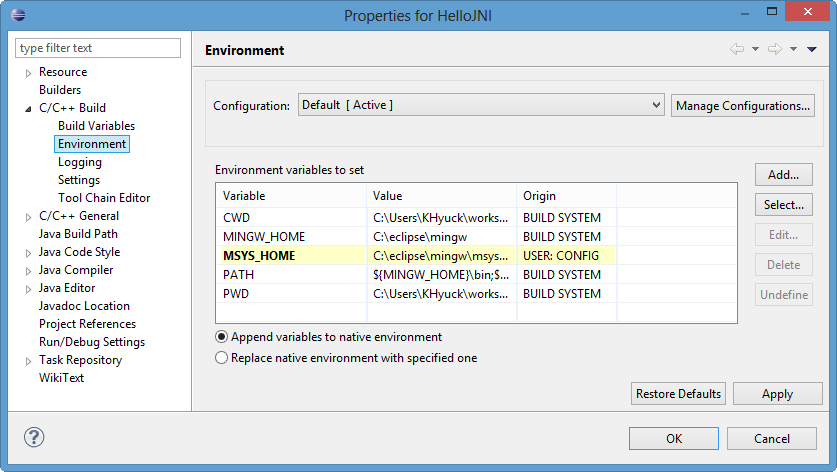
For example, the PATH under Environment should lead us to the compiler and it should look like this:
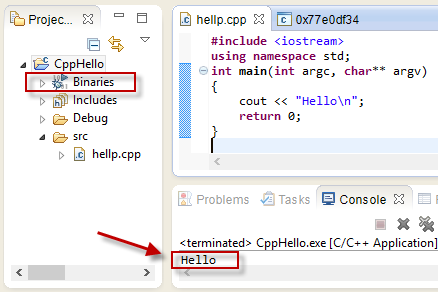
${MINGW_HOME}\bin; - Build project and run:
- Create a new Java project (HelloJNI)
- Make the HelloJNI.java Java class:
public class HelloJNI
{
   static {
      // hello.dll on Windows or libhello.so on Linux
      System.loadLibrary("hello");
   }
   private native void sayHello();

   public static void main(String[] args) {
      // invoke the native method
      new HelloJNI().sayHello();
   }
}
Converting the Java Project to a C/C++ Project
- Right-click on the HelloJNI Java project->New->Other...
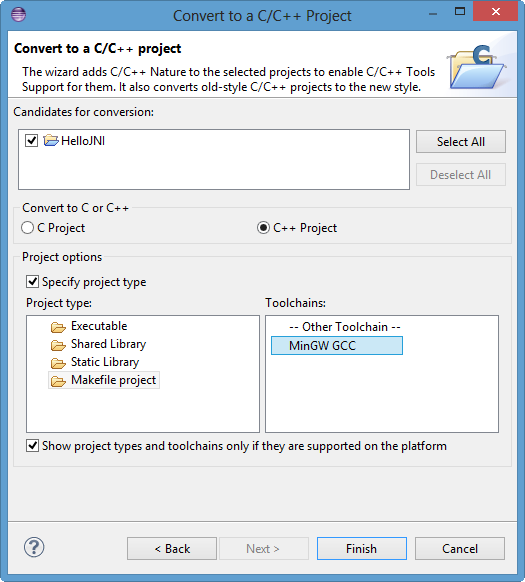
Under C/C++, Convert to a C/C++ Project (Adds C/C++ Nature)->Next. - Then, the "Convert to a C/C++ Project" dialog will pop up. In "Project type", select "Makefile Project" ->In "Toolchains", select "MinGW GCC", and hit Finish.
- Now, we can run this project as a Java as well as a C/C++ project.
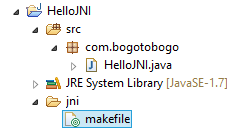
Generating C/C++ Header File- Create a directroy called "jni" under the project to keep all the C/C++ codes:
right-click on the project->New->Folder. In "Folder name", enter "jni". - Create a "makefile" under the "jni" directory:
Right-click on the "jni" folder->new->File. In "File name", enter "makefile", and hit Finish.
- Then, enter the following codes. Because it is makefile, we should use tab for the indent instead of spaces.
# Define a variable for classpath
CLASS_PATH = ../bin

# Define a virtual path for .class in the bin directory
vpath %.class $(CLASS_PATH)

# $* matches the target filename without the extension
HelloJNI.h : HelloJNI.class
	javah -classpath $(CLASS_PATH) $*
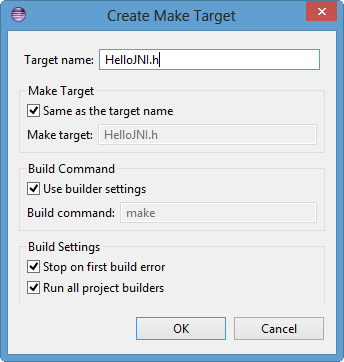
This makefile creates a target "HelloJNI.h", which has a dependency of "HelloJNI.class", and invokes the javah utiltiy on "HelloJNI.class" (under -classpath) to build the target header file: Right-click on the makefile->Make Targets->Create...
In "Target Name", enter "HelloJNI.h". Then, hit OK.
- Run the makefile for the target "HelloJNI.h":
Right-click on the makefile->Make Targets->Build...
Make sure all the files (HelloJNI.java and makefile) are saved.
Select the target "HelloJNI.h"->Build...
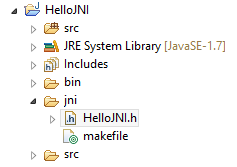
The header file "HelloJNI.h" shall be generated in the "jni" directory.

C File - HelloJNI.c
- Create a C program called "HelloJNI.c":
Right-click on the "jni" folder->New->Source file.
In "Source file", enter "HelloJNI.c".
Enter the following code:#include <jni.h> #include <stdio.h> #include "HelloJNI.h" JNIEXPORT void JNICALL Java_HelloJNI_sayHello(JNIEnv *env, jobject thisObj) { printf("Hello World!\n"); return; } - Modify the "makefile" as shown below to generate the shared library "hello.dll":
# Define a variable for classpath
CLASS_PATH = ../bin

# Define a virtual path for .class in the bin directory
vpath %.class $(CLASS_PATH)

all : hello.dll

# $@ matches the target, $< matches the first dependancy
hello.dll : HelloJNI.o
	gcc -m64 -Wl,--add-stdcall-alias -shared -o $@ $<

# $@ matches the target, $< matches the first dependancy
HelloJNI.o : HelloJNI.c HelloJNI.h
	gcc -m64 -I"C:\Program Files\Java\jdk1.7.0_21\include" -c $< -o $@

# $* matches the target filename without the extension
HelloJNI.h : HelloJNI.class
	javah -classpath $(CLASS_PATH) $*

clean :
	rm HelloJNI.h HelloJNI.o hello.dll
- Right-click on the "makefile"->Make Targets->Create...
In "Target Name", enter "all".
Repeat to create a target "clean". - Run the makefile for the target "all":
Right-click on the makefile->Make Targets->Build...
Select the target "all"->Build...
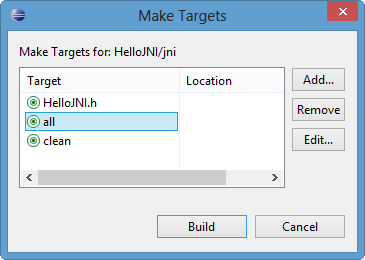

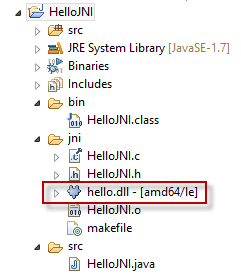
- The shared library "hello.dll" has been created in "jni" directory.
Finally, Running the Java JNI Program
- We need to provide the library path to the "hello.dll".
This can be done via VM argument -Djava.library.path:
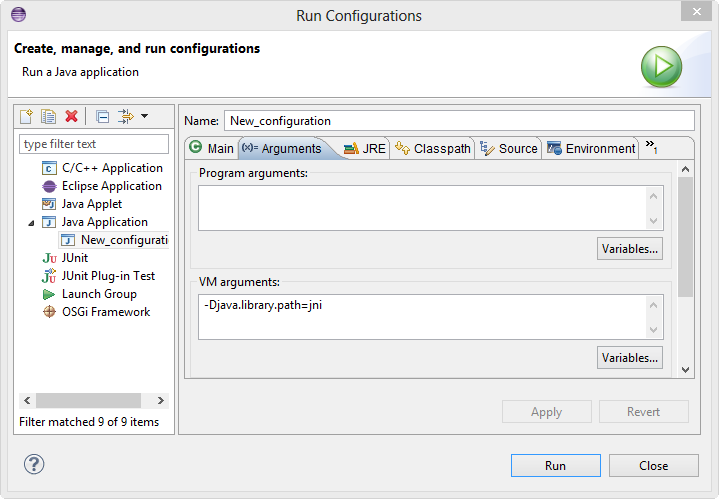
Right-click on the project->Run As->Run Configurations...
Select (double-click) "Java Application"
In "Main" tab, enter the Main class "HelloJNI".
In "Arguments", "VM Arguments", enter "-Djava.library.path=jni"
-
Run.
We should see the output "Hello World!" displayed on the console.

Note: 32-bit dll on 64-bit JVM?
In my case (AMD 64-bit, Windows8), initially, I had an error related to the 64bit JVM (or 32bit dll):
UnsatisfiedLinkError: C:\Users\KHyuck\workspaceJNI\HelloJNI\jni\hello.dll:
Can't load IA 32-bit .dll on a AMD 64-bit platform.
So, I checked my machine using java -d64 -version command:
C:\>java -d64 -version
java version "1.7.0_21"
Java(TM) SE Runtime Environment (build 1.7.0_21-b11)
Java HotSpot(TM) 64-Bit Server VM (build 23.21-b01, mixed mode)

C:\>java -d32 -version
Error: This Java instance does not support a 32-bit JVM.
Please install the desired version.
As expected, my JVM is 64-bit.
Regarding the complain: Can't load IA 32-bit .dll (hello.dll), I checked it with Dependency Walker.

Indeed, the CPU columns are not x64, x86_64 or amd64 (64-bit) but it is x86 (32-bit)!
So, I needed to get the 64-bit MinGW to make 64-bit dll. It has msys as well.
Here is the Environment variables for Project Properties that works with the MinGW 64-bit.
C++ with Eclipse on LinuxThe steps are similar to the Windows case except that we do not have to install additional the compiler.
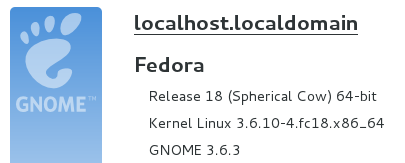
This example is running on Fedora 18.
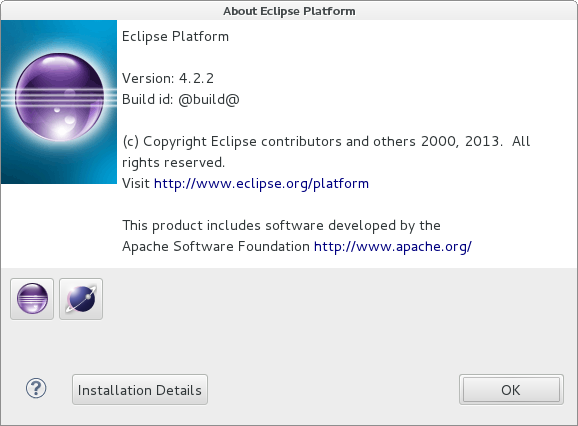
Install Eclipse and Eclipse C/C++ Development Tools (CDT) plugin.
- yum install eclipse
- yum install eclipse-cdt

- Right-click on the HelloJNI Java project->New->Other...
Ph.D. / Golden Gate Ave, San Francisco / Seoul National Univ / Carnegie Mellon / UC Berkeley / DevOps / Deep Learning / Visualization