Spring-Boot REST API with CORS App Maven war file deploy to Tomcat - 2020

This post is the extension of the previous Spring-Boot apps. So far, we've been playing with dumb apps, but this time, we'll learn the Spring REST API with Cross-Origin Resource Sharing. Our app will respond with CORS headers.
This tutorial is based on Enabling Cross Origin Requests for a RESTful Web Service.
Primarily we'll run it by creating a standalone application which we package everything in a single, executable JAR file. This is possible thanks to the Spring's support for embedding the Tomcat servlet container as the HTTP runtime.
However, we'll try it more popular way, deploying the app to a Tomcat's external instance (80.1 Create a deployable war file).
In this tutorial, we'll use Maven 3.
Though we can start from scratch, we can bypass basic setup steps since we're already familiar with the process of setting basic Spring-boot setup:
$ git clone https://github.com/spring-guides/gs-rest-service-cors.git
We'll add and modify the code during this tutorial.
gs-rest-service-cors/initial/pom.xml:
<?xml version="1.0" encoding="UTF-8"?>
<project xmlns="http://maven.apache.org/POM/4.0.0" xmlns:xsi="http://www.w3.org/2001/XMLSchema-instance"
    xsi:schemaLocation="http://maven.apache.org/POM/4.0.0 http://maven.apache.org/xsd/maven-4.0.0.xsd">
    <modelVersion>4.0.0</modelVersion>

    <groupId>org.springframework</groupId>
    <artifactId>gs-rest-service-cors</artifactId>
    <version>0.1.0</version>

    <parent>
        <groupId>org.springframework.boot</groupId>
        <artifactId>spring-boot-starter-parent</artifactId>
        <version>1.3.3.RELEASE</version>
    </parent>

    <dependencies>
        <dependency>
            <groupId>org.springframework.boot</groupId>
            <artifactId>spring-boot-starter-web</artifactId>
        </dependency>
    </dependencies>

    <properties>
        <java.version>1.8</java.version>
    </properties>


    <build>
        <plugins>
            <plugin>
                <groupId>org.springframework.boot</groupId>
                <artifactId>spring-boot-maven-plugin</artifactId>
            </plugin>
        </plugins>
    </build>

</project>
The pom file not only handles dependencies but also tries to find main() method to flag as a runnable class.
Later, we may need to modify the file to make executable war for Tomcat deploy.
We don't have to do anything because the codes are already there. Basically, we deal with three files:
- src/main/java/hello/Greeting.java
- src/main/java/hello/GreetingController.java
- src/main/java/hello/Application.java
Here is the src/main/java/hello/Greeting.java:
package hello;

public class Greeting {

    private final long id;
    private final String content;

    public Greeting(long id, String content) {
        this.id = id;
        this.content = content;
    }

    public long getId() {
        return id;
    }

    public String getContent() {
        return content;
    }
}
At the GET request, the Greeting class responde with JSON in the body that represents a greeting via the Jackson JSON library to automatically marshal instances of type Greeting into JSON.
As we can see soon, we have a RESTful web service controller which populates and returns the Greeting object. The object data will be written directly to the HTTP response as JSON without going through view rendering step.
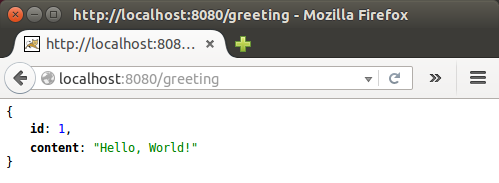
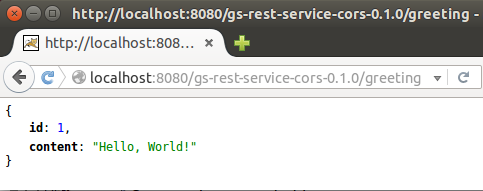
The greeting object should look like this:
{
    "id": 1,
    "content": "Hello, World!"
}
The id field is a unique identifier for the greeting, and content is the textual representation of the greeting.
src/main/java/hello/GreetingController.java:
package hello;

import java.util.concurrent.atomic.AtomicLong;

import org.springframework.stereotype.Controller;
import org.springframework.web.bind.annotation.RequestMapping;
import org.springframework.web.bind.annotation.RequestParam;
import org.springframework.web.bind.annotation.ResponseBody;
import org.springframework.web.bind.annotation.CrossOrigin;

@Controller
public class GreetingController {

    private static final String template = "Hello, %s!";
    private final AtomicLong counter = new AtomicLong();

    @RequestMapping("/greeting")
    public @ResponseBody Greeting greeting(@RequestParam(required=false, defaultValue="World") String name) {
        System.out.println("==== in greeting ====");
        return new Greeting(counter.incrementAndGet(), String.format(template, name));
    }

}
In Spring, HTTP requests are handled by a controller identified by the @Controller annotation, and the GreetingController above handles GET requests for /greeting by returning a new instance of the Greeting class.
Note that we're using three annotations in the code:
- @RequestMapping annotation:
The /greeting request are mapped to the greeting() method Greeting.java is ensured by the @RequestMapping annotation.
- @RequestParam annotation:
@RequestParam binds the value of the query string parameter name into the name parameter of the greeting() method. If it is not in the request, the defaultValue of "World" is used.
The greeting() method body creates and returns a new Greeting object with id and content based on the next value from the counter, and formats the given name by using the greeting template. - @@ResponseBody annotation:
The @@ResponseBody annotation on the greeting() method tells Spring MVC that it does not need to render the greeting object through a server-side view layer. It let's Spring know that the greeting object returned is the response body, and should be written out directly.
To controll CORS access, we have to add a @CrossOrigin annotation to the handler method in GreetingController.java:
package hello;

import java.util.concurrent.atomic.AtomicLong;

import org.springframework.stereotype.Controller;
import org.springframework.web.bind.annotation.RequestMapping;
import org.springframework.web.bind.annotation.RequestParam;
import org.springframework.web.bind.annotation.ResponseBody;
import org.springframework.web.bind.annotation.CrossOrigin;

@Controller
public class GreetingController {

    private static final String template = "Hello, %s!";
    private final AtomicLong counter = new AtomicLong();

    @CrossOrigin(origins = "http://localhost:9000")
    @RequestMapping("/greeting")
    public @ResponseBody Greeting greeting(@RequestParam(required=false, defaultValue="World") String name) {
        System.out.println("==== in greeting ====");
        return new Greeting(counter.incrementAndGet(), String.format(template, name));
    }

}
By default, the @CrossOrigin annotation allows all origins, all headers, but in our case, we enabled cross-origin requests only for headers.
We'll package everything in a single, executable JAR file by embedding the Tomcat servlet container as the HTTP runtime.
Here is src/main/java/hello/Application.java file:
package hello;

import org.springframework.boot.SpringApplication;
import org.springframework.boot.autoconfigure.SpringBootApplication;
import org.springframework.context.annotation.Bean;
import org.springframework.web.servlet.config.annotation.CorsRegistry;
import org.springframework.web.servlet.config.annotation.WebMvcConfigurer;
import org.springframework.web.servlet.config.annotation.WebMvcConfigurerAdapter;

@SpringBootApplication
public class Application {

    public static void main(String[] args) {
        SpringApplication.run(Application.class, args);
    }

}
The main() method uses Spring Boot's SpringApplication.run() method to launch our application.
We can run the app using mvn spring-boot:run:
$ mvn spring-boot:run
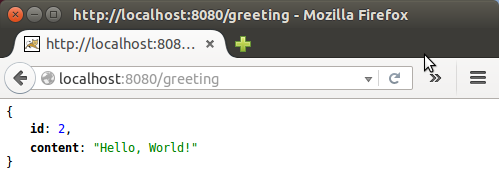
Notice that the id attribute has changed from 1 to 2 when we make another request. This proves that we are working against the same GreetingController instance across multiple requests, and that its counter field is being incremented on each call as expected.
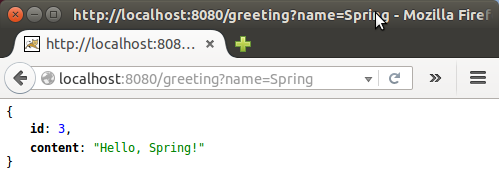
If we add a query string, we get the following:
To test that the CORS headers are in place and allowing a Javascript client from another origin to access the service, we need to create a Javascript client to consume the service.
Since we cloned the repo, it's already there, gs-rest-service-cors/complete/public/hello.js:
$(document).ready(function() {
    $.ajax({
        url: "http://localhost:8080/greeting"
    }).then(function(data, status, jqxhr) {
       $('.greeting-id').append(data.id);
       $('.greeting-content').append(data.content);
       console.log(jqxhr);
    });
});
This Javascript uses jQuery to consume the REST service at http://localhost:8080/greeting. It is loaded by index.html as shown below:
<!DOCTYPE html>
<html>
    <head>
        <title>Hello CORS</title>
        <script src="https://ajax.googleapis.com/ajax/libs/jquery/1.10.2/jquery.min.js"></script>
        <script src="hello.js"></script>
    </head>

    <body>
        <div>
            <p class="greeting-id">The ID is </p>
            <p class="greeting-content">The content is </p>
        </div>
    </body>
</html>
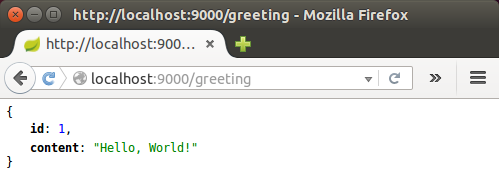
Since we're already using the port 8080, we need to be sure to start the client from another server and/or port. This will not only avoid a collision between the two applications, but will also ensure that the client code is served from a different origin than the service. To start the client running on localhost, port 9000:
$ mvn spring-boot:run -Dserver.port=9000
Once the client starts, open http://localhost:9000 in a browser, where we should see:
Let's deploy the app to a Tomcat's external instance. To do that we need to modify our pom.xml:
<?xml version="1.0" encoding="UTF-8"?>
<project xmlns="http://maven.apache.org/POM/4.0.0" xmlns:xsi="http://www.w3.org/2001/XMLSchema-instance"
    xsi:schemaLocation="http://maven.apache.org/POM/4.0.0 http://maven.apache.org/xsd/maven-4.0.0.xsd">
    <modelVersion>4.0.0</modelVersion>

    <groupId>org.springframework</groupId>
    <artifactId>gs-rest-service-cors</artifactId>
    <version>0.1.0</version>
    <packaging>war</packaging>

    <parent>
        <groupId>org.springframework.boot</groupId>
        <artifactId>spring-boot-starter-parent</artifactId>
        <version>1.3.3.RELEASE</version>
    </parent>

    <dependencies>
        <dependency>
            <groupId>org.springframework.boot</groupId>
            <artifactId>spring-boot-starter-web</artifactId>
        </dependency>
        <dependency>
            <groupId>org.springframework.boot</groupId>
            <artifactId>spring-boot-starter-tomcat</artifactId>
            <scope>provided</scope>
        </dependency>
    </dependencies>

    <properties>
        <java.version>1.8</java.version>
    </properties>

    <build>
        <plugins>
            <plugin>
                <groupId>org.springframework.boot</groupId>
                <artifactId>spring-boot-maven-plugin</artifactId>
            </plugin>
        </plugins>
    </build>

</project>
Two things:
- Note that we used packaging element to specify war file we want to create.
- To build a war file that is both executable and deployable into an external container we need to mark the embedded container dependencies as provided to avoid embedding the Tomcat servlet container as the HTTP runtime.
The last step for deplying to Tomcat is to modify our main():
package hello;

import org.springframework.boot.SpringApplication;
import org.springframework.boot.autoconfigure.SpringBootApplication;
import org.springframework.context.annotation.Bean;
import org.springframework.web.servlet.config.annotation.CorsRegistry;
import org.springframework.web.servlet.config.annotation.WebMvcConfigurer;
import org.springframework.web.servlet.config.annotation.WebMvcConfigurerAdapter;
import org.springframework.boot.context.web.SpringBootServletInitializer;


@SpringBootApplication
public class Application extends SpringBootServletInitializer {

    public static void main(String[] args) throws Exception {
        SpringApplication.run(Application.class, args);
    }

}
Here we provide a SpringBootServletInitializer subclass and override its configure method. This makes use of Spring Framework's Servlet 3.0 support and allows us to configure our application when it's launched by the servlet container. Typically, we update our application's main class to extend SpringBootServletInitializer as shown above.
Now everything is ready, let's create our war. We can do using one of the following commands:
$ mvn clean install
Or:
$ mvn package
Wake up our Tomcat:
$ sudo service tomcat start
Deploy it via "Tomcat Web Application Manager":

Here is the Tomcat deployed app:
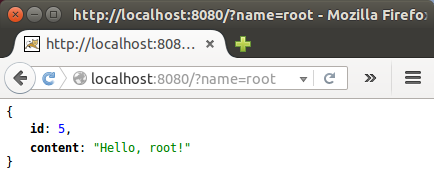
With the current controller, we cannot server the request "/". So, we may just want to add it to our existing controller, src/main/java/hello/GreetingController.java:
@RequestMapping({"/greeting", "/"})
As we can see, multiple requests using different HTTP verbs can be mapped to the same controller method.
Here is the response to "localhost:8080/?name=root:
Ph.D. / Golden Gate Ave, San Francisco / Seoul National Univ / Carnegie Mellon / UC Berkeley / DevOps / Deep Learning / Visualization