Heroku Deploy - Authentication and sending confirmation email using Devise 2020

In this chapter, we'll deploy our app we made in Authentication and sending confirmation email using Devise to Heroku.
Now that our Devise works on local, let's deploy our app to Heroku.
Download "Toolbelt":
$ wget -O- https://toolbelt.heroku.com/install-ubuntu.sh | sh
Login to Heroku:
k@laptop:~/ROR/DeviseActionMailer$ heroku login
Enter your Heroku credentials.
Email: pygoogle@aol.com
Password (typing will be hidden):
Logged in as pygoogle@aol.com
k@laptop:~/ROR/DeviseActionMailer$
We need to add the pg gem to your Rails project. Edit Gemfile and change this line:
gem 'sqlite3'To this:
gem 'pg'
Now re-install dependencies (to generate a new Gemfile.lock):
$ bundle install
In addition to using the pg gem, we'll also need to ensure the config/database.yml is using the postgresql adapter. The config/database.yml file should look something like this:
default: &default;
  adapter: postgresql
  pool: 5
  timeout: 5000

development:
  adapter: postgresql
  encoding: unicode
  database: DeviseMailer_dev
  pool: 5
  username: postgres
  password: postgres

# Warning: The database defined as "test" will be erased and
# re-generated from your development database when you run "rake".
# Do not set this db to the same as development or production.
test:
  <<: *default
  database: DeviseMailer_test

production:
  <<: *default
  database: DeviseMailer_prod
Since we switched db from sqlite3 to postgres, we need to create a new db and migrate before we run our server:
$ rake db:create
$ sudo -i -u postgres psql
$ rails server
At his point, our home page should be ok:
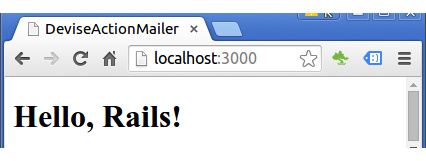
Heroku integration has previously relied on using the Rails plugin system, which has been removed from Rails 4. To enable features such as static asset serving and logging on Heroku, we need to add rails_12factor gem to our Gemfile.
At the end of Gemfile add:
gem 'rails_12factor', group: :production
Then run:
$ bundle install
Now run the following commands in our Rails app directory to initialize and commit our code to git:
$ git init
$ git add .
$ git commit -m "initial commit"
Do we have remote repository?
$ git remote -v
$
No remote yet.
We should make sure that we are in the directory that contains our Rails app:
$ pwd
/home/k/ROR/DeviseActionMailer
Then, create our app on Heroku:
$ heroku create
Creating app... done, stack is cedar-14
https://safe-mountain-99336.herokuapp.com/ | https://git.heroku.com/safe-mountain-99336.git

$ git remote -v
heroku	https://git.heroku.com/safe-mountain-99336.git (fetch)
heroku	https://git.heroku.com/safe-mountain-99336.git (push)
Now we may want to deploy our code to Heroku:
$ git push heroku master
It is always a good idea to check to see if there are any warnings or errors in the output. Actually, we got the following warnings:
remote: ###### WARNING:
remote:        You have not declared a Ruby version in your Gemfile.
remote:        To set your Ruby version add this line to your Gemfile:
remote:        ruby '2.0.0'
remote:        # See https://devcenter.heroku.com/articles/ruby-versions for more information.
So, added the ruby version to Gemfile:
ruby '2.1.3'
The next warning:
remote:
remote: ###### WARNING:
remote:        No Procfile detected, using the default web server (webrick)
remote:        https://devcenter.heroku.com/articles/ruby-default-web-server
By default, our apps web process runs rails server, which uses Webrick. This is fine for testing, but for production apps we'll want to switch to a more robust webserver. We'll use Puma as our webserver. Regardless of the webserver we choose, production apps should always specify the webserver explicitly in the Procfile. First, add Puma to our Gemfile:
gem 'puma'
Then run:
$ bundle install
If we are using the database in our application we need to manually migrate the database by running:
$ heroku run rake db:migrate
Any commands after the heroku run will be executed on a Heroku dyno.
First, we want to make sure we're logout from Heroku:
$ heroku auth:logout
Local credentials cleared.
Then, issue the following command:
$ heroku addons:create sendgrid:starter
We can check addons:
$ heroku addons Add-on Plan Price âââââââââââââââââââââââââââââââââââââââââââ âââââââââ âââââ heroku-postgresql (postgresql-shaped-61073) hobby-dev free ââ as DATABASE sendgrid (sendgrid-transparent-82413) starter free ââ as SENDGRID The table above shows add-ons and the attachments to the current app (safe-mountain-99336) or other apps.
Let's get Heroku's SENDGRID credentials:
$ heroku config:get SENDGRID_USERNAME
...
$ heroku config:get SENDGRID_PASSWORD
...
Let's create a file config/initializers/setup_mail.rb:
ActionMailer::Base.delivery_method = :smtp
ActionMailer::Base.smtp_settings = {
  :address              =>  'smtp.sendgrid.net',
  :port                 =>  '587',
  :authentication       =>  :plain,
  :user_name            =>  'username@heroku.com',
  :password             =>  'password',
  :domain               =>  'heroku.com',
  :enable_starttls_auto  =>  true
}
Also, our config/enviroments/development.rb looks like this:
Rails.application.configure do
  ...
  config.action_mailer.perform_deliveries = true
  config.action_mailer.raise_delivery_errors = true
  config.action_mailer.default_url_options = { :host => 'localhost:3000' }
  config.action_mailer.delivery_method = :smtp
  config.action_mailer.perform_deliveries = true

end
Since we made some changes to the code, we need to push it before we run it on Heroku:
git add config/environments/development.rb config/environments/production.rb
git commit -m "env change"
git push heroku master
Let's run if the SENDGRID mailer works on Heroku as well.
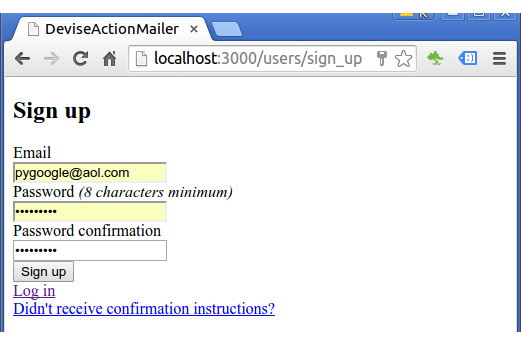
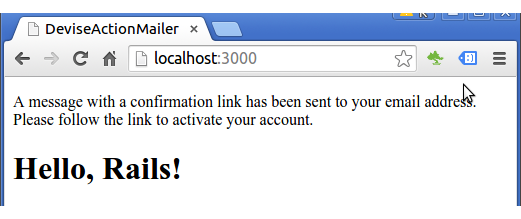
In inbox:

Now we are ready to configure our app to use Puma. But we will use the default settings of Puma.
We can now visit the app in our browser with heroku open.
$ heroku open
Let's directly go to the Sign-Up page, and type in email and password:
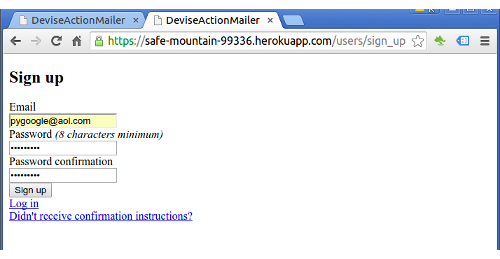
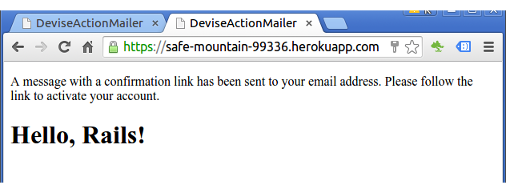
After hitting the submit, the app let us know the message has been sent:
Source available : Rails4-Devise-Authentication-and-Sending-Confirmation-Email.
Ruby on Rails
- Ruby On Rails Home
- Ruby - Input/Output, Objects, Load
- Ruby - Condition (if), Operators (comparison/logical) & case statement
- Ruby - loop, while, until, for, each, (..)
- Ruby - Functions
- Ruby - Exceptions (raise/rescue)
- Ruby - Strings (single quote vs double quote, multiline string - EOM, concatenation, substring, include, index, strip, justification, chop, chomp, split)
- Ruby - Class and Instance Variables
- Ruby - Class and Instance Variables II
- Ruby - Modules
- Ruby - Iterator : each
- Ruby - Symbols (:)
- Ruby - Hashes (aka associative arrays, maps, or dictionaries)
- Ruby - Arrays
- Ruby - Enumerables
- Ruby - Filess
- Ruby - code blocks and yield
- Rails - Embedded Ruby (ERb) and Rails html
- Rails - Partial template
- Rails - HTML Helpers (link_to, imag_tag, and form_for)
- Layouts and Rendering I - yield, content_for, content_for?
- Layouts and Rendering II - asset tag helpers, stylesheet_link_tag, javascript_include_tag
- Rails Project
- Rails - Hello World
- Rails - MVC and ActionController
- Rails - Parameters (hash, array, JSON, routing, and strong parameter)
- Filters and controller actions - before_action, skip_before_action
- The simplest app - Rails default page on a Shared Host
- Redmine Install on a Shared Host
- Git and BitBucket
- Deploying Rails 4 to Heroku
- Scaffold: A quickest way of building a blog with posts and comments
- Databases and migration
- Active Record
- Microblog 1
- Microblog 2
- Microblog 3 (Users resource)
- Microblog 4 (Microposts resource I)
- Microblog 5 (Microposts resource II)
- Simple_app I - rails html pages
- Simple_app II - TDD (Home/Help page)
- Simple_app III - TDD (About page)
- Simple_app IV - TDD (Dynamic Pages)
- Simple_app V - TDD (Dynamic Pages - Embedded Ruby)
- Simple_app VI - TDD (Dynamic Pages - Embedded Ruby, Layouts)
- App : Facebook and Twitter Authentication using Omniauth oauth2
- Authentication and sending confirmation email using Devise
- Adding custom fields to Devise User model and Customization
- Devise Customization 2. views/users
- Rails Heroku Deploy - Authentication and sending confirmation email using Devise
- Deploying a Rails 4 app on CentOS 7 production server with Apache and Passenger I
- Deploying a Rails 4 app on CentOS 7 production server with Apache and Passenger II
- OOPS! Deploying a Rails 4 app on CentOS 7 production server with Apache and Passenger (Trouble shooting)
Ph.D. / Golden Gate Ave, San Francisco / Seoul National Univ / Carnegie Mellon / UC Berkeley / DevOps / Deep Learning / Visualization