Devise Customization 2. views/users 2020
This tutorial is the continuation from previous chapters on Devise:
- Authentication and sending confirmation email using Devise
- Adding custom fields to Devise User model and Customization
- Rails Heroku Deploy - Authentication and sending confirmation email using Devise
In this chapter, we'll extend the views related to the User model. Actually, we've created UsersController via rails g controller users command but not fully implemented in my previous tutorials.
When I first started using Devise with views with Users model, it was quite confusing because we could have two views in different folder: views/ or views/devise/.
Following statements are clear explanations about that from Plataformatec:
Since Devise is an engine, all its views are packaged inside the gem. These views will help you get started, but after some time you may want to change them. If this is the case, you just need to invoke the following generator, and it will copy all views to your application:
$ rails generate devise:views
If you have more than one Devise model in your application (such as User and Admin), you will notice that Devise uses the same views for all models. Fortunately, Devise offers an easy way to customize views. All you need to do is set:
config.scoped_views = trueinside the config/initializers/devise.rb file.
After doing so, you will be able to have views based on the role like "users/sessions/new" and "admins/sessions/new". If no view is found within the scope, Devise will use the default view at "devise/sessions/new". You can also use the generator to generate scoped views:
$ rails generate devise:views users
If you would like to generate only a few sets of views, like the ones for the registerable and confirmable module, you can pass a list of modules to the generator with the -v flag.
$ rails generate devise:views -v registrations confirmations
In our previous tutorial, we've created UsersController via rails g controller users command, and after modification it looks like this:
class UsersController < ApplicationController

  before_action :set_user, only: [:show, :edit, :update] # probably want to keep using this

  # GET /users
  # GET /users.json
  def index
    @users = User.all
  end

  # # GET /users/1
  # # GET /users/1.json
  def show

  end

  # GET /users/1/edit
  def edit

  end

  # # PATCH/PUT /users/1
  # # PATCH/PUT /users/1.json
  def update
    respond_to do |format|
      if @user.update(user_params)
        format.html { redirect_to @user, notice: 'User was successfully updated.' }
        format.json { render :show, status: :ok, location: @user }
      else
        format.html { render :edit }
        format.json { render json: @user.errors, status: :unprocessable_entity }
      end
    end
  end

  private
    # Use callbacks to share common setup or constraints between actions.
    def set_user
      @user = User.find(params[:id])
    end

    # Never trust parameters from the scary internet, only allow the white list through.
    def user_params
      params.require(:user).permit(:role, :name)
    end

end
To customize our views, let's create scoped views:
$ rails generate devise:views users
Also, we need to set scope configuration:
config.scoped_views = trueinside the config/initializers/devise.rb file.
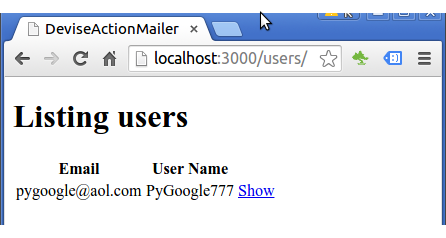
Index action for user, views/users/index.html.erb:
<h1>Listing users</h1>

<table>
  <thead>
    <tr>
      <th>Email</th>
      <th>User Name</th>
      <th colspan="3"></th>
    </tr>
  </thead>

  <tbody>
    <% @users.each do |user| %>
      <tr>
        <td><%= user.email %></td>
        <td><%= user.name %></td>
        <td><%= link_to 'Show', user %></td>
        <td><%#= link_to 'Edit', edit_user_path(user) %></td>
        <td><%#= link_to 'Destroy', user, method: :delete, data: { confirm: 'Are you sure?' } %></td>
      </tr>
    <% end %>
  </tbody>
</table>

<br>

<%#= link_to 'New User', new_user_path %>
What We get from this is:
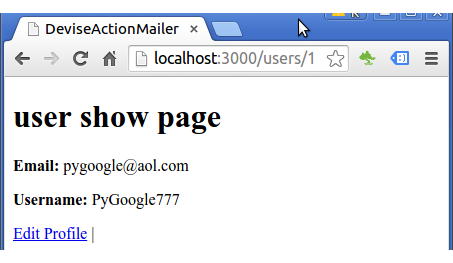
For show, we have views/users/show.html.erb:
<p id="notice"><%= notice %></p>

<h1>user show page</h1>

<p>
  <strong>Email:</strong>
  <%= @user.email %>
</p>

<p>
  <strong>Username:</strong>
  <%= @user.name %>
</p>

<!-- include others, etc. -->

<%= link_to 'Edit Profile', edit_user_path(@user) %> |
<%#= link_to "Settings", edit_user_path %>
So, the user select "Show", we get this:
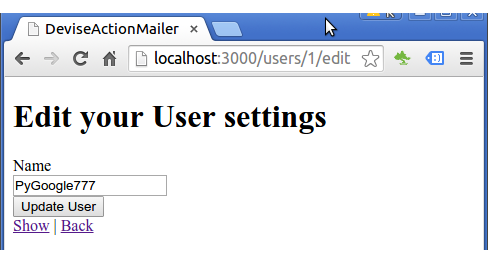
For edit action, the corresponding view file is views/users/edit.html.erb:
<h1>Edit your User settings</h1>

<%= render 'form' %>

<%= link_to 'Show', @user %> |
<%= link_to 'Back', users_path %>
This requires a form like this (views/users/_form.html.erb):
<%= form_for(@user) do |f| %>
<!--   <%# if @user.errors.any? %>
    <div id="error_explanation">
      <h2><%#= pluralize(@user.errors.count, "error") %> prohibited this user from being saved:</h2>
      <ul>
      <%# @user.errors.full_messages.each do |message| %>
        <li><%#= message %></li>
      <%# end %>
      </ul>
    </div>
  <%# end %> -->

<!-- this needs to be set to a radio button -->
  <div class="field">
    <%= f.label :name %><br>
    <%= f.text_field :name %>
  </div>

  <div class="actions">
    <%= f.submit %>
  </div>
<% end %>
What we get from the "Edit" action is this:
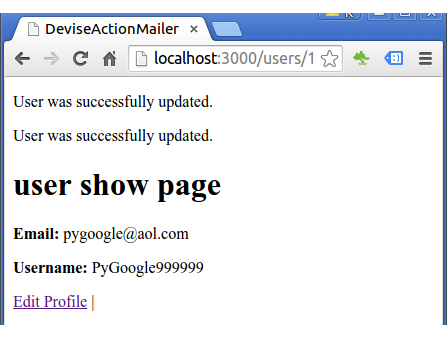
The last one: "Update", we get this:
- implement user's "role"
Ruby on Rails
- Ruby On Rails Home
- Ruby - Input/Output, Objects, Load
- Ruby - Condition (if), Operators (comparison/logical) & case statement
- Ruby - loop, while, until, for, each, (..)
- Ruby - Functions
- Ruby - Exceptions (raise/rescue)
- Ruby - Strings (single quote vs double quote, multiline string - EOM, concatenation, substring, include, index, strip, justification, chop, chomp, split)
- Ruby - Class and Instance Variables
- Ruby - Class and Instance Variables II
- Ruby - Modules
- Ruby - Iterator : each
- Ruby - Symbols (:)
- Ruby - Hashes (aka associative arrays, maps, or dictionaries)
- Ruby - Arrays
- Ruby - Enumerables
- Ruby - Filess
- Ruby - code blocks and yield
- Rails - Embedded Ruby (ERb) and Rails html
- Rails - Partial template
- Rails - HTML Helpers (link_to, imag_tag, and form_for)
- Layouts and Rendering I - yield, content_for, content_for?
- Layouts and Rendering II - asset tag helpers, stylesheet_link_tag, javascript_include_tag
- Rails Project
- Rails - Hello World
- Rails - MVC and ActionController
- Rails - Parameters (hash, array, JSON, routing, and strong parameter)
- Filters and controller actions - before_action, skip_before_action
- The simplest app - Rails default page on a Shared Host
- Redmine Install on a Shared Host
- Git and BitBucket
- Deploying Rails 4 to Heroku
- Scaffold: A quickest way of building a blog with posts and comments
- Databases and migration
- Active Record
- Microblog 1
- Microblog 2
- Microblog 3 (Users resource)
- Microblog 4 (Microposts resource I)
- Microblog 5 (Microposts resource II)
- Simple_app I - rails html pages
- Simple_app II - TDD (Home/Help page)
- Simple_app III - TDD (About page)
- Simple_app IV - TDD (Dynamic Pages)
- Simple_app V - TDD (Dynamic Pages - Embedded Ruby)
- Simple_app VI - TDD (Dynamic Pages - Embedded Ruby, Layouts)
- App : Facebook and Twitter Authentication using Omniauth oauth2
- Authentication and sending confirmation email using Devise
- Adding custom fields to Devise User model and Customization
- Devise Customization 2. views/users
- Rails Heroku Deploy - Authentication and sending confirmation email using Devise
- Deploying a Rails 4 app on CentOS 7 production server with Apache and Passenger I
- Deploying a Rails 4 app on CentOS 7 production server with Apache and Passenger II
- OOPS! Deploying a Rails 4 app on CentOS 7 production server with Apache and Passenger (Trouble shooting)
Ph.D. / Golden Gate Ave, San Francisco / Seoul National Univ / Carnegie Mellon / UC Berkeley / DevOps / Deep Learning / Visualization