Microblog App I 2020

Let's check the versions of ruby and rails:
$ ruby -v
ruby 2.1.3p242 (2014-09-19 revision 47630) [x86_64-linux]

$ rails -v
Rails 4.2.5.1
Almost all Rails applications start by running rails new command. We generate a skeleton Rails application in a directory we choose.
$ cd ~/rails_projects
$
$ rails new microblog_app
$ cd microblog_app
As we can see rails new automatically runs the bundle install command after the file creation is done. Notice that the rails command creates numerous files and directories.
Typically when we make a web application, first thing we do is creating a data model. The data model is a representation of the structures needed by our application, microblog.
We'll begin with a model for users of the app, and then we'll add a model for microposts.
Users of our microblog app will have a unique integer identifier called id, a publicly viewable name (of type string), and an email address (also a string) that will be used as a username.
Here is the users table:
| users | |
| id | integer |
| name | string |
| string | |
For the users table in database, the id, name, and email attributes are columns in that table.
Our micropost has only an id and a content field for the micropost's text (of type string). We also want to associate each micropost with a particular user by recording the user_id of the owner of the post.
Here is the micropost table:
| microposts | |
| id | integer |
| content | string |
| user_id | integer |
We're going to implement the users data model defined in the earlier section.
The Users resource will allow us to think of users as objects that can be created, read, updated, and deleted (CRUD) through the web via the HTTP protocol. Our Users resource will be created by a scaffold generator which comes standard with each Rails project.
By passing the scaffold command to the rails generate script, we can generate Rails scaffolding. The argument of the scaffold command is the singular form of the resource name, User, together with optional parameters for the data model's attributes.
$ rails generate scaffold User name:string email:string
      invoke  active_record
      create    db/migrate/20140519174512_create_users.rb
      create    app/models/user.rb
      invoke    test_unit
      create      test/models/user_test.rb
      create      test/fixtures/users.yml
      invoke  resource_route
       route    resources :users
      invoke  scaffold_controller
      create    app/controllers/users_controller.rb
      invoke    erb
      create      app/views/users
      create      app/views/users/index.html.erb
      create      app/views/users/edit.html.erb
      create      app/views/users/show.html.erb
      create      app/views/users/new.html.erb
      create      app/views/users/_form.html.erb
      invoke    test_unit
      create      test/controllers/users_controller_test.rb
      invoke    helper
      create      app/helpers/users_helper.rb
      invoke      test_unit
      create        test/helpers/users_helper_test.rb
      invoke    jbuilder
      create      app/views/users/index.json.jbuilder
      create      app/views/users/show.json.jbuilder
      invoke  assets
      invoke    coffee
      create      app/assets/javascripts/users.js.coffee
      invoke    scss
      create      app/assets/stylesheets/users.css.scss
      invoke  scss
      create    app/assets/stylesheets/scaffolds.css.scss
Now, the User model has a form shown in the table above by including name:string and email:string.
The the primary key id in the table is created automatically by Rails.
We need to migrate the database using rake.
We simply update the database with our new users data model:
$ bundle exec rake db:migrate
== 20160127231829 CreateUsers: migrating ======================================
-- create_table(:users)
   -> 0.0125s
== 20160127231829 CreateUsers: migrated (0.0164s) =============================
Note that we needed to run rake using bundle exec in order to ensure that the command uses the version of Rake corresponding to our Gemfile.
Now, we can run the local web server using rails server:
$ rails server
=> Booting WEBrick
=> Rails 4.2.5.1 application starting in development on http://localhost:3000
=> Run `rails server -h` for more startup options
=> Ctrl-C to shutdown server
[2016-01-27 15:23:17] INFO  WEBrick 1.3.1
[2016-01-27 15:23:17] INFO  ruby 2.1.3 (2014-09-19) [x86_64-linux]
[2016-01-27 15:23:17] INFO  WEBrick::HTTPServer#start: pid=14445 port=3000
Now our application is ready for http://localhost:3000/.

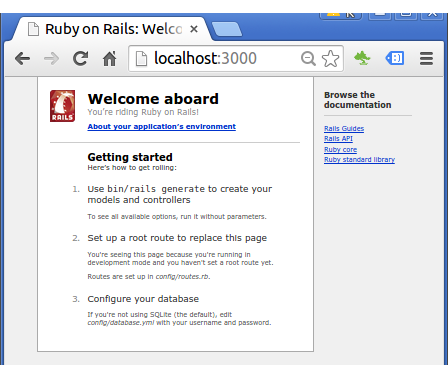
This root url http://localhost:3000/ page is the same default Rails page we've seen in previous chapter.
Note that we also created a large number of pages for manipulating users.
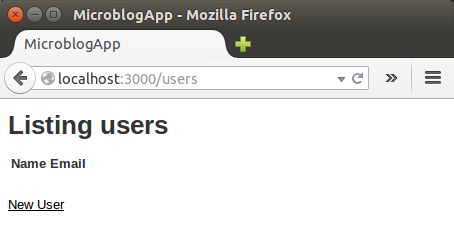
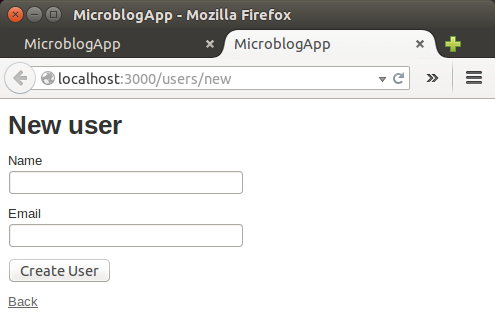
For example, the page for listing all users is at /users, and the page for making a new user is at /users/new.


Ph.D. / Golden Gate Ave, San Francisco / Seoul National Univ / Carnegie Mellon / UC Berkeley / DevOps / Deep Learning / Visualization