Laravel 5 Framework Hackerthon Starter
We'll use Postgres DB, so we neet to set it up. We'll use the apt packaging system since Ubuntu's default repositories contain Postgres packages.
Let's install the Postgres package and a "-contrib" package that adds some additional utilities:
$ sudo apt-get update
$ sudo apt-get install postgresql postgresql-contrib
Postgres uses roles to handle in authentication and authorization instead of users / groups.
It uses ident which associates Postgres roles with a matching Unix/Linux system account. So, if a role exists within Postgres, a Unix/Linux username with the same name will be able to sign in as that role.
Once installed, PostgreSQL has a user account called postgres that is associated with the default Postgres role. In order to use Postgres roll, we can log into that account by typing:
$ sudo -i -u postgres
postgres@ip-172-31-11-56:~$
We can now access a Postgres:
postgres $ psql
psql (9.5.5)
Type "help" for help.

postgres=#
Now we're logged in and able to interact with the database management system.
To exit out of the PostgreSQLby typing:
postgres=# \quit
$
We can also run the command we'd like with the postgres account directly with sudo, which will log us directly into Postgres without the intermediary bash shell in between:
$ sudo -u postgres psql
psql (9.5.5)
Type "help" for help.

postgres=#
Create a db called xophistdb, a user postgres and password, postgres. Note the user name is the default provided by Postgres.
As we discussed in the previous section, we can get in like this:
$ sudo -i -u postgres psqlOr
$ sudo su - postgres
postgres@laptop:~$ psql
Password:
psql (9.3.9)
Once we're in, let's create our db:
postgres=# CREATE DATABASE xophistdb;
CREATE DATABASE

postgres=# \l
                                        List of databases
          Name          |  Owner   | Encoding |   Collate   |    Ctype    |   Access privileges
------------------------+----------+----------+-------------+-------------+-----------------------
...
 xophistdb              | postgres | UTF8     | en_US.UTF-8 | en_US.UTF-8 |
Let's list the roles:
postgres=# \du
                              List of roles
 Role name  |                   Attributes                   | Member of
------------+------------------------------------------------+-----------
 bogotobogo | Superuser, Create role, Create DB              | {}
 k          | Superuser, Create role, Create DB              | {}
 postgres   | Superuser, Create role, Create DB, Replication | {}
 sfvue      |                                                | {}
One of the methods for creating roles is using the "createuser" command. Get out of the PostgreSQL command prompt for a moment by typing:
postgres=# \q
Create a role called "homestead" with the following command:
postgres@laptop:~$ psql
Password:
psql (9.3.9)
Type "help" for help.

postgres=# \du
                              List of roles
 Role name  |                   Attributes                   | Member of
------------+------------------------------------------------+-----------
 bogotobogo | Superuser, Create role, Create DB              | {}
 homestead  |                                                | {}
 k          | Superuser, Create role, Create DB              | {}
 postgres   | Superuser, Create role, Create DB, Replication | {}
 sfvue      |                                                | {}

postgres=#
By default, users are only allowed to login locally if the system username matches the PostgreSQL username.
We can get around this by either changing the login type, or by specifying that PostgreSQL should use the loopback network interface, which would change the connection type to remote, even though it is actually a local connection.
We will use the second option. First, we need to give the user we'd like to connect as a password so that we can authenticate.
Give the "homestead" a password with the following command:
postgres=# \password homestead
Enter new password:
Enter it again:
postgres=#
Set the password the same as the username, well, it's just a local machine.
Now, exit the PostgreSQL interface and exit back to our normal user:
postgres=# \q
postgres@laptop:~$ exit
logout
$
PostgreSQL assumes that when we log in, we will be using a username that matches our operating system username, and that you will be connecting to a database with the same name as well.
This is not the case with the situation we are demonstrating, so we will need to explicitly specify the options we want to use. Use the following syntax:
$ psql -U user_name -d database_name -h 127.0.0.1 -W
In my case, it will be like this:
$ psql -U homestead -d xophistdb -h 127.0.0.1 -W
Password for user homestead:
psql (9.3.9)
SSL connection (cipher: DHE-RSA-AES256-GCM-SHA384, bits: 256)
Type "help" for help.

xophistdb=> \q
The "-h 127.0.0.1" section is the part that specifies that we will be connecting to the local machine, but through a network interface, which allows us to authenticate even though our system username does not match. The "-W" flag tells PostgreSQL that we will be entering a password.
To log in with our "homestead" we can issue the following command:
$ psql -U homestead -d postgres -h 127.0.0.1 -W
Password for user homestead:
psql (9.3.9)
SSL connection (cipher: DHE-RSA-AES256-GCM-SHA384, bits: 256)
Type "help" for help.

postgres=> \q
If we try to perform some actions in this session, we will see that we don't have the ability to do many things. This is because we did not give "homestead" user permissions to administer many things.
So, let's exit and get back into the administrative session:
$ sudo -i -u postgres psql
[sudo] password for k:
Password:
psql (9.3.9)
Type "help" for help.

postgres=#
Let's give the homestead user the privilege of superuser:
postgres=# ALTER USER homestead WITH SUPERUSER;
ALTER ROLE

postgres=# \du
                              List of roles
 Role name  |                   Attributes                   | Member of
------------+------------------------------------------------+-----------
 bogotobogo | Superuser, Create role, Create DB              | {}
 homestead  | Superuser                                      | {}
 k          | Superuser, Create role, Create DB              | {}
 postgres   | Superuser, Create role, Create DB, Replication | {}
 sfvue      |                                                | {}

postgres=#
This section is based on How To Use Roles and Manage Grant Permissions in PostgreSQL on a VPS.
Download the Laravel Hackathon Starter Pack Installer using Composer:
$ git clone https://github.com/unicodeveloper/laravel-hackathon-starter.git hackathon-starter-pack
Rename env.example to .env.
Also, we need to put lots of data for DB, email, social logins, etc.:
DB_HOST=127.0.0.1
DB_DATABASE=xophistdb
DB_USERNAME=homestead
DB_PASSWORD=homestead
...
Fill in all the keys and secrets.
We also need to configure db connection in config/database.php:
'connections' => [
...
  'pgsql' => [
      'driver'   => 'pgsql',
      'host'     => env('DB_HOST', 'xophistdb'),
      'database' => env('DB_DATABASE', 'homestead'),
      'username' => env('DB_USERNAME', 'homestead'),
      'password' => env('DB_PASSWORD', ''),
      'charset'  => 'utf8',
      'prefix'   => '',
      'schema'   => 'public',
  ],
Install Composer dependencies:
$ composer install
Generate a secure key for the app using:
$ php artisan key:generate
Put that into .env:
APP_KEY=bK....cZ
Run migrations:
$ php artisan migrate
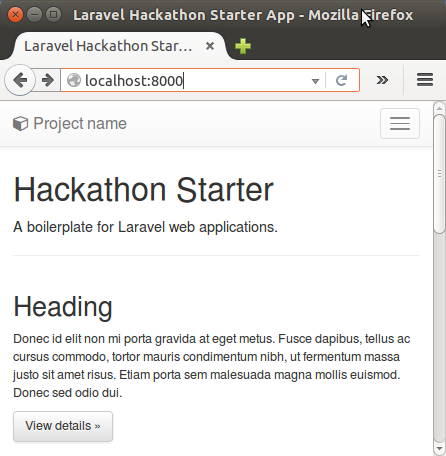
To test our Laravel application without setting up a web server:
$ php artisan serve

We may get blank pages when we do login or Create Account because of the permissions. So, we need to do the followings:
$ sudo chown -R www-data:www-data storage
$ sudo chown -R www-data:www-data vendor
Also, the following:
$ sudo mkdir -p /var/www/xophist/logs
$ sudo chown -R www-data:www-data logs
Run the following command as well:
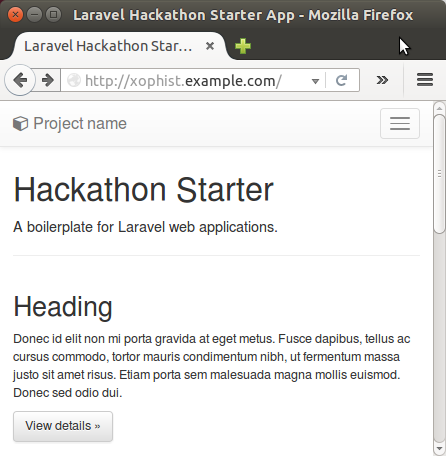
$ sudo ran the following command: $ sudo chmod -R 777 storage/ $ sudo chmod -R 777 bootstrap/We can serve the page via Apache server.
Here is the configuration (/etc/apache2/sites-available/xophist.example.conf):
<VirtualHost *:80>
        ServerName xophist.example.com
        #DocumentRoot /var/www/xophist/public
        DocumentRoot /home/k/MySitesPre2/TEST/hackathon-starter-pack/public
        <Directory />
                AllowOverride None
        </Directory>
        <Directory /home/k/MySitesPre2/TEST/hackathon-starter-pack/public>
                AllowOverride All
                Require all granted
                Options Indexes FollowSymLinks
        </Directory>

        ErrorLog ${APACHE_LOG_DIR}/error.log
        LogLevel warn
        CustomLog ${APACHE_LOG_DIR}/access.log combined
</VirtualHost>
Set a link:
$ sudo ln -s /etc/apache2/sites-available/xophist.example.conf /etc/apache2/sites-enabled/xophist.example.conf
With /etc/hosts:
127.0.0.1 xophist.example.com

Ph.D. / Golden Gate Ave, San Francisco / Seoul National Univ / Carnegie Mellon / UC Berkeley / DevOps / Deep Learning / Visualization