PHP Tutorial Laravel 4 Framework (Authentication) - Database connection and sending email

Laravel 4
- Installing on Ubuntu - local
- Installing on a Shared host
- Installing on Windows
- Creating users table
- Home page with controller and blade
- Blade Templating
- Database connection and sending emails
- Creating user account I - GET
- Creating user account II - POST
- Creating user account III - Error checking & redirecting input
- Creating user account IV - User::create()
- Activating user account I - Mail::send()
- Activating user account II - Update user's status
- User account sign-in I - Route and link
- User account sign-in II - Validation
- User account sign-in III - Login Authentication
- Singing out
- Remember the user
- Changing Password I
- Changing Password II
- Recovering forgotten password I
- Recovering forgotten password II
- User Profile
- Database Migration using artisan
This tutorial is the continuation from Blade Templating.
In this chapter, we'll see how we can send an email after extracting information from our database. In that process, we can check to see if we can connect to the database via Eloquent.
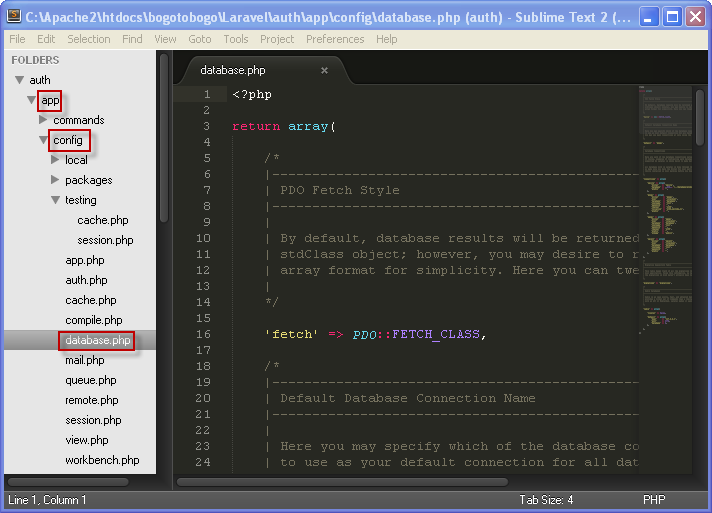
All setting related to database is in auth/app/config/database.php:

In our case, we are interested in mysql settings:
'mysql' => array(
                'driver'    => 'mysql',
		'host'      => 'localhost',
		'database'  => 'auth',
		'username'  => 'root',
		'password'  => '',
		'charset'   => 'utf8',
		'collation' => 'utf8_unicode_ci',
		'prefix'    => '',
	),
The database name has been changed to auth from database.
To send an email, we need to get sender information from our database, however, before the extraction, we need to insert that information into our database.
INSERT INTO `auth`.`users` (`id`, `email`, `username`, `password`, `password_temp`, `code`, `active`, `created_at`, `updated_at`) VALUES (NULL, 'tom@bogotobogo.com', 'tom', '', '', '', '1', '2014-04-01 00:00:00', '2014-04-01 00:00:00');

We'll extract the email info using id.
<?php

class HomeController extends BaseController {

	public function home()
	{
		$user = User::find(1);

		return View::make('home');
	}

}
In the code, we are able to use User::find(1) because the class is defined in Models/User.php:
class User extends Eloquent implements UserInterface, RemindableInterface {

	/**
	 * The database table used by the model.
	 *
	 * @var string
	 */
	protected $table = 'users';
As we can see in the code, we're accessing the users table via Eloquent. We can print out the what we extract:
<?php

class HomeController extends BaseController {

	public function home()
	{
		$user = User::find(1);

		echo '<pre>', print_r($user), '</pre>';

		return View::make('home');
	}

}
Here is the rendered home page:
User Object
(
    [table:protected] => users
    [hidden:protected] => Array
        (
            [0] => password
        )

    [connection:protected] =>
    [primaryKey:protected] => id
    [perPage:protected] => 15
    [incrementing] => 1
    [timestamps] => 1
    [attributes:protected] => Array
        (
            [id] => 1
            [email] => tom@bogotobogo.com
            [username] => tom
            [password] =>
            [password_temp] =>
            [code] =>
            [active] => 1
            [created_at] => 2014-04-01 00:00:00
            [updated_at] => 2014-04-01 00:00:00
        )
We can access the username from the User table:
echo $user = User::find(1)->username;
The rendered output:
tom
Home sweet home!! Naviation
Home sweet home!! @yield and template
Let's modify config/mail.php.
We'll use gmail:
/*
'host' => 'smtp.mailgun.org', ====>
*/
'host' => 'mail.bogotobogo.com',
The port number should be changed:
/*
'port' => 587,
====>
*/
'port' => 465,
from:
/*
'from' => array('address' => null, 'name' => null),
===> */
'from' => array('address' => 'tom@bogotobogo.com', 'name' => auth),
Encryption:
/*
'encryption' => 'tls',
==>
*/
'encryption' => 'ssl',
Username and password for sender's
'username' => tom@bogotobogo.com,
'password' => passwd,
In my case, I'm sending an email from tom@bogotobogo.com to my yahoo account. As we already know, the password required for the sending side but not the receiving.
We need to modify controllers/HomeController.php like this:
<?php

class HomeController extends BaseController {

	public function home()
	{

		Mail::send('emails.auth.test', array('name'=>'Tom'), function($message)
		{
    		$message->to('myYahooAccount@yahoo.com')
    		->subject('Test email from tom@bogotobogo.com with port 465');
		});

		return View::make('home');
	}

}
The Mail::send method may be used to send an e-mail message.
The first argument passed to the send method is the name of the view that should be used as the e-mail body. The second is the array() that should be passed to the view, and the third is a Closure allowing us to specify various options on the e-mail message.
Regarding the view (emails.auth.test, we need to create a view file: views/emails/auth/test.blade.php. But in this case, it's just an empty file.
If we refresh the browser:

an email will be sent to my yahoo account.

Ph.D. / Golden Gate Ave, San Francisco / Seoul National Univ / Carnegie Mellon / UC Berkeley / DevOps / Deep Learning / Visualization