Flask with Embedded Machine Learning II : Basic Flask App

Continued from Flask with Embedded Machine Learning I : Serializing with pickle and DB setup.
Now that we have prepared the code to classify movie reviews in the previous section, we're going to work on our Flask web application. In this section, we'll setup a basic Flask app which can be found any introductory course for building a Flask app.
Our main app with embedded machine learning classification will be resumed in next article (Flask with Embedded Machine Learning III : Embedding Classifier) but not in this page.
Let's install Flask:
$ sudo install it via pip
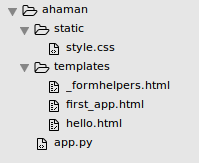
Here are the files for our basic app with a domain name ahaman.com:

The app.py has the main code that will be executed by the Python to run the Flask application. The templates directory is the directory where Flask will look for static HTML files to render.
We run our application as a single module and initializes a new Flask instance with the argument __name__ to let Flask know that it can find the HTML template folder, templates, in the same directory where our module (app.py) is located:
from flask import Flask, render_template

app = Flask(__name__)

@app.route('/')
def index():
	return render_template('first_app.html')

if __name__ == '__main__':
	app.run()
In the code, we used the route decorator. @app.route('/'), to specify the URL that should trigger the execution of the index function. Here, our index function simply renders the HTML file templates/first_app.html.
Then, we used the run() function to only run the application on the server when this script is directly executed by the Python interpreter (not being imported), which we ensured using the if statement with __name__ == '__main__'.
Here is the basic html file:
<!doctype html>
<html>
<head>
	<title>My first app</title>
</head>
<body>
	<div>This is my first Flask app!</div>
</body>
</html>
Like other web frameworks, Flask allows us to run our apps locally, which is useful for developing and testing web applications before we deploy them on a public web server.
Let's start our web application:
$ python app.py
 * Running on http://127.0.0.1:5000/ (Press CTRL+C to quit)
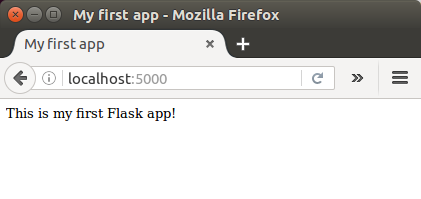
We can now enter this address in our web browser to see the web application in action. If everything has executed correctly, we should now see the following:

We're going to extend our basic Flask web application via WTForms library and learn how to collect data from a user using the library.
WTForms is a flexible forms validation and rendering library for python web development.
We can install it using pip:
$ sudo pip install wtforms
Here is our new directory structure:

We need to modify the app.py file.
Using wtforms, we extend the index() function with a text field that we will embed in our start page using the TextAreaField class, which automatically checks whether a user has provided valid input text or not.
Here is the file:
from flask import Flask, render_template, request
from wtforms import Form, TextAreaField, validators

app = Flask(__name__)

class HelloForm(Form):
	sayhello = TextAreaField('',[validators.DataRequired()])

@app.route('/')
def index():
	form = HelloForm(request.form)
	return render_template('first_app.html', form=form)

@app.route('/hello', methods=['POST'])
def hello():
	form = HelloForm(request.form)
	if request.method == 'POST' and form.validate():
		name = request.form['sayhello']
		return render_template('hello.html', name=name)
	return render_template('first_app.html', form=form)

if __name__ == '__main__':
	app.run(debug=True)
We also defined a new function, hello(), which will render an HTML page hello.html if the form has been validated. Note that we used the POST method to transport the form data to the server in the message body.
Lastly, by setting the argument debug=True inside the app.run() method so that it can help for developing new web applications.
Now, we're going to implement a generic macro in the file _formhelpers.html via the Jinja2 templating engine, which we will later import in our first_app.html file to render the text field:
{% macro render_field(field) %}
	<dt>{{ field.label }}
	<dd>{{ field(**kwargs)|safe }}
	{% if field.errors %}
		<ul class=errors>
		{% for error in field.errors %}
			<li>{{ error }}</li>
		{% endfor %}
		</ul>
	{% endif %}
	</dd>
{% endmacro %}
We'll have a very simple css file which doubles the font size of our HTML body elements:
body {
   font-size: 2em;
}
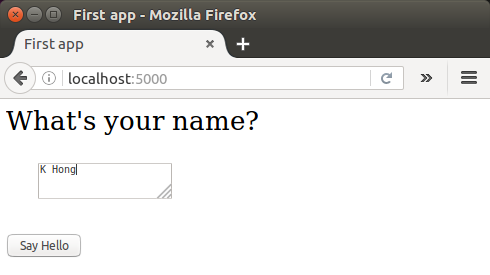
Out modified first_app.html file that will now render a text form where a user can enter a name:
<!doctype html>
<html>
<head>
	<title>First app</title>
	<link rel="stylesheet" href="{{ url_for('static',
		filename='style.css') }}">
</head>

<body>
	{% from "_formhelpers.html" import render_field %}
	<div>What's your name?</div>
	<form method=post action="/hello">
		<dl>
			{{ render_field(form.sayhello) }}
		</dl>
		<input type=submit value='Say Hello' name='submit_btn'>
	</form>
</body>

</html>
In the body section, we imported the form macro from _formhelpers.html and we rendered the sayhello form that we specified in the app.py file. Also, we added a button to the same form element so that a user can submit the text field entry.
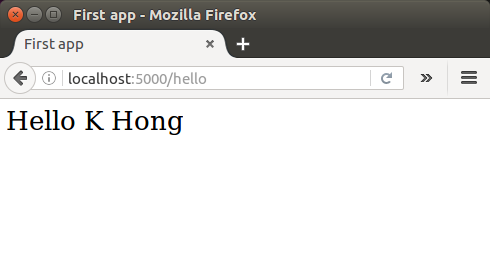
We create a hello.html file that will be rendered via the line return render_template('hello.html', name=name) inside the hello() function, which we defined in the app.py script to display the text that a user submitted via the text field. Here is the code:
<!doctype html>
<html>
<head>
	<title>First app</title>
	<link rel="stylesheet" href="{{ url_for('static',
		filename='style.css') }}">
</head>

<body>
	<div>Hello {{ name }}</div>
</body>
</html>
We can run our app again:


Source is available from ahaman-Flask-with-Machine-Learning-Sentiment-Analysis
Python Machine Learning, Sebastian Raschka
Flask with Embedded Machine Learning III : Embedding Classifier
Ph.D. / Golden Gate Ave, San Francisco / Seoul National Univ / Carnegie Mellon / UC Berkeley / DevOps / Deep Learning / Visualization