iPython and Jupyter - Install Jupyter, iPython Notebook, drawing with Matplotlib, and publishing it to Github
To install Jupyter, in this section, we'll install Jupyter via Anaconda as recommended by Jupyter Doc.
To install Jupyter via traditional pip, skip this section, and go to Ipython and Jupyter Notebook Install via pip.
Anaconda conveniently installs Python, the Jupyter Notebook, and other commonly used packages for scientific computing and data science.
We'll install "Anaconda for Linux" for Python 3.5:
$ bash Anaconda3-2.5.0-Linux-x86_64.sh
...
installing: conda-env-2.4.5-py35_0 ...
Python 3.5.1 :: Continuum Analytics, Inc.
creating default environment...
installation finished.
Do you wish the installer to prepend the Anaconda3 install location
to PATH in your /home/k/.bashrc ? [yes|no]
Since it added a new path:
# added by Anaconda3 2.5.0 installer
export PATH="/home/k/anaconda3/bin:$PATH"
we need to update our shell env:
$ source ~/.bashrc
and then using Anaconda and conda to install Jupyter:
$ conda install jupyter
Now that we have installed Jupyter Notebook, we are ready to run the notebook.
If Ipython and Jupyter Notebook are already installed, skip this section.
Install Ipython:
$ sudo apt-get -y install ipython ipython-notebook
Install Jupyter:
$ sudo -H pip install jupyter
Depending on the pip version on our Ubuntu apt-get repository, we may get the following error:
You are using pip version 8.1.1, however version 8.1.2 is available.
You should consider upgrading via the 'pip install --upgrade pip' command.
Then, we may want to upgrade pip to the latest version:
$ sudo -H pip install --upgrade pip
We can re-try installing Jupyter:
$ sudo -H pip install jupyter
We can start the notebook server from the command line:
$ jupyter notebook
This will print some information about the notebook server in terminal, including the URL of the web application (by default, http://127.0.0.1:8888). It will then open default web browser to this URL.

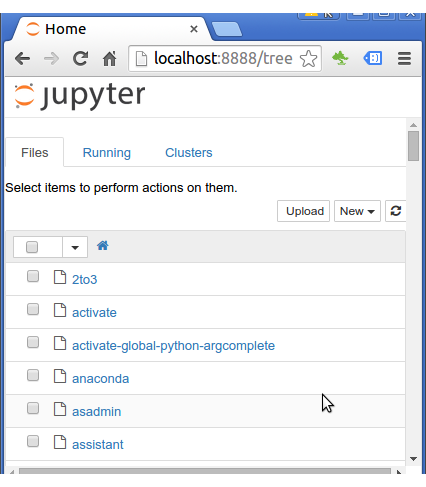
"When the notebook opens, you will see the notebook dashboard, which will show a list of the notebooks, files, and subdirectories in the directory where the notebook server was started (as seen in the next section, below). Most of the time, you will want to start a notebook server in the highest directory in your filesystem where notebooks can be found. Often this will be your home directory."
- Running the Notebook.
The Notebook is most convenient when we start a complex analysis project that will involve a substantial amount of interactive experimentation with our code.
Other common use-cases include keeping track of our interactive session (like a lab notebook), or writing technical documents that involve code, equations, and figures.
To close the Notebook server, go to the OS terminal where we launched the server from, and press Ctrl + C. We may need to confirm with y.
By default, the notebook server starts on port 8888. If port 8888 is unavailable, the notebook server searches the next available port. We can also specify the port manually:
$ jupyter notebook --port 9999
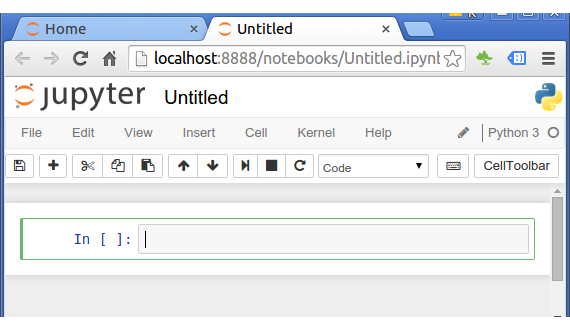
To create a new notebook, click on the New button, and select Notebook (Python 3).
A new browser tab opens and shows the Notebook interface as follows:

Here are the main components of the interface, from top to bottom:
- The notebook name (Untitled in the picture), which we can change by clicking on it. This is also the name of the .ipynb file.
- The Menu bar (File, Edit, etc.) gives us access to several actions pertaining to either the notebook or the kernel.
- To the right of the menu bar is the Kernel name (Python 3). We can change the kernel language of our notebook from the Kernel menu.
- The Toolbar contains icons for common actions. In particular, the dropdown menu showing Code lets us change the type of a cell.
To create a file jupyter_notebook_config.py in ~/.jupyter:
$ jupyter notebook --generate-config
The file already has a line starting with # c.NotebookApp.notebook_dir=u''. So, all we need to do is to uncomment this line and change the value to our desired location:
c.NotebookApp.notebook_dir=u'/home/k/TEST/NeuralNetworks'
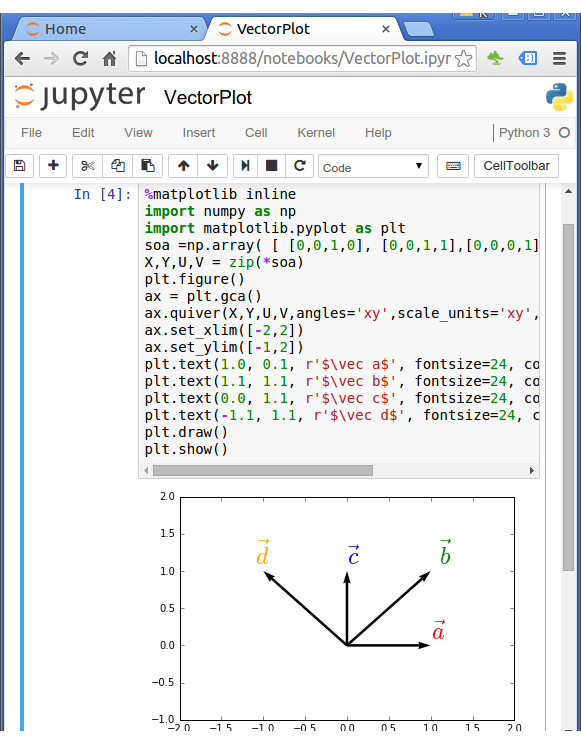
As the first example, we'll draw vectors using Matplotlib:

Note that we used %matplotlib inline to draw directly to our Notebook.
I'm not aware of publishing the Notebook file directly to Github from Notebook. But at least we can do it as we do with our normal files as long as we save it as Notebook file format, ~/.local/bin/VectorPlot.ipynb or /home/TEST/NeuralNetworks/VectorPlot.ipynb if we have a configuration setting as "c.NotebookApp.notebook_dir = /home/k/TEST/NeuralNetworks" in ~/.jupyter/jupyter_notebook_config.py file.
So, the drawing and the script is available at GitHub:
https://github.com/PyGoogle/IPython-Jupyter/blob/master/VectorPlot.ipynb
Just closing the browser (or the tab) will not close the Jupyter Notebook App.
To completely shut it down we need to close the associated terminal.
IPython: Jupyter
- iPython and Jupyter - Install Jupyter, iPython Notebook, drawing with Matplotlib, and publishing it to Github
- iPython and Jupyter Notebook with Embedded D3.js
Ph.D. / Golden Gate Ave, San Francisco / Seoul National Univ / Carnegie Mellon / UC Berkeley / DevOps / Deep Learning / Visualization