Django Python Social Auth : Getting App ID (OAuth2) - Facebook, Twitter, and Google

For most the social networks we are using, the process of obtaining an OAuth2 client ID (aka. Application ID) is pretty mush similar. All of them will require that our application has a "real" URL - that is, not http://127.0.0.1 or http://localhost. We can add an entry in our /etc/hosts file that maps 127.0.0.1 to something like "mysite.com", and the URL of our application becomes http://mysite.com:8000. Later, we can change it in the social app settings when it goes into production.
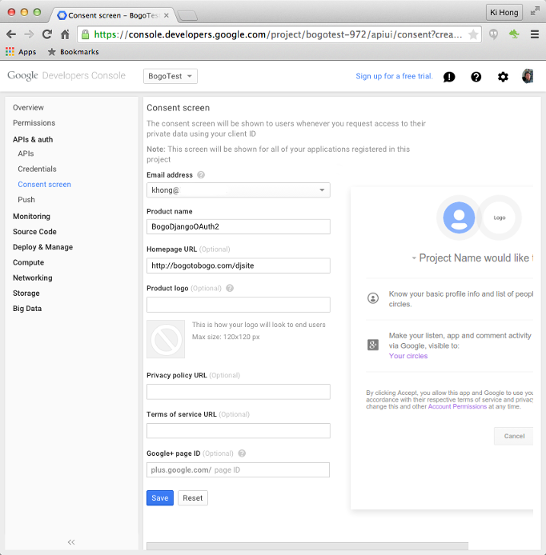
- Go to https://console.developers.google.com/ and create a new application.
- Under APIs and auth > Credentials, Create new Client ID.
- Make sure to specify the right callback URL:
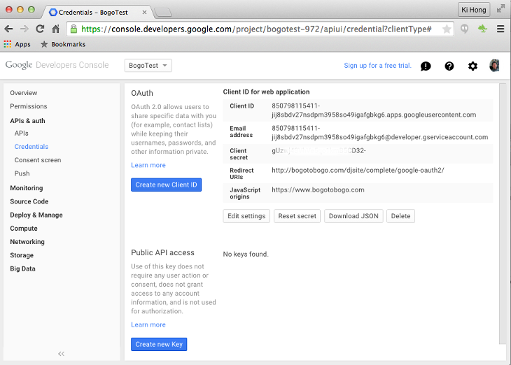
- Copy the values into Django settings file:
SOCIAL_AUTH_GOOGLE_OAUTH2_KEY =
SOCIAL_AUTH_GOOGLE_OAUTH2_SECRET =
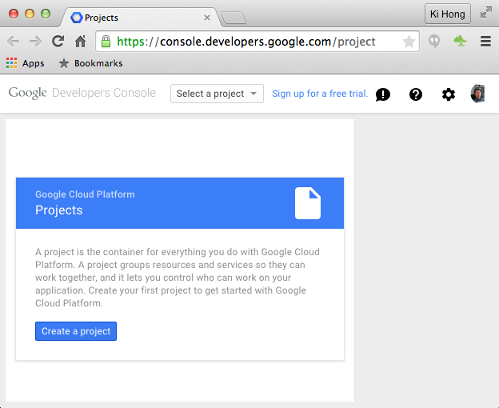
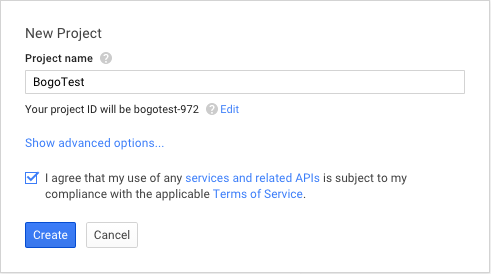
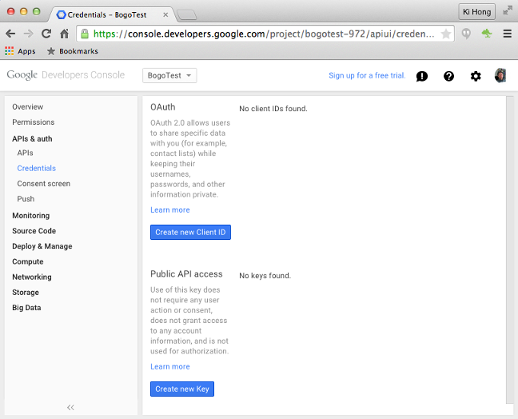
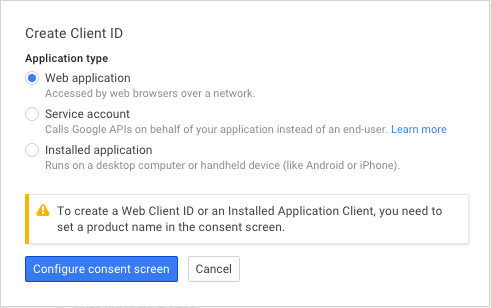
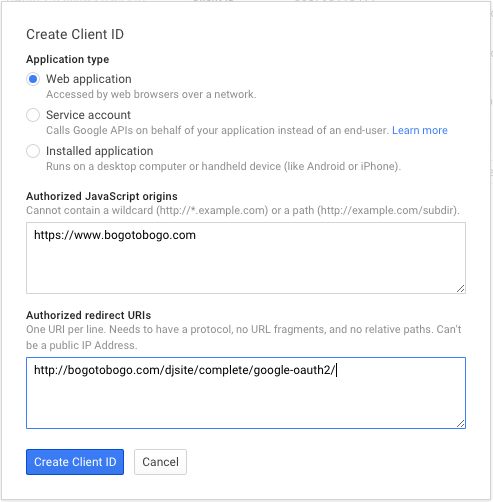
Click "Client ID".
- Go to https://developers.facebook.com/apps/?action=create and click the green Create New App button.
- In the settings of the newly-created application, click Add Platform. From the options provided, choose Web, and fill in the URL of the site.
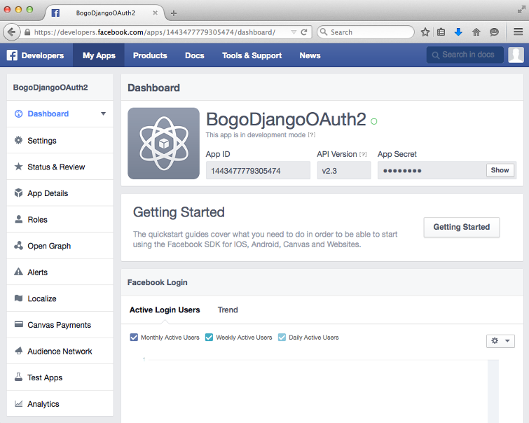
- Copy the App ID and App Secret, and place them into Django's settings.py file:
SOCIAL_AUTH_FACEBOOK_KEY =
SOCIAL_AUTH_FACEBOOK_SECRET =


Click "Skip and Create App ID":
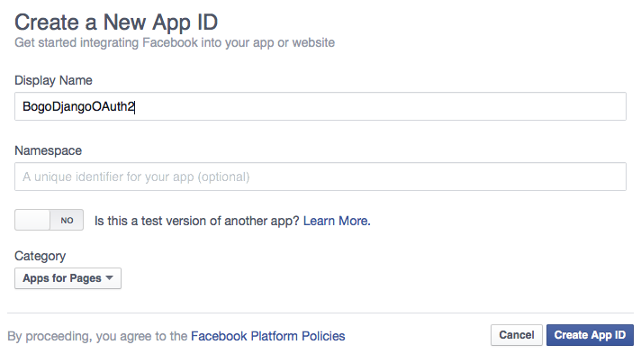
After filling out the requested fields, click the blue Create App ID button in the bottom right corner - this will take us to a page where we retrieve our info:
- Go to https://apps.twitter.com/app/new and create the new application.
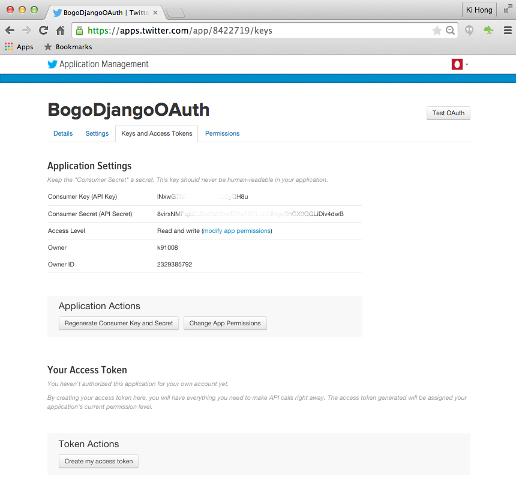
- Copy the values into settings.py:
SOCIAL_AUTH_TWITTER_KEY =
SOCIAL_AUTH_TWITTER_SECRET =
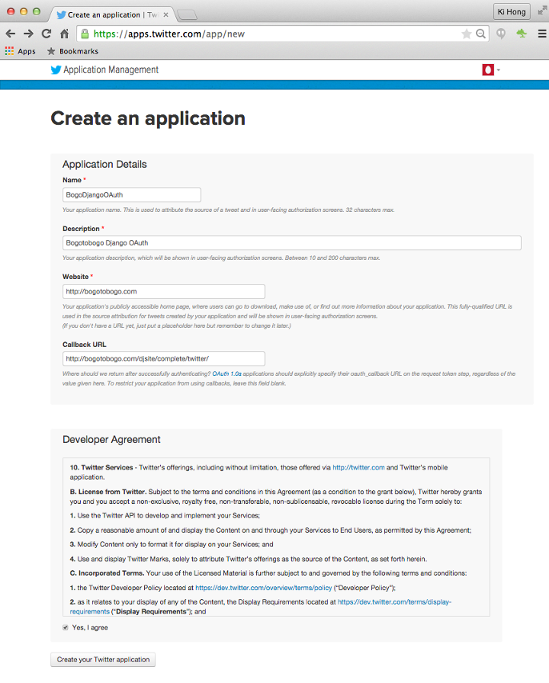
make sure to use a Callback URL of http:.../complete/twitter:
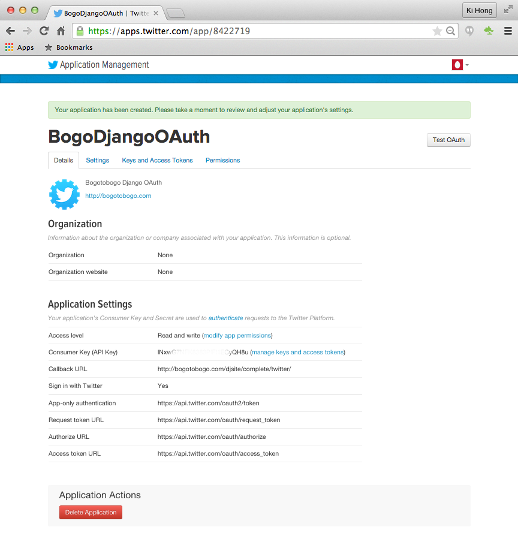
Click "manage keys and access tokens" in "Consumer Key (API Key)":
To see how we can login to Django applications via above Client IDs we got, please visit Django: Python social auth, Facebook, Twitter, and Google Auth.
Ph.D. / Golden Gate Ave, San Francisco / Seoul National Univ / Carnegie Mellon / UC Berkeley / DevOps / Deep Learning / Visualization