Meteor Angular Todo App with MongoDB (Part I)

I worked on MEAN Stack for sometime on and off. However, I think it's not a complete stack in terms of readiness for use, not yet at least.
We need to learn Angular which could require stiff learning curve. Also, we should be able to communicate with Node server which is not without hassles on top of learning Node/Express/Mongo.
Simply put it's matured yet, or at least, we cannot say it is seamless. Well, to be fair, the task of gluing server and client requires quite a few features, and it is not supposed to be that easy.
So, when I heard that with Meteor, we can implement both sides within an hour, I decided to give it a try thinking it may well take more than an hour.
This tutorial, in its initial draft, is going to be my log of progress while I'm following Creating your first angular-meteor app. After that, if it looks promising, I'll incorporate Meteor into my production site.
You may want to use it instead of my tutorial. But mine is more visual and it's written in reader's perspective!
We'll build a simple ToDo app with social logins backed by MongoDB:
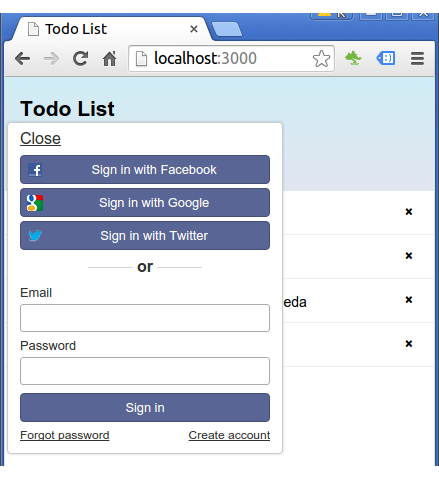
We'll use angular-meteor package to integrate angular as our reactive front-end.
Install the latest official Meteor release:
$ curl https://install.meteor.com/ | sh
Now, we've installed Meteor.
To create a Meteor app, type the following (no angular package yet):
$ meteor create simple-todos-angular
This will create a new folder called simple-todos-angular with 4 files that a Meteor app needs:
- simple-todos-angular.js: a JavaScript file loaded on both client and server.
- simple-todos-angular.html: an HTML file that defines our main view.
- simple-todos-angular.css: a CSS file to define your app's styles.
- .meteor: internal Meteor files.
To run the newly created app:
$ cd simple-todos-angular
$ meteor
Open a browser and go to http://localhost:3000:
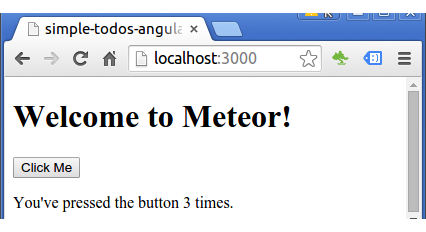
Meteor does "hot code push": when update a file, the page will automatically be updated.
To use Angular in our app, we first need to remove two things from Meteor:
- The default UI package of Meteor, called Blaze:
- default ECMAScript2015 package (ecmascript):
$ meteor remove blaze-html-templates
$ meteor remove ecmascript
Now we need to add the angular-meteor package:
$ meteor add angular
Let's add Angular app and controller to HTML simple-todos-angular.html:
<head>
  <title>Todo List</title>
</head>

<body>
<div class="container"
  ng-app="simple-todos"
  ng-controller="TodosListCtrl">

  <header>
    <h1>Todo List</h1>
  </header>

  <ul>
    <li ng-repeat="item in items">{{item.text}}</li>
  </ul>

</div>
</body>
The angular-meteor package parses all of the html files in our app folder and puts them in Angular's template cache with the id of their full path.
For example, when we have a file called client/my-angular-template.html, it will be available for ng-include or ui-router with the name client/my-angular-template.html.
Note also that we used the ng-repeat for our list.
Init Angular app and controller simple-todos-angular.js:
if (Meteor.isClient) {

  // This code only runs on the client
  angular.module('simple-todos',['angular-meteor']);

  angular.module('simple-todos').controller('TodosListCtrl', ['$scope',
    function ($scope) {

      $scope.items = [
        { text: 'Build Meteor-angular ToDo app' },
        { text: 'Add Social Auth to it' },
        { text: 'Deploy' }
      ];

  }]);
}
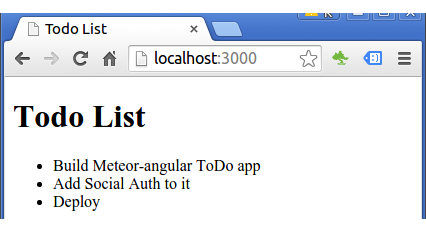
At this point, our app is already displaying the list:
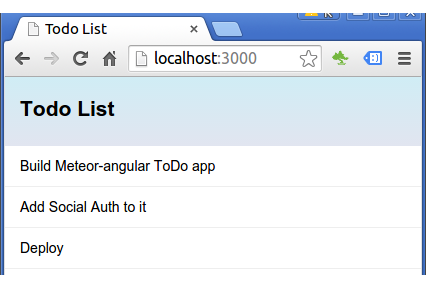
If we put the recommended css into simple-todos-angular.css, we have a new look:
simple-todos-angular.css:
/* CSS declarations go here */
body {
  font-family: sans-serif;
  background-color: #315481;
  background-image: linear-gradient(to bottom, #315481, #918e82 100%);
  background-attachment: fixed;

  position: absolute;
  top: 0;
  bottom: 0;
  left: 0;
  right: 0;

  padding: 0;
  margin: 0;

  font-size: 14px;
}

.container {
  max-width: 600px;
  margin: 0 auto;
  min-height: 100%;
  background: white;
}

header {
  background: #d2edf4;
  background-image: linear-gradient(to bottom, #d0edf5, #e1e5f0 100%);
  padding: 20px 15px 15px 15px;
  position: relative;
}

#login-buttons {
  display: block;
}

h1 {
  font-size: 1.5em;
  margin: 0;
  margin-bottom: 10px;
  display: inline-block;
  margin-right: 1em;
}

form {
  margin-top: 10px;
  margin-bottom: -10px;
  position: relative;
}

.new-item input {
  box-sizing: border-box;
  padding: 10px 0;
  background: transparent;
  border: none;
  width: 100%;
  padding-right: 80px;
  font-size: 1em;
}

.new-item input:focus{
  outline: 0;
}

ul {
  margin: 0;
  padding: 0;
  background: white;
}

.delete {
  float: right;
  font-weight: bold;
  background: none;
  font-size: 1em;
  border: none;
  position: relative;
}

li {
  position: relative;
  list-style: none;
  padding: 15px;
  border-bottom: #eee solid 1px;
}

li .text {
  margin-left: 10px;
}

li.checked {
  color: #888;
}

li.checked .text {
  text-decoration: line-through;
}

li.private {
  background: #eee;
  border-color: #ddd;
}

header .hide-completed {
  float: right;
}

.toggle-private {
  margin-left: 5px;
}

@media (max-width: 600px) {
  li {
    padding: 12px 15px;
  }

  .search {
    width: 150px;
    clear: both;
  }

  .new-item input {
    padding-bottom: 5px;
  }
}
Meteor stores data into Collections.
They can be accessed from both the server and the client, which makes it easy to write view logic without having to write a lot of server code.
They are updated automatically, so a view using the collection will be automatically displayed.
To create a new collection, we put the following into our JavaScript:
MyCollection = new Mongo.Collection("my-collection");
Then, on the server side, this sets up a MongoDB collection called my-collection, and on the client side, this creates a cache connected to the server collection.
Let's replace the static array with a Collection in simple-todos-angular.js file:
Items = new Mongo.Collection('items');

if (Meteor.isClient) {

  // This code only runs on the client
  angular.module('simple-todos',['angular-meteor']);

  angular.module('simple-todos').controller('TodosListCtrl', ['$scope', '$meteor',
    function ($scope, $meteor) {

      $scope.items = $meteor.collection(Items);

    }]);
}
Note that we're using the $meteor service to bind our Items collection to our $scope.items variable. Now every change that will happen to each of those objects will be synced in real time across our stack.
After made these changes to the code, we can see the items that used to be in the todo list have disappeared:
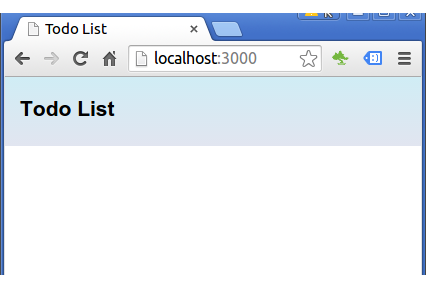
Our database is currently empty!
Now we want to insert items from the server-side database console.
Let's use the server database console to insert items into our collection:
$ meteor mongo
We're supposed to issue the command in a new console while we're still running meteor. At this point, however, we may get the following error:
mongo: Meteor isn't running a local MongoDB server.
Meteor starts the local MongoDB instance when we invoke meteor, which is why it can't connect. So, we need to unsett MONGO_URL and starting meteor normally:
$ echo $MONGO_URL
mongodb://localhost/

$ unset MONGO_URL
$ meteor
Then connect to MongoDB:
$ meteor mongo
MongoDB shell version: 2.6.7
connecting to: 127.0.0.1:3001/meteor
meteor:PRIMARY>
As we can see, meteor mongo opens a console into our app's local development database. So, we may want to type into the prompt the following:
meteor:PRIMARY> db.items.insert({ text: "Hello world!", createdAt: new Date() });
WriteResult({ "nInserted" : 1 })
Let's see if the UI of our app has been updated:
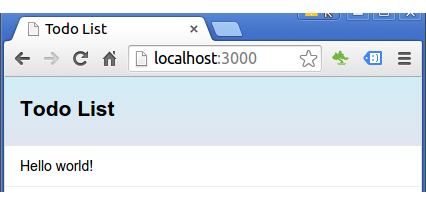
Yes, it has.
We can see that we didn't have to write any code to connect the server-side database to our front-end code - it just happened automatically!
In the next article (Meteor Angular Todo App with MongoDB (Part II)), we'll see how to add functionality to our app's UI so that we can add items without push them manually via the database console.
AngularJS
Ph.D. / Golden Gate Ave, San Francisco / Seoul National Univ / Carnegie Mellon / UC Berkeley / DevOps / Deep Learning / Visualization