Docker & Kubernetes : HashiCorp's Vault and Consul on minikube
In this post, we'll deploy Vault and Consul on minikue.
We'll configure Vault for TLS-protected communication between Vault Servers. The Consul is deployed as headless statefulset.
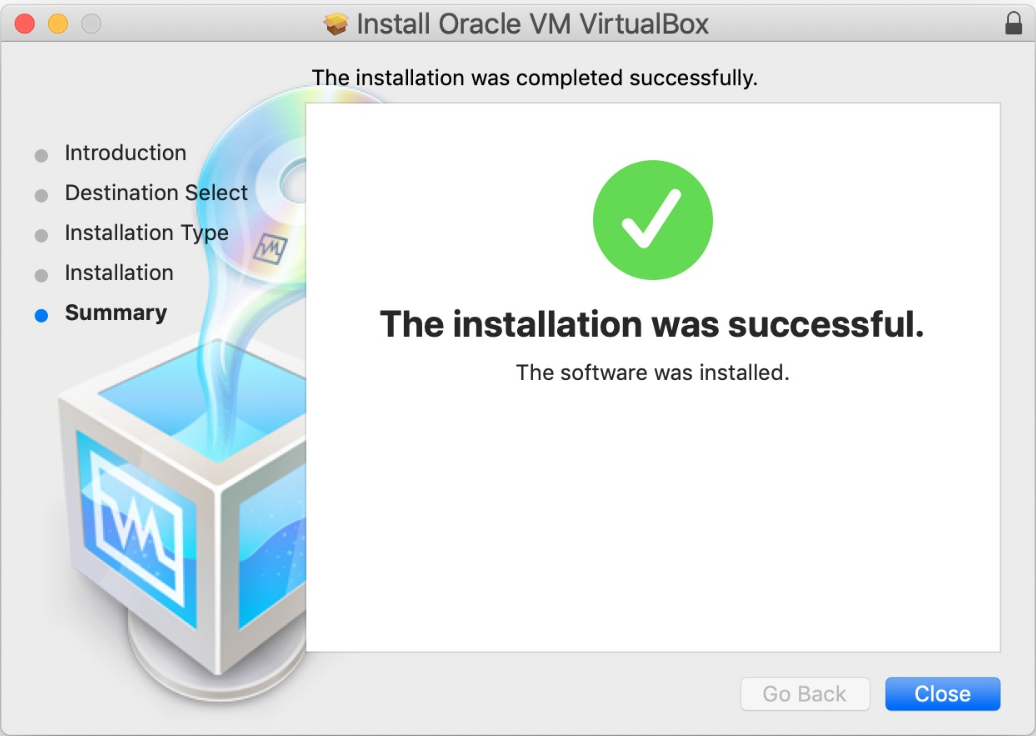
Before we install minikube, we need to have VirtualBox installed:
We'll be running a minikube on macOS. The easiest way to install Minikube on macOS is using Homebrew:
$ brew cask install minikube
...
==> Summary
🍺  /usr/local/Cellar/kubernetes-cli/1.14.2: 220 files, 47.9MB
==> Downloading https://storage.googleapis.com/minikube/releases/v1.0.1/minikube-darwin-amd64
######################################################################## 100.0%
==> Verifying SHA-256 checksum for Cask 'minikube'.
==> Installing Cask minikube
==> Linking Binary 'minikube-darwin-amd64' to '/usr/local/bin/minikube'.
🍺  minikube was successfully installed!
Then, start the cluster:
$ minikube start
😄  minikube v1.0.1 on darwin (amd64)
🤹  Downloading Kubernetes v1.14.1 images in the background ...
🔥  Creating virtualbox VM (CPUs=2, Memory=2048MB, Disk=20000MB) ...
📶  "minikube" IP address is 192.168.99.102
🐳  Configuring Docker as the container runtime ...
🐳  Version of container runtime is 18.06.3-ce
⌛  Waiting for image downloads to complete ...
✨  Preparing Kubernetes environment ...
🚜  Pulling images required by Kubernetes v1.14.1 ...
🚀  Launching Kubernetes v1.14.1 using kubeadm ...
⌛  Waiting for pods: apiserver proxy etcd scheduler controller dns
🔑  Configuring cluster permissions ...
🤔  Verifying component health .....
💗  kubectl is now configured to use "minikube"
🏄  Done! Thank you for using minikube!
Pull up the Minikube dashboard:
$ minikube dashboard
🔌  Enabling dashboard ...
🤔  Verifying dashboard health ...
🚀  Launching proxy ...
🤔  Verifying proxy health ...
🎉  Opening http://127.0.0.1:53388/api/v1/namespaces/kube-system/services/http:kubernetes-dashboard:/proxy/ in your default browser...
kubectl install:
$ brew install kubectl
After installing kubectl with brew, following the suggestion from Kubernetes create deployment unexpected SchemaError, we need to take additional steps regarding the kubectl:
$ rm /usr/local/bin/kubectl

$ brew link --overwrite kubernetes-cli
We need to have Go installed:
$ brew update

$ brew install go
...
==> Pouring go-1.12.5.mojave.bottle.tar.gz
🍺  /usr/local/Cellar/go/1.12.5: 9,808 files, 452.6MB
Once installed, create a workspace, configure the GOPATH and add the workspace's bin folder to our system path:
$ mkdir $HOME/go
$ export GOPATH=$HOME/go
$ export PATH=$PATH:$GOPATH/bin
TLS will be used to secure RPC communication between each Consul member.
To set this up, we'll create a Certificate Authority (CA) to sign the certificates, via CloudFlare's SSL ToolKit (cfssl and cfssljson), and distribute keys to the nodes.
Let's install the SSL ToolKit:
$ go get -u github.com/cloudflare/cfssl/cmd/cfssl
$ go get -u github.com/cloudflare/cfssl/cmd/cfssljson
Create a new project directory, vault-kubernetes and under it add the following files and folders:
.
├── certs
│   └── config
│       ├── ca-config.json
│       ├── ca-csr.json
│       ├── consul-csr
│       └── vault-csr.json
├── consul
└── vault
ca-config.json:
{
  "signing": {
    "default": {
      "expiry": "87600h"
    },
    "profiles": {
      "default": {
        "usages": [
          "signing",
          "key encipherment",
          "server auth",
          "client auth"
        ],
        "expiry": "8760h"
      }
    }
  }
}
ca-csr.json:
{
  "hosts": [
    "cluster.local"
  ],
  "key": {
    "algo": "rsa",
    "size": 2048
  },
  "names": [
    {
      "C": "US",
      "ST": "Colorado",
      "L": "Denver"
    }
  ]
}
consul-csr.json:
{
  "CN": "server.dc1.cluster.local",
  "hosts": [
    "server.dc1.cluster.local",
    "127.0.0.1"
  ],
  "key": {
    "algo": "rsa",
    "size": 2048
  },
  "names": [
    {
      "C": "US",
      "ST": "Colorado",
      "L": "Denver"
    }
  ]
}
vault-csr.json:
{
  "hosts": [
    "vault",
    "127.0.0.1"
  ],
  "key": {
    "algo": "rsa",
    "size": 2048
  },
  "names": [
    {
      "C": "US",
      "ST": "Colorado",
      "L": "Denver"
    }
  ]
}
Create a Certificate Authority via cfssl and cfssljson commands which are in $GOPATH/bin/:
$ cfssl gencert -initca certs/config/ca-csr.json | cfssljson -bare certs/ca
2019/05/20 19:58:31 [INFO] generating a new CA key and certificate from CSR
2019/05/20 19:58:31 [INFO] generate received request
2019/05/20 19:58:31 [INFO] received CSR
2019/05/20 19:58:31 [INFO] generating key: rsa-2048
2019/05/20 19:58:31 [INFO] encoded CSR
2019/05/20 19:58:31 [INFO] signed certificate with serial number 630752563024715612514217364216255765336417788
This will create ca-key.pem, ca.csr, and ca.pem:
.
├── README.md
├── certs
│   ├── ca-key.pem
│   ├── ca.csr
│   ├── ca.pem
│   └── config
│       ├── ca-config.json
│       ├── ca-csr.json
│       ├── consul-csr.json
│       └── vault-csr.json
├── consul
│   ├── config.json
│   ├── service.yaml
│   └── statefulset.yaml
└── vault
    ├── config.json
    ├── deployment.yaml
    └── service.yaml
Then, create a private key and a TLS certificate for Consul:
$ cfssl gencert \
    -ca=certs/ca.pem \
    -ca-key=certs/ca-key.pem \
    -config=certs/config/ca-config.json \
    -profile=default \
    certs/config/consul-csr.json | cfssljson -bare certs/consul
2019/05/20 20:07:43 [INFO] generate received request
2019/05/20 20:07:43 [INFO] received CSR
2019/05/20 20:07:43 [INFO] generating key: rsa-2048
2019/05/20 20:07:43 [INFO] encoded CSR
2019/05/20 20:07:43 [INFO] signed certificate with serial number 620913020784323260860414197710294241882525287592
Also, we need to create a private key and a TLS certificate for Vault:
$ cfssl gencert \
    -ca=certs/ca.pem \
    -ca-key=certs/ca-key.pem \
    -config=certs/config/ca-config.json \
    -profile=default \
    certs/config/vault-csr.json | cfssljson -bare certs/vault
2019/05/20 20:09:50 [INFO] generate received request
2019/05/20 20:09:50 [INFO] received CSR
2019/05/20 20:09:50 [INFO] generating key: rsa-2048
2019/05/20 20:09:50 [INFO] encoded CSR
2019/05/20 20:09:50 [INFO] signed certificate with serial number 380985865951293597206354608310748008535869648239
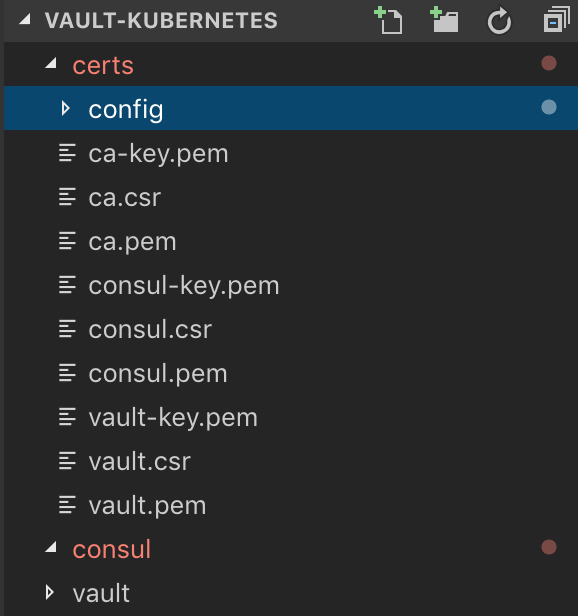
We should now see the following files within the certs directory:
Consul uses the Gossip protocol to broadcast encrypted messages and discover new members added to the cluster. This requires a shared key.
First we need to install the Consul client, and then generate a key and store it in an environment variable:
$ brew install consul
Updating Homebrew...
==> Auto-updated Homebrew!
Updated 2 taps (homebrew/core and homebrew/cask).
==> Updated Formulae
acpica                 augeas                 aws-sdk-cpp            byteman                dub                    lmod                   xmrig
ant@1.9                avra                   b2-tools               docfx                  kibana                 paket

==> Downloading https://homebrew.bintray.com/bottles/consul-1.5.0.mojave.bottle.tar.gz
==> Downloading from https://akamai.bintray.com/f4/f47e4b2dff87574dbf7c52aa06b58baf0435a02c452f6f6622316393c3f4be17?__gda__=exp=1558454445~hmac=024fdea4ad049bf
######################################################################## 100.0%
==> Pouring consul-1.5.0.mojave.bottle.tar.gz
==> Caveats
To have launchd start consul now and restart at login:
  brew services start consul
Or, if you don't want/need a background service you can just run:
  consul agent -dev -advertise 127.0.0.1
==> Summary
🍺  /usr/local/Cellar/consul/1.5.0: 8 files, 105MB

$ brew services start consul
==> Tapping homebrew/services
Cloning into '/usr/local/Homebrew/Library/Taps/homebrew/homebrew-services'...
remote: Enumerating objects: 17, done.
remote: Counting objects: 100% (17/17), done.
remote: Compressing objects: 100% (14/14), done.
remote: Total 17 (delta 0), reused 12 (delta 0), pack-reused 0
Unpacking objects: 100% (17/17), done.
Tapped 1 command (50 files, 62.7KB).
==> Successfully started `consul` (label: homebrew.mxcl.consul)

# This is just to see the output from "consul keygen"
$ consul keygen
uDda88hdqNyc9CPA1w5sMg==

# store generated key into an env variable
$ export GOSSIP_ENCRYPTION_KEY=$(consul keygen)

$ echo $GOSSIP_ENCRYPTION_KEY
NoEV3hkPTvWnmLQ1H5FyDQ==
Store the key along with the TLS certificates in a Secret:
$ kubectl create secret generic consul \
  --from-literal="gossip-encryption-key=${GOSSIP_ENCRYPTION_KEY}" \
  --from-file=certs/ca.pem \
  --from-file=certs/consul.pem \
  --from-file=certs/consul-key.pem
secret "consul" created
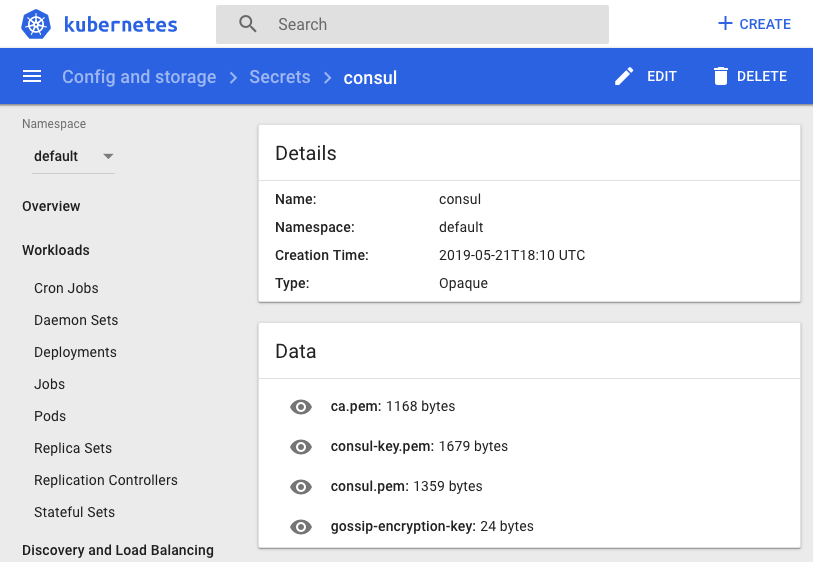
We may want to verify:
$ kubectl describe secrets consul
Name:         consul
Namespace:    default
Labels:       <none>
Annotations:  <none>

Type:  Opaque

Data
====
gossip-encryption-key:  24 bytes
ca.pem:                 1168 bytes
consul-key.pem:         1679 bytes
consul.pem:             1359 bytes
Add a new file to consul/config.json:
{
  "ca_file": "/etc/tls/ca.pem",
  "cert_file": "/etc/tls/consul.pem",
  "key_file": "/etc/tls/consul-key.pem",
  "verify_incoming": true,
  "verify_outgoing": true,
  "verify_server_hostname": true,
  "ports": {
    "https": 8443
  }
}
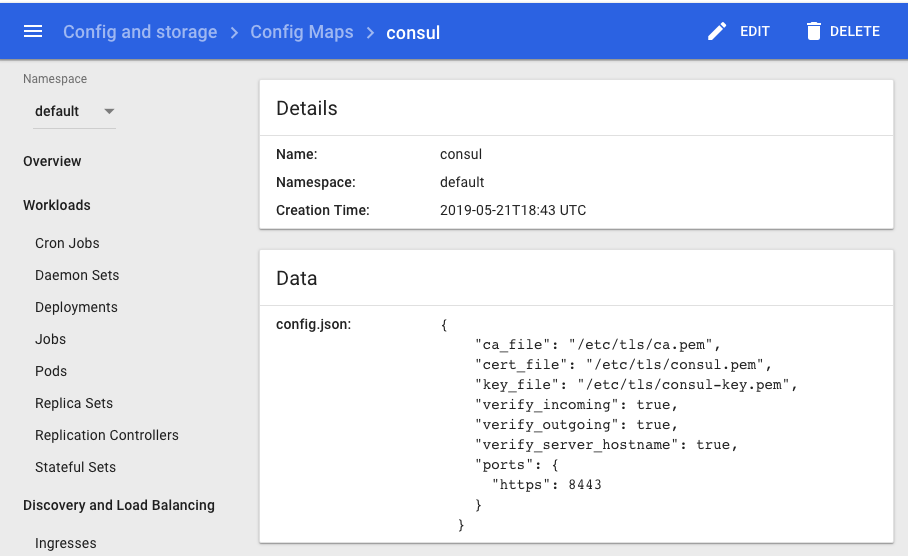
By setting verify_incoming, verify_outgoing and verify_server_hostname to true all RPC calls must be encrypted.
Save this config in a ConfigMap:
$ kubectl create configmap consul --from-file=consul/config.json
configmap "consul" created

$ kubectl describe configmap consul
Name:         consul
Namespace:    default
Labels:       <none>
Annotations:  <none>

Data
====
config.json:
----
{
    "ca_file": "/etc/tls/ca.pem",
    "cert_file": "/etc/tls/consul.pem",
    "key_file": "/etc/tls/consul-key.pem",
    "verify_incoming": true,
    "verify_outgoing": true,
    "verify_server_hostname": true,
    "ports": {
      "https": 8443
    }
  }
Events:  <none>
We'll define a Headless Service which is a Service without a ClusterIP. In other words, we'll expose each of the Consul members internally in consul/service.yaml:
apiVersion: v1
kind: Service
metadata:
  name: consul
  labels:
    name: consul
spec:
  clusterIP: None
  ports:
    - name: http
      port: 8500
      targetPort: 8500
    - name: https
      port: 8443
      targetPort: 8443
    - name: rpc
      port: 8400
      targetPort: 8400
    - name: serflan-tcp
      protocol: "TCP"
      port: 8301
      targetPort: 8301
    - name: serflan-udp
      protocol: "UDP"
      port: 8301
      targetPort: 8301
    - name: serfwan-tcp
      protocol: "TCP"
      port: 8302
      targetPort: 8302
    - name: serfwan-udp
      protocol: "UDP"
      port: 8302
      targetPort: 8302
    - name: server
      port: 8300
      targetPort: 8300
    - name: consuldns
      port: 8600
      targetPort: 8600
  selector:
    app: consul
Create the Service:
$ kubectl create -f consul/service.yaml
service/consul created
Because we created a headless service which is a service that does not get a ClusterIP and is created when we specify a Service with ClusterIP set to None.
$ kubectl get svc
NAME         TYPE        CLUSTER-IP      EXTERNAL-IP   PORT(S)                                                                            AGE
consul       ClusterIP   None            <none>        8500/TCP,8443/TCP,8400/TCP,8301/TCP,8301/UDP,8302/TCP,8302/UDP,8300/TCP,8600/TCP   7m8s
Note that we're creating the Service before the StatefulSet since the Pods created by the StatefulSet will immediately start doing DNS lookups to find other members.
consul/statefulset.yaml:
apiVersion: apps/v1beta1
kind: StatefulSet
metadata:
  name: consul
spec:
  serviceName: consul
  replicas: 3
  template:
    metadata:
      labels:
        app: consul
    spec:
      securityContext:
        fsGroup: 1000
      containers:
        - name: consul
          image: "consul:1.4.0"
          env:
            - name: POD_IP
              valueFrom:
                fieldRef:
                  fieldPath: status.podIP
            - name: GOSSIP_ENCRYPTION_KEY
              valueFrom:
                secretKeyRef:
                  name: consul
                  key: gossip-encryption-key
            - name: NAMESPACE
              valueFrom:
                fieldRef:
                  fieldPath: metadata.namespace
          args:
            - "agent"
            - "-advertise=$(POD_IP)"
            - "-bind=0.0.0.0"
            - "-bootstrap-expect=3"
            - "-retry-join=consul-0.consul.$(NAMESPACE).svc.cluster.local"
            - "-retry-join=consul-1.consul.$(NAMESPACE).svc.cluster.local"
            - "-retry-join=consul-2.consul.$(NAMESPACE).svc.cluster.local"
            - "-client=0.0.0.0"
            - "-config-file=/consul/myconfig/config.json"
            - "-datacenter=dc1"
            - "-data-dir=/consul/data"
            - "-domain=cluster.local"
            - "-encrypt=$(GOSSIP_ENCRYPTION_KEY)"
            - "-server"
            - "-ui"
            - "-disable-host-node-id"
          volumeMounts:
            - name: config
              mountPath: /consul/myconfig
            - name: tls
              mountPath: /etc/tls
          lifecycle:
            preStop:
              exec:
                command:
                - /bin/sh
                - -c
                - consul leave
          ports:
            - containerPort: 8500
              name: ui-port
            - containerPort: 8400
              name: alt-port
            - containerPort: 53
              name: udp-port
            - containerPort: 8443
              name: https-port
            - containerPort: 8080
              name: http-port
            - containerPort: 8301
              name: serflan
            - containerPort: 8302
              name: serfwan
            - containerPort: 8600
              name: consuldns
            - containerPort: 8300
              name: server
      volumes:
        - name: config
          configMap:
            name: consul
        - name: tls
          secret:
            secretName: consul
We may want to stop the consul agent that's been running background for our certs since we don't need it now:
$ brew services stop consul
Stopping `consul`... (might take a while)
==> Successfully stopped `consul` (label: homebrew.mxcl.consul)
$ kubectl create -f consul/statefulset.yaml
statefulset.apps/consul created
Check if the Pods are up and running:
$ kubectl get pods
NAME       READY   STATUS    RESTARTS   AGE
consul-0   1/1     Running   0          94s
consul-1   1/1     Running   0          73s
consul-2   1/1     Running   0          71s
We may want to take a look at the logs from each of the Pods to ensure that one of them has been chosen as the leader:
$ kubectl logs consul-0
$ kubectl logs consul-1
$ kubectl logs consul-2

...
    2019/05/21 22:29:52 [INFO] consul: cluster leadership acquired
    2019/05/21 22:29:52 [INFO] consul: New leader elected: consul-0
    2019/05/21 22:29:52 [WARN] raft: AppendEntries to {Voter 52b84291-e11b-903b-1648-a952f5b0c73c 172.17.0.7:8300} rejected, sending older logs (next: 1)
    2019/05/21 22:29:52 [INFO] raft: pipelining replication to peer {Voter 52b84291-e11b-903b-1648-a952f5b0c73c 172.17.0.7:8300}
    2019/05/21 22:29:52 [WARN] raft: AppendEntries to {Voter 521de959-6bbd-937f-90d3-88b5ee4fa472 172.17.0.6:8300} rejected, sending older logs (next: 1)
    2019/05/21 22:29:52 [INFO] raft: pipelining replication to peer {Voter 521de959-6bbd-937f-90d3-88b5ee4fa472 172.17.0.6:8300}
    2019/05/21 22:29:52 [INFO] consul: member 'consul-0' joined, marking health alive
    2019/05/21 22:29:52 [INFO] consul: member 'consul-1' joined, marking health alive
    2019/05/21 22:29:52 [INFO] consul: member 'consul-2' joined, marking health alive
    2019/05/21 22:29:53 [INFO] agent: Synced node info
...
Forward the port to the local machine:
$ kubectl port-forward consul-1 8500:8500
Forwarding from 127.0.0.1:8500 -> 8500
Forwarding from [::1]:8500 -> 8500
Handling connection for 8500
We can do the port-forward with other consul (consul-0 or consul-2)
Connections made to local port 8500 are forwarded to port 8500 of the pod that is running the Consul.
Then, open another terminal, check if all members are alive:
$ consul members
Node      Address          Status  Type    Build  Protocol  DC   Segment
consul-0  172.17.0.5:8301  alive   server  1.4.0  2         dc1  <all>
consul-1  172.17.0.6:8301  alive   server  1.4.0  2         dc1  <all>
consul-2  172.17.0.7:8301  alive   server  1.4.0  2         dc1  <all>
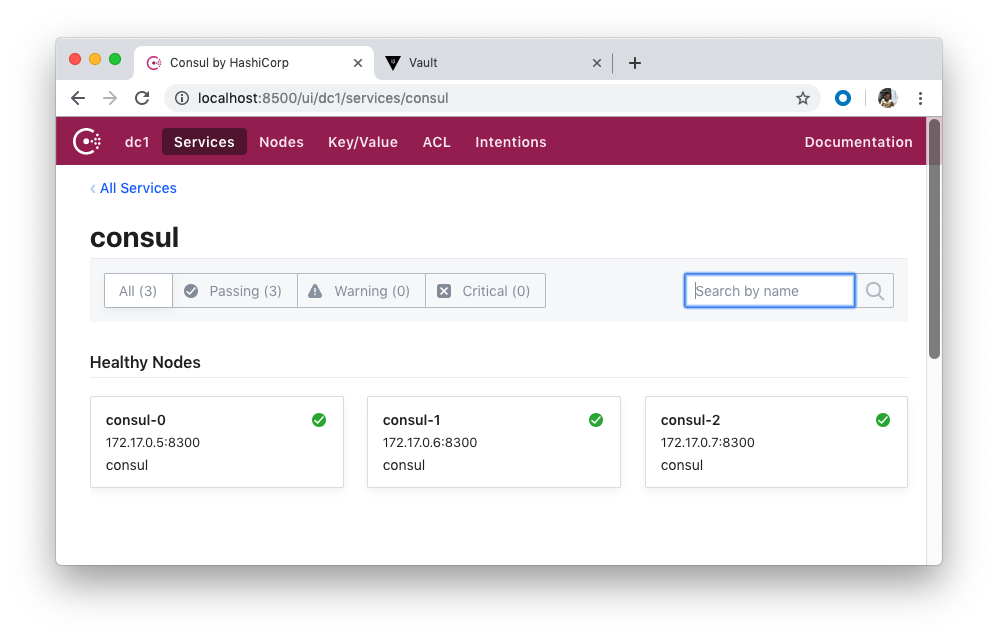
We should be able to access the web interface at http://localhost:8500:
Store the Vault TLS certificates that we created into a Secret, secret/vault:
$ kubectl create secret generic vault \
    --from-file=certs/ca.pem \
    --from-file=certs/vault.pem \
    --from-file=certs/vault-key.pem
secret/vault created

$ kubectl describe secrets vault
Name:         vault
Namespace:    default
Labels:       <none>
Annotations:  <none>

Type:  Opaque

Data
====
ca.pem:         1168 bytes
vault-key.pem:  1675 bytes
vault.pem:      1241 bytes
Add a new file for the Vault config, vault/config.json:
{
  "listener": {
    "tcp":{
      "address": "127.0.0.1:8200",
      "tls_disable": 0,
      "tls_cert_file": "/etc/tls/vault.pem",
      "tls_key_file": "/etc/tls/vault-key.pem"
    }
  },
  "storage": {
    "consul": {
      "address": "consul:8500",
      "path": "vault/",
      "disable_registration": "true",
      "ha_enabled": "true"
    }
  },
  "ui": true
}
Here, we configured Vault to use the Consul backend (which supports high availability), defined the TCP listener for Vault, enabled TLS, added the paths to the TLS certificate and the private key, and enabled the Vault UI.
Save this config in a ConfigMap, configmap/vault:
$ kubectl create configmap vault --from-file=vault/config.json
configmap/vault created

$ kubectl describe configmap vault
Name:         vault
Namespace:    default
Labels:       <none>
Annotations:  <none>

Data
====
config.json:
----
{
    "listener": {
      "tcp":{
        "address": "127.0.0.1:8200",
        "tls_disable": 0,
        "tls_cert_file": "/etc/tls/vault.pem",
        "tls_key_file": "/etc/tls/vault-key.pem"
      }
    },
    "storage": {
      "consul": {
        "address": "consul:8500",
        "path": "vault/",
        "disable_registration": "true",
        "ha_enabled": "true"
      }
    },
    "ui": true
  }
Events:  <none>
vault/service.yaml:
apiVersion: v1
kind: Service
metadata:
  name: vault
  labels:
    app: vault
spec:
  type: ClusterIP
  ports:
    - port: 8200
      targetPort: 8200
      protocol: TCP
      name: vault
  selector:
    app: vault
Create the vault service:
$ kubectl create -f vault/service.yaml
service/vault created

$ kubectl get service vault
NAME    TYPE        CLUSTER-IP      EXTERNAL-IP   PORT(S)    AGE
vault   ClusterIP   10.103.226.81   <none>        8200/TCP   17s
vault/deployment.yaml:
apiVersion: extensions/v1beta1
kind: Deployment
metadata:
  name: vault
  labels:
    app: vault
spec:
  replicas: 1
  template:
    metadata:
      labels:
        app: vault
    spec:
      containers:
      - name: vault
        command: ["vault", "server", "-config", "/vault/config/config.json"]
        image: "vault:0.11.5"
        imagePullPolicy: IfNotPresent
        securityContext:
          capabilities:
            add:
              - IPC_LOCK
        volumeMounts:
          - name: configurations
            mountPath: /vault/config/config.json
            subPath: config.json
          - name: vault
            mountPath: /etc/tls
      - name: consul-vault-agent
        image: "consul:1.4.0"
        env:
          - name: GOSSIP_ENCRYPTION_KEY
            valueFrom:
              secretKeyRef:
                name: consul
                key: gossip-encryption-key
          - name: NAMESPACE
            valueFrom:
              fieldRef:
                fieldPath: metadata.namespace
        args:
          - "agent"
          - "-retry-join=consul-0.consul.$(NAMESPACE).svc.cluster.local"
          - "-retry-join=consul-1.consul.$(NAMESPACE).svc.cluster.local"
          - "-retry-join=consul-2.consul.$(NAMESPACE).svc.cluster.local"
          - "-encrypt=$(GOSSIP_ENCRYPTION_KEY)"
          - "-domain=cluster.local"
          - "-datacenter=dc1"
          - "-disable-host-node-id"
          - "-node=vault-1"
        volumeMounts:
            - name: config
              mountPath: /consul/myconfig
            - name: tls
              mountPath: /etc/tls
      volumes:
        - name: configurations
          configMap:
            name: vault
        - name: config
          configMap:
            name: consul
        - name: tls
          secret:
            secretName: consul
        - name: vault
          secret:
            secretName: vault
Deploy Vault:
$ kubectl apply -f vault/deployment.yaml
deployment.extensions/vault created
To test, grab the Pod name and then forward the port:
$ kubectl get pods
NAME                    READY   STATUS    RESTARTS   AGE
consul-0                1/1     Running   0          52m
consul-1                1/1     Running   0          51m
consul-2                1/1     Running   0          51m
vault-fb8d76649-5fjxt   2/2     Running   0          2m42s

$ kubectl port-forward vault-fb8d76649-5fjxt 8200:8200
Make sure we can view the UI at https://localhost:8200.
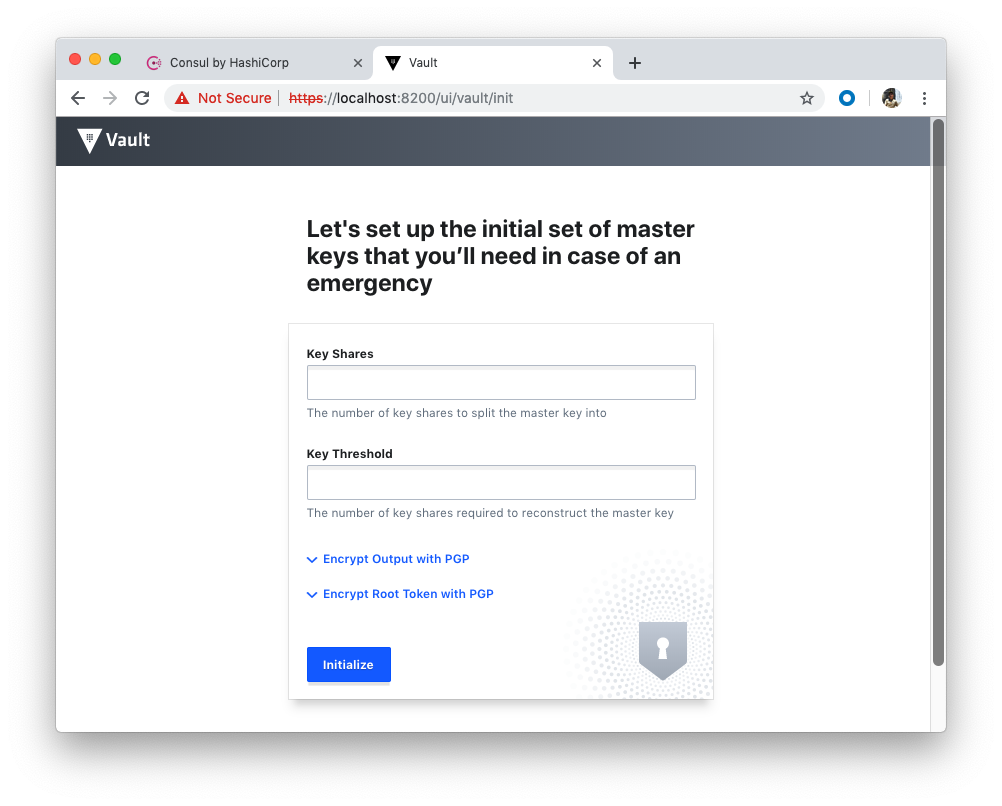
With port forwarding still on, let's do some tests for our setup.
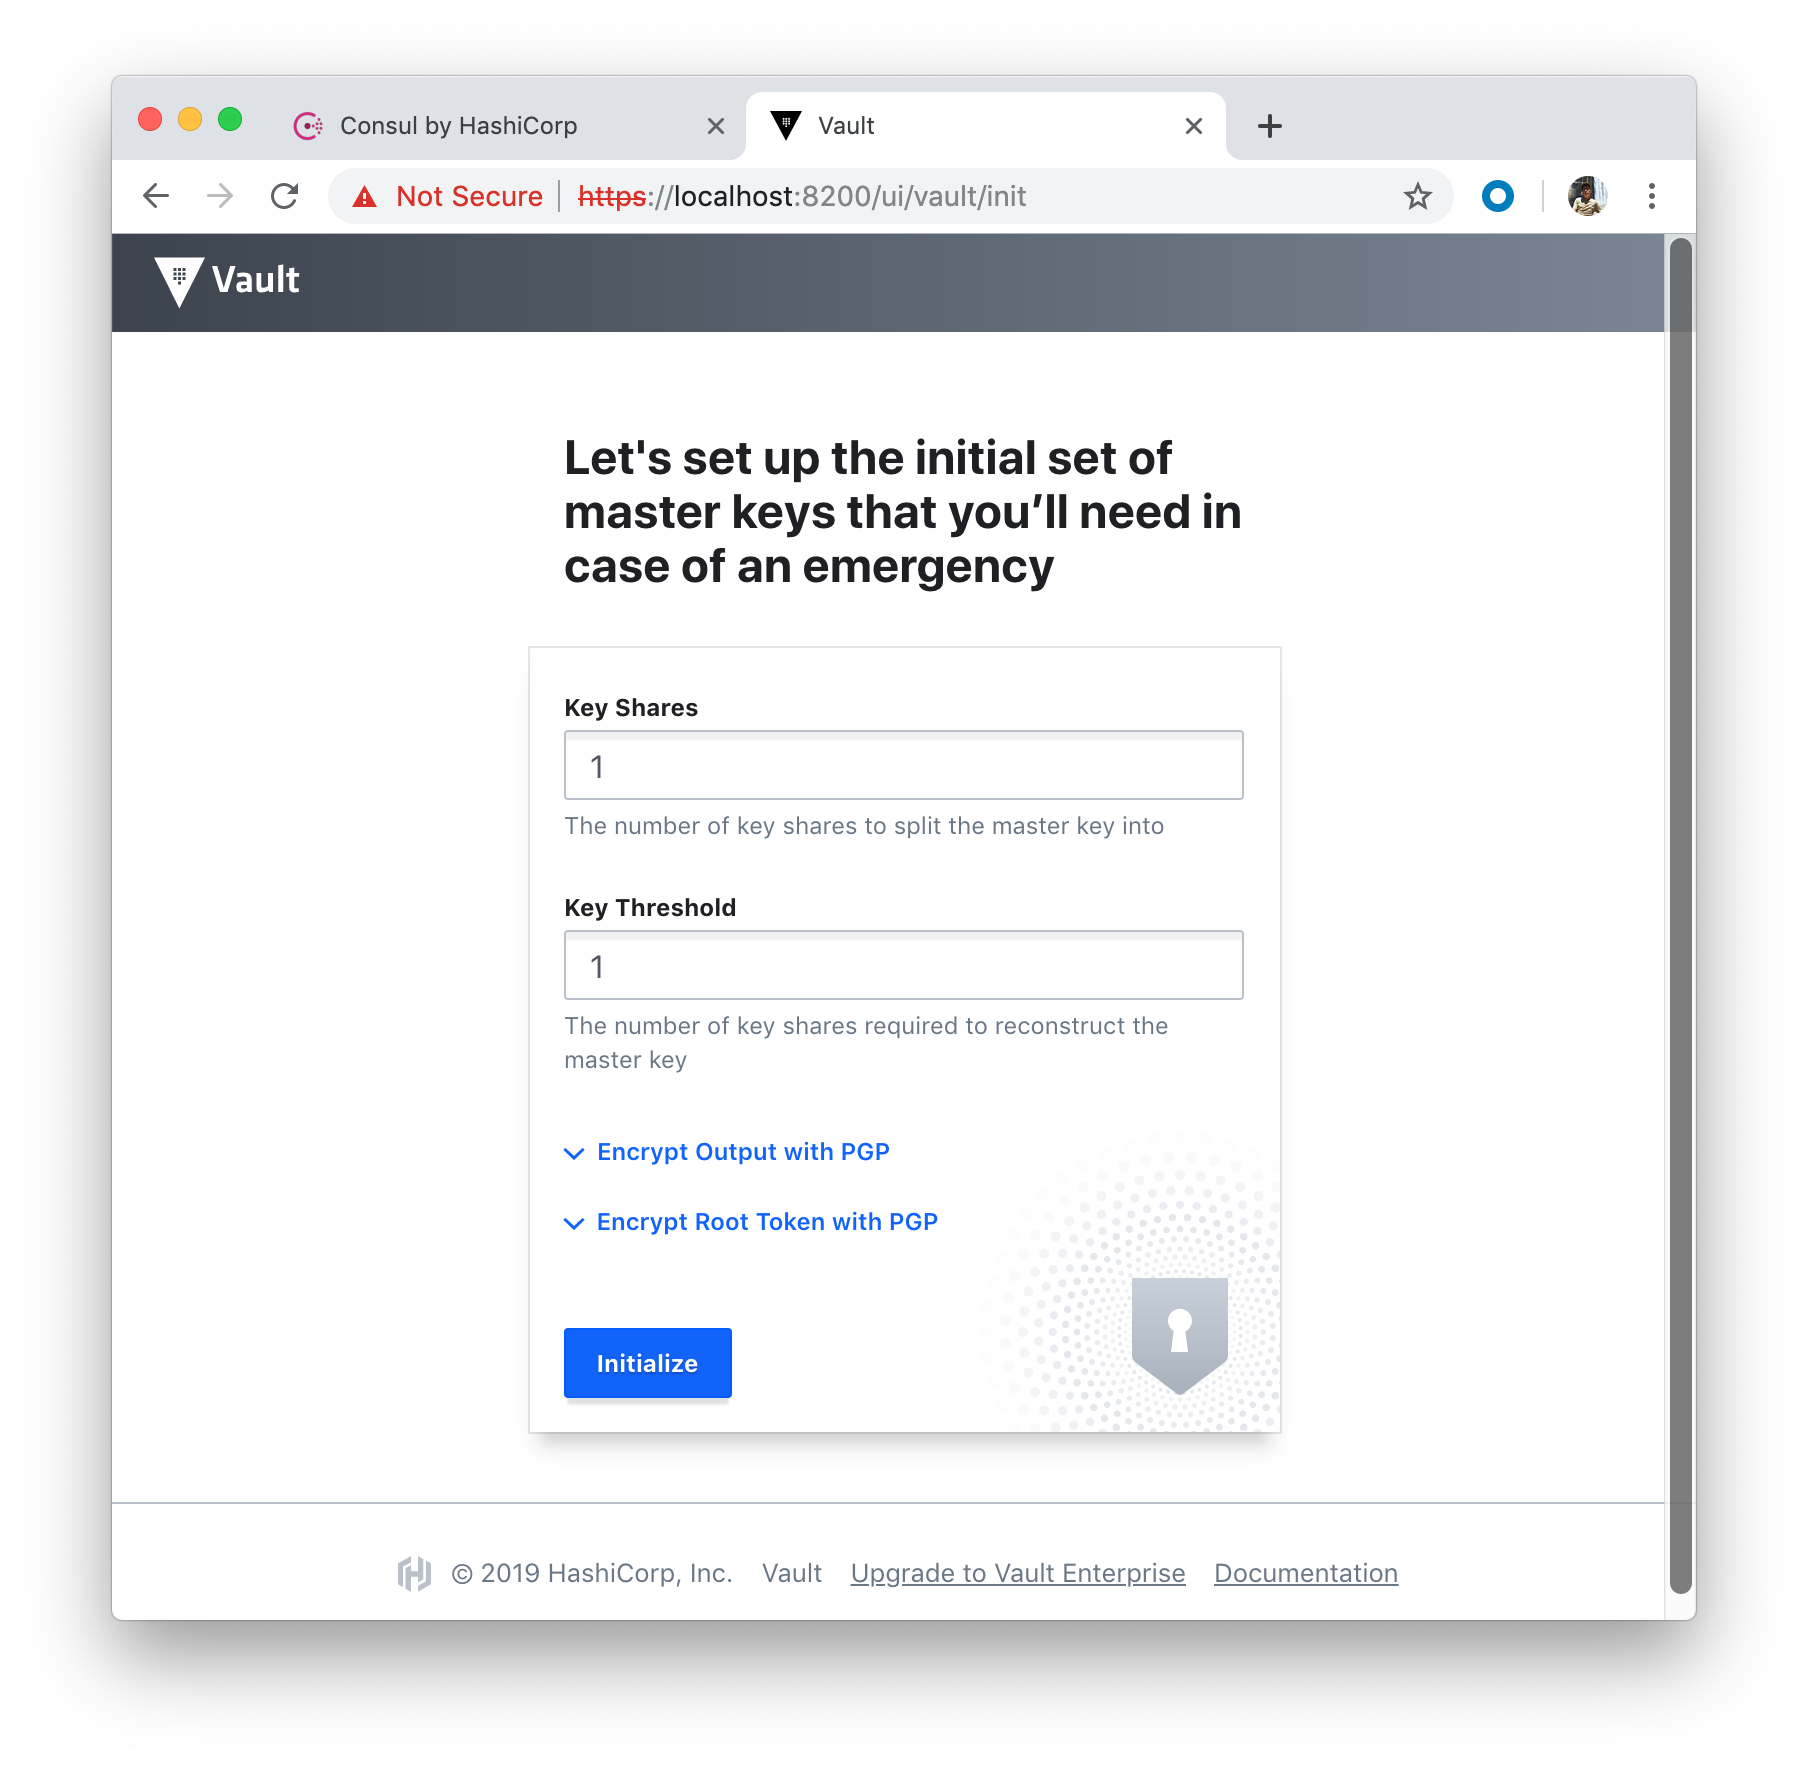
Click "Initialize" button:
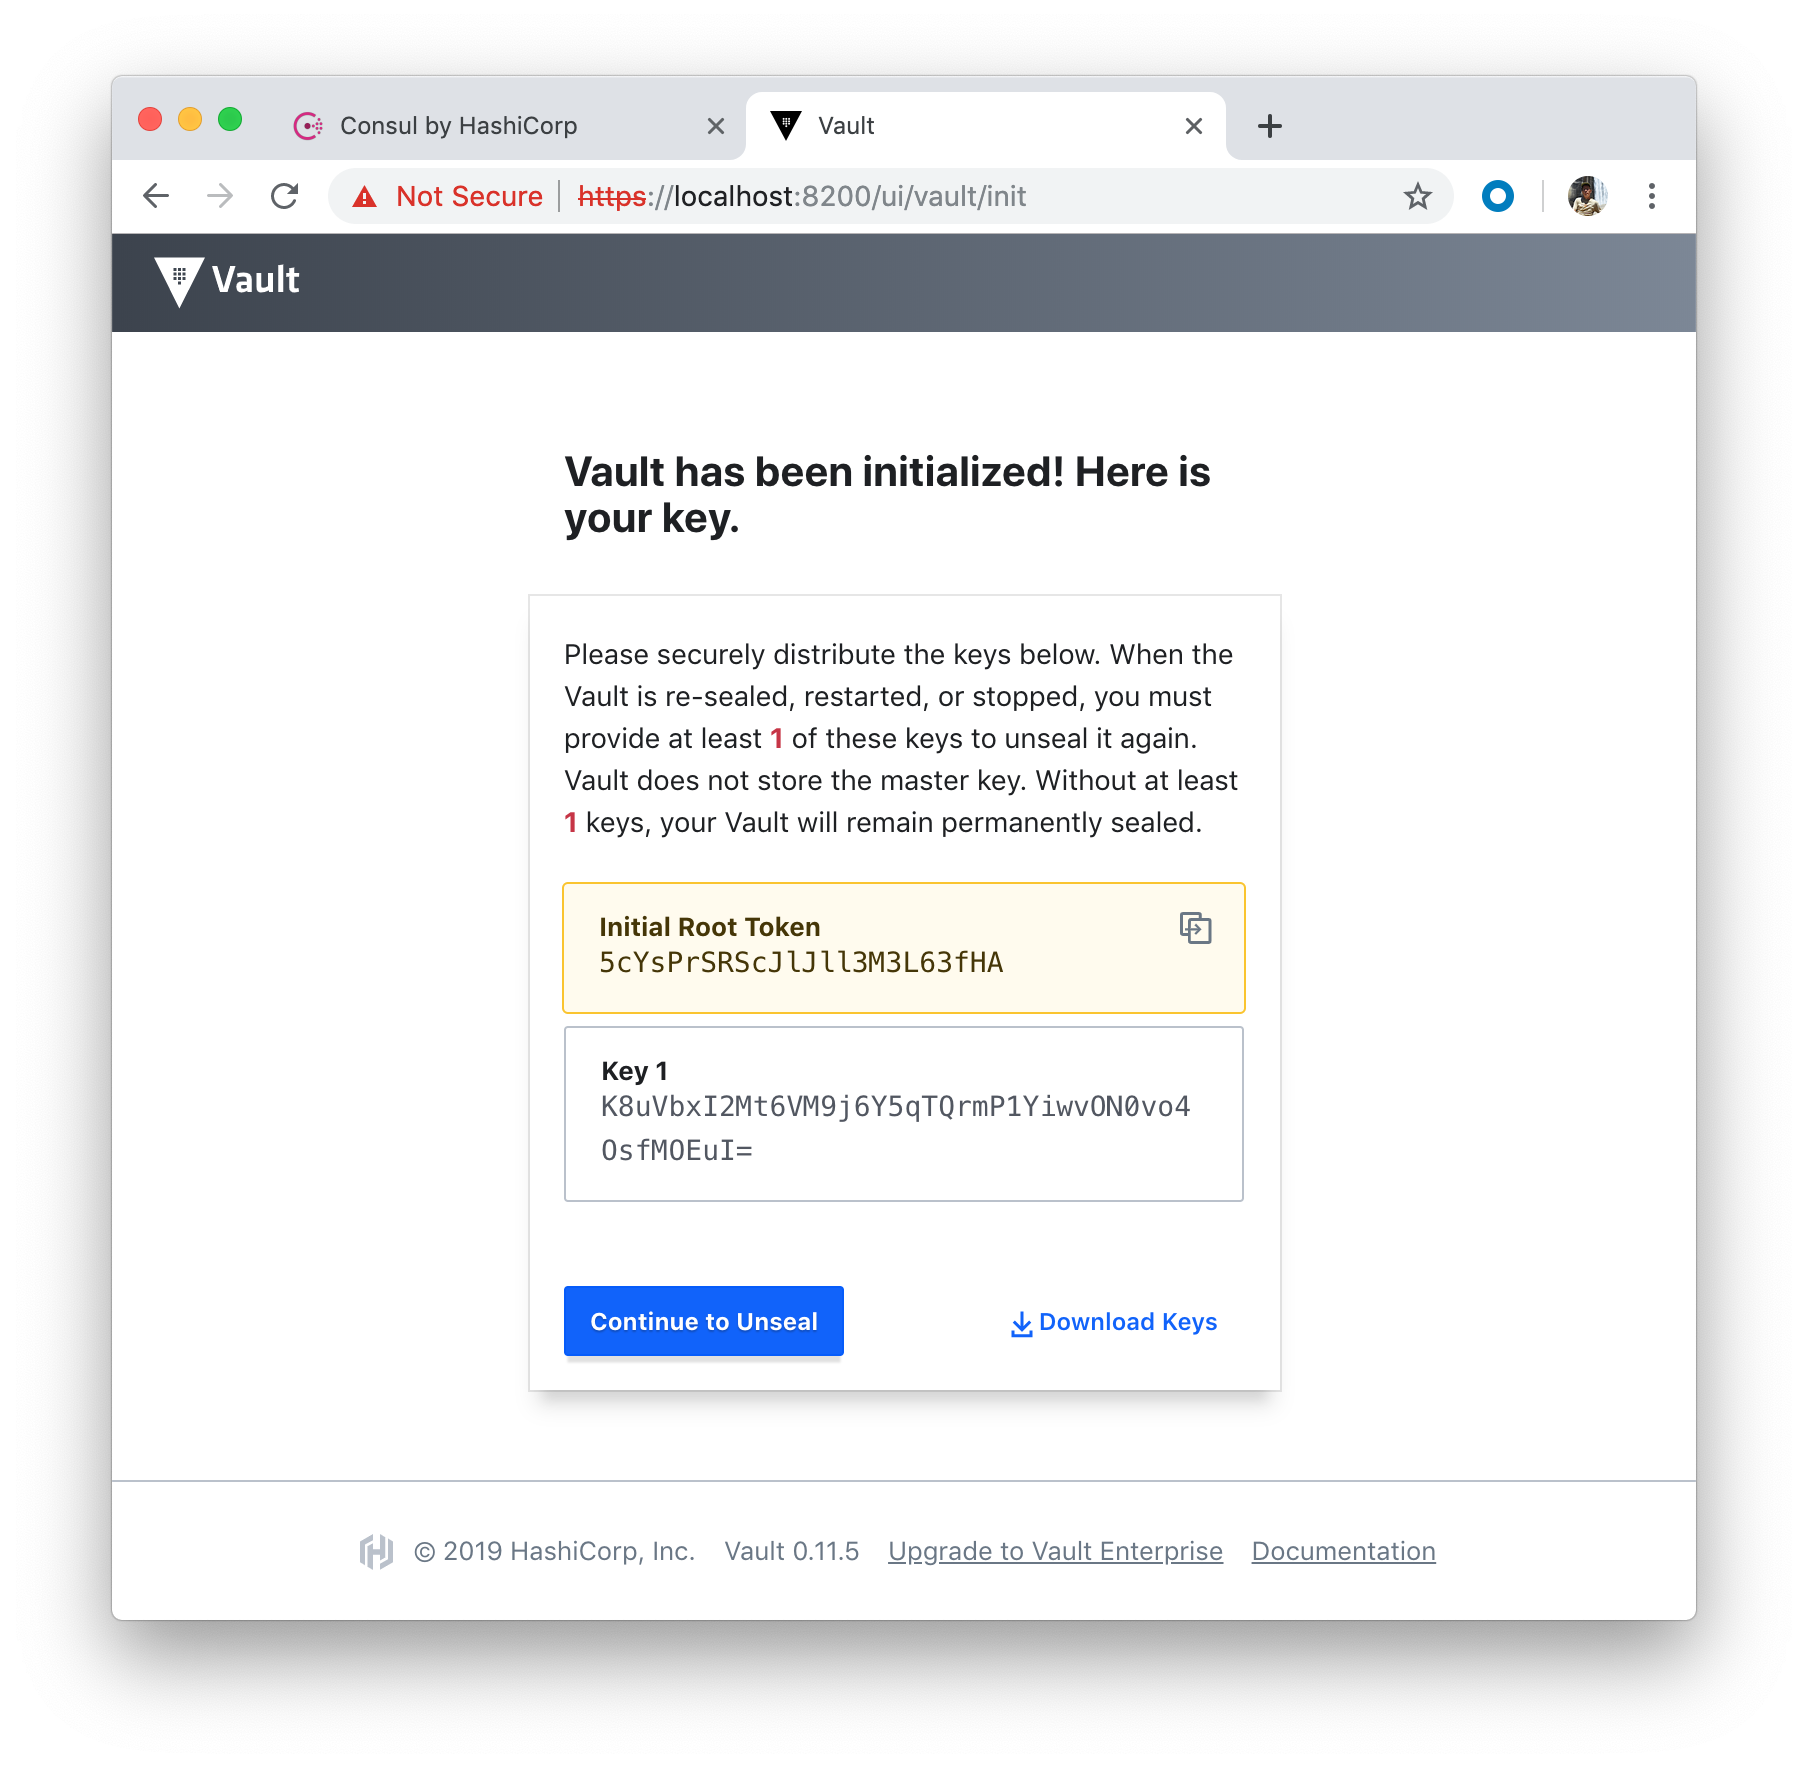
The equivalent command looks like this:
$ vault operator init -key-shares=1 -key-threshold=1
- Initial Root Token: 5cYsPrSRScJlJll3M3L63fHA
- key 1: K8uVbxI2Mt6VM9j6Y5qTQrmP1YiwvON0vo4OsfMOEuI=
Click "Continue to Unseal" button:

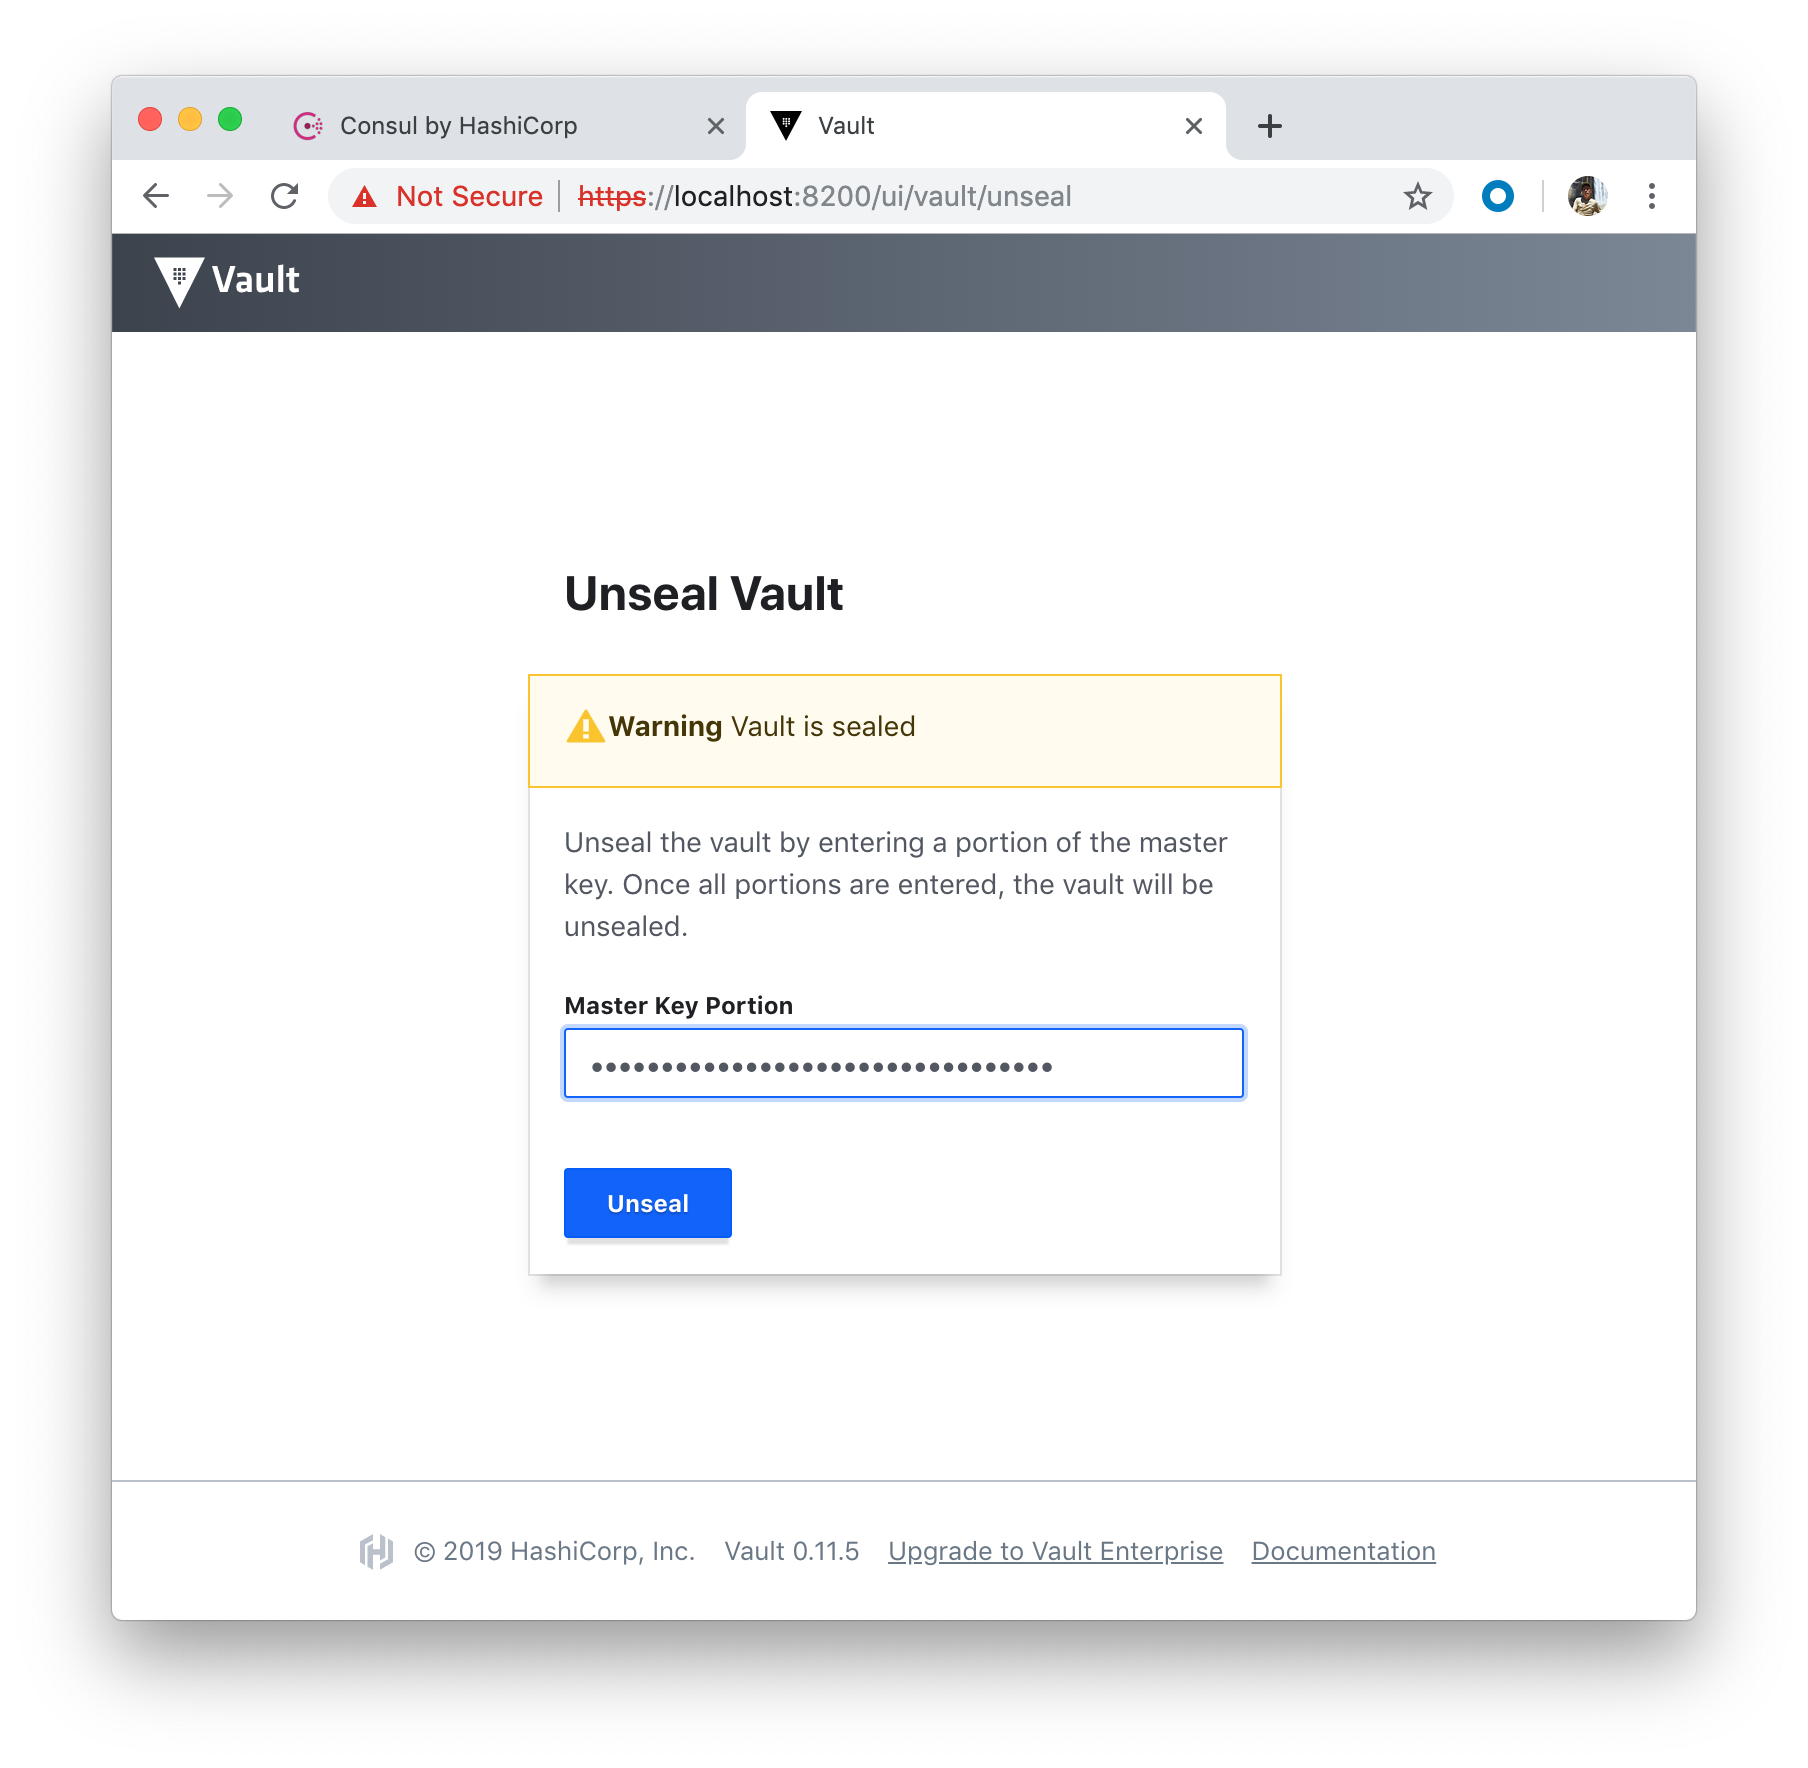
Unseal with the Unseal key 1:
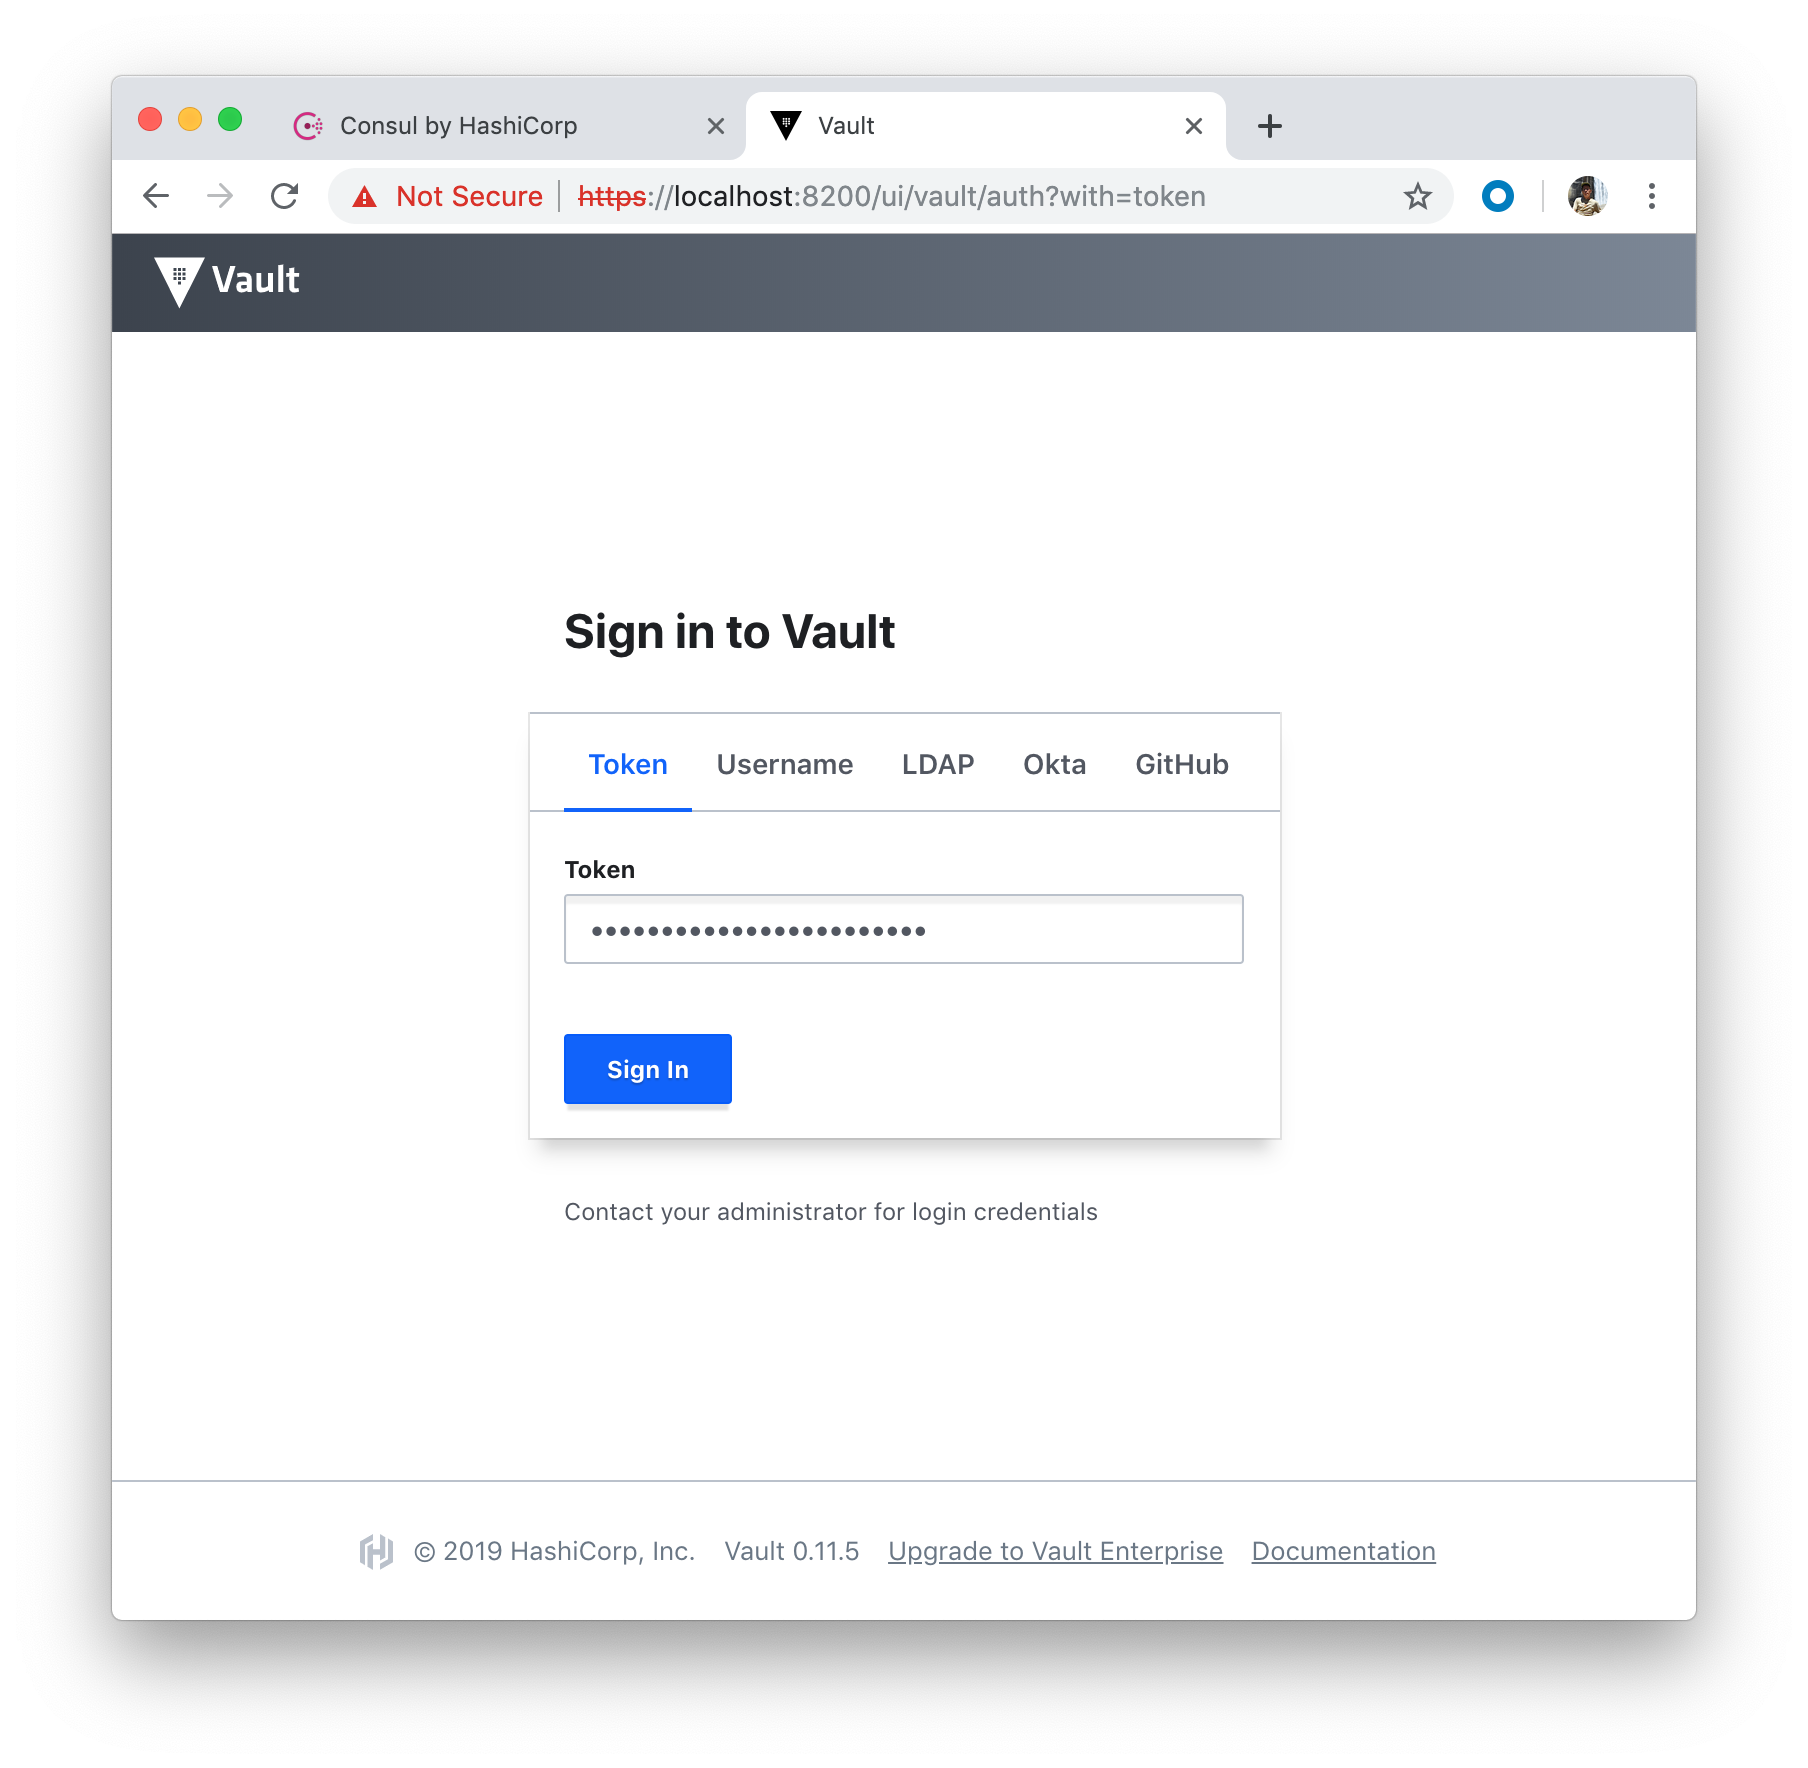
Sign in with the Initial Root Token for Token:
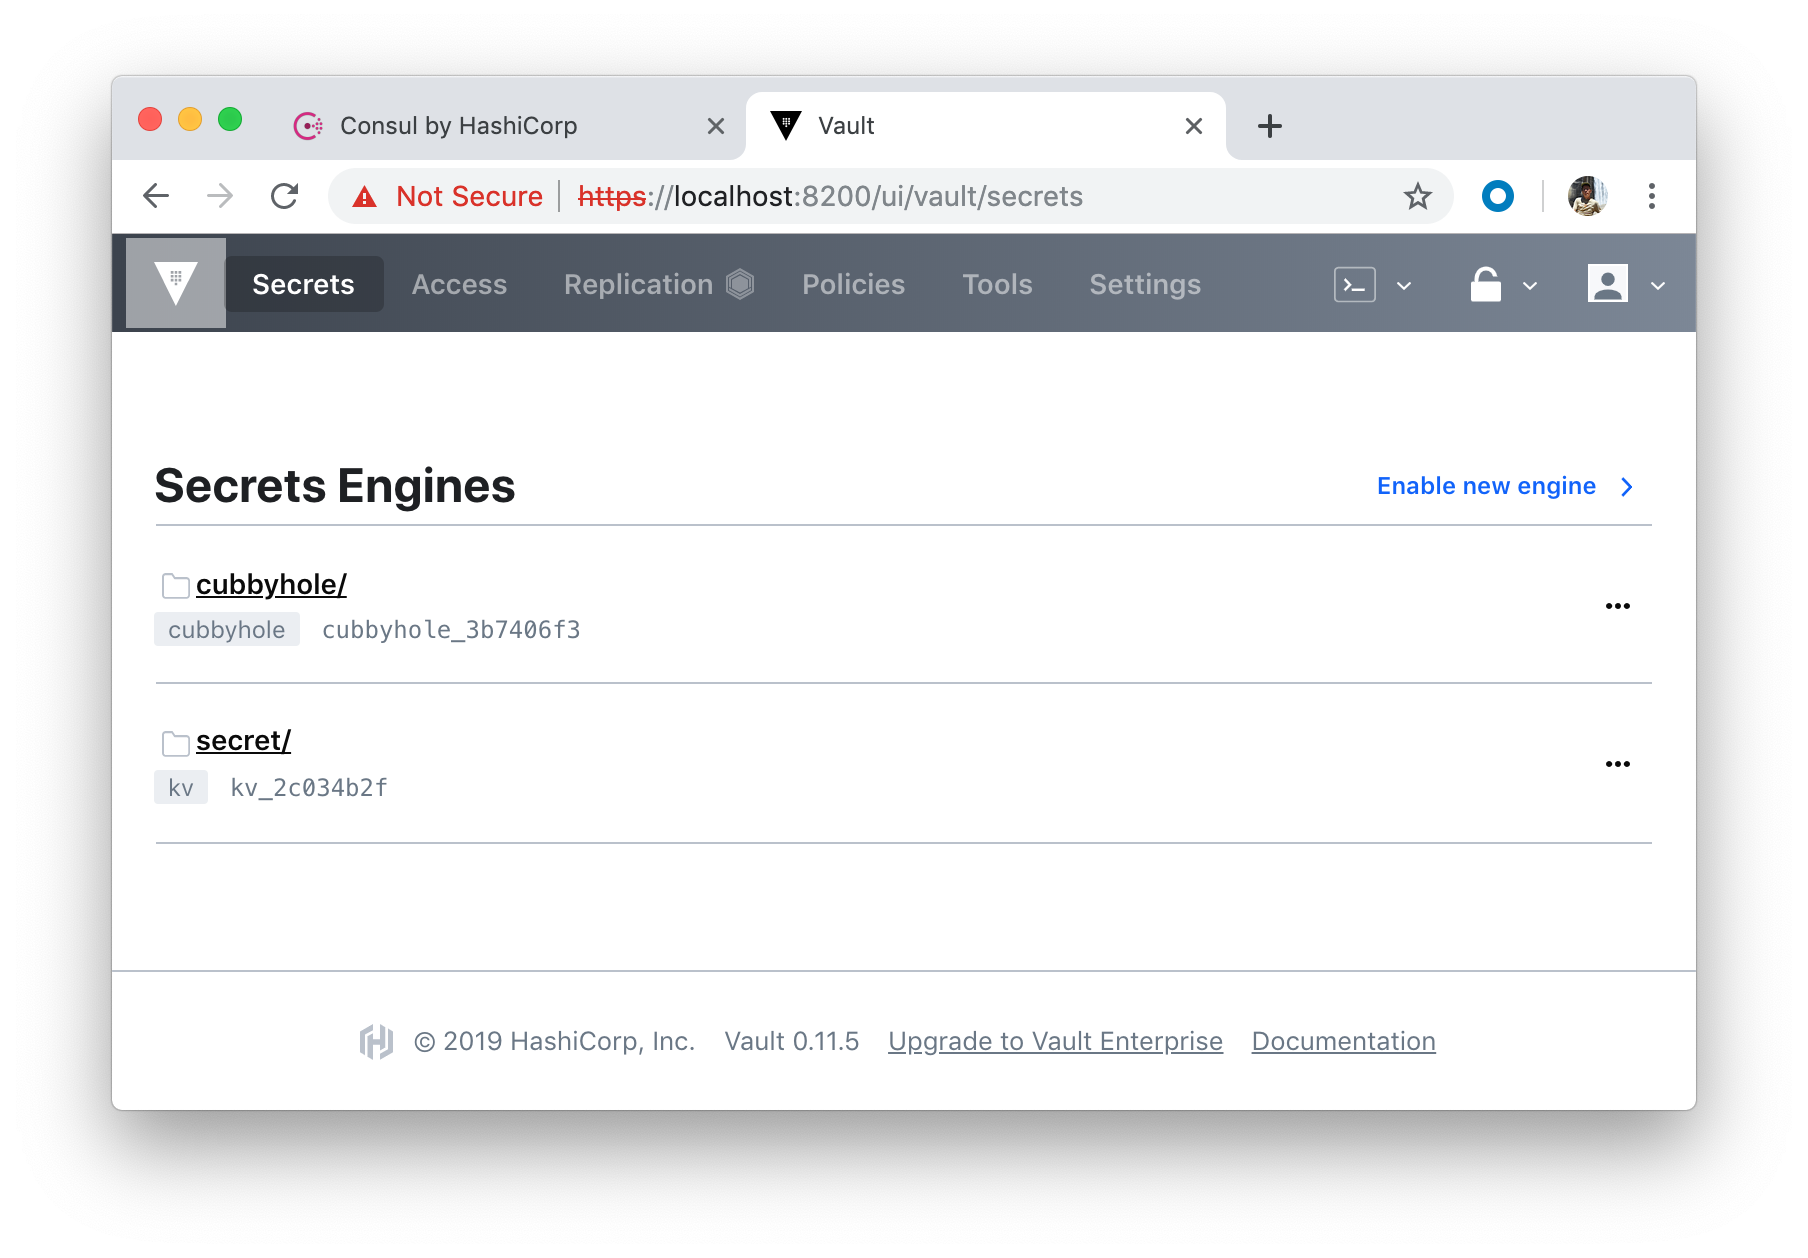
Important : we need to make sure two env variables should be set (VAULT_ADDR and VAULT_CACERT), which is explained later in this section, otherwise we get 509 error for vault command.
Let's delete the Consul/Vault pods to get fresh Vault:
$ kubectl delete -f consul/statefulset.yaml
statefulset.apps "consul" deleted

$ kubectl delete -f vault/deployment.yaml
deployment.extensions "vault" deleted
Then, create 3 of them by setting replicas: 3 in vault/deployment.yaml:
$ kubectl create -f vault/deployment.yaml
deployment.extensions/vault created
We may want to create consul pods as well:
$ kubectl create -f consul/statefulset.yaml
statefulset.apps/consul created
$ kubectl get pods
NAME                    READY   STATUS    RESTARTS   AGE
consul-0                1/1     Running   0          30s
consul-1                1/1     Running   0          29s
consul-2                1/1     Running   0          27s
vault-fb8d76649-4gbcn   2/2     Running   0          7s
vault-fb8d76649-7gstx   2/2     Running   0          7s
vault-fb8d76649-hrjbn   2/2     Running   0          7s

$ kubectl port-forward vault-fb8d76649-hrjbn 8200:8200
Forwarding from 127.0.0.1:8200 -> 8200
Forwarding from [::1]:8200 -> 8200
...
Vault client needs to be installed (Download Vault):
By executing vault, we should see help output similar to the following:
$ vault
Usage: vault <command> [args]

Common commands:
    read        Read data and retrieves secrets
    write       Write data, configuration, and secrets
    delete      Delete secrets and configuration
    list        List data or secrets
    login       Authenticate locally
    agent       Start a Vault agent
    server      Start a Vault server
    status      Print seal and HA status
    unwrap      Unwrap a wrapped secret
...
Let's set certs related environment variables:
$ export VAULT_ADDR=https://127.0.0.1:8200
$ export VAULT_CACERT="certs/ca.pem"
Without those variables, we may get the following error during the initialization:
Error initializing: Put https://127.0.0.1:8200/v1/sys/init: x509: certificate signed by unknown authority
Start initialization with the default options:
$ vault operator init
Unseal Key 1: JYX4cgPcttFfuBur7YllnQVQfUermLCh/CPb3hxV6pBJ
Unseal Key 2: VpNJdXxOx5kBkvWrl6Cpx5eiiMV2qtTMBiqqMujM3hit
Unseal Key 3: jlGjpe6qmdkAoPdUAYu+z/yz3evajCwnwbdsBq88sbFQ
Unseal Key 4: bN8QOoVDvcUcFNJE/cJDNVjvuGOpyT5Qj0QtPBFVvEHS
Unseal Key 5: agHcJJ5ioSlZHbtSzZksBICiu/9FI1wLaBfvmJ4dR3IP

Initial Root Token: 2OggPNfha51VCgW1EQl1qb0F

Vault initialized with 5 key shares and a key threshold of 3. Please securely
distribute the key shares printed above. When the Vault is re-sealed,
restarted, or stopped, you must supply at least 3 of these keys to unseal it
before it can start servicing requests.

Vault does not store the generated master key. Without at least 3 key to
reconstruct the master key, Vault will remain permanently sealed!

It is possible to generate new unseal keys, provided you have a quorum of
existing unseal keys shares. See "vault operator rekey" for more information.
We could have used the following command doing the same:
$ vault operator init \
    -key-shares=5 \
    -key-threshold=3
The key-shares is the number of key shares to split the generated master key into. This is the number of "unseal keys" to generate. key-threshold is the number of key shares required to reconstruct the master key. This must be less than or equal to key-shares.
Unseal:
$ vault operator unseal JYX4cgPcttFfuBur7YllnQVQfUermLCh/CPb3hxV6pBJ
Key                    Value
---                    -----
Seal Type              shamir
Initialized            true
Sealed                 false
Total Shares           5
Threshold              3
Version                0.11.5
Cluster Name           vault-cluster-12f4a120
Cluster ID             144baa36-ef82-2a96-71ca-fcd839a1ef0e
HA Enabled             true
HA Cluster             n/a
HA Mode                standby
Active Node Address    <none>

$ vault operator unseal VpNJdXxOx5kBkvWrl6Cpx5eiiMV2qtTMBiqqMujM3hit
Key             Value
---             -----
Seal Type       shamir
Initialized     true
Sealed          false
Total Shares    5
Threshold       3
Version         0.11.5
Cluster Name    vault-cluster-12f4a120
Cluster ID      144baa36-ef82-2a96-71ca-fcd839a1ef0e
HA Enabled      true
HA Cluster      https://127.0.0.1:8201
HA Mode         active

$ vault operator unseal jlGjpe6qmdkAoPdUAYu+z/yz3evajCwnwbdsBq88sbFQ
Key             Value
---             -----
Seal Type       shamir
Initialized     true
Sealed          false
Total Shares    5
Threshold       3
Version         0.11.5
Cluster Name    vault-cluster-12f4a120
Cluster ID      144baa36-ef82-2a96-71ca-fcd839a1ef0e
HA Enabled      true
HA Cluster      https://127.0.0.1:8201
HA Mode         active
Authenticate with the root token:
$ vault login
Token (will be hidden):
Success! You are now authenticated. The token information displayed below
is already stored in the token helper. You do NOT need to run "vault login"
again. Future Vault requests will automatically use this token.

Key                  Value
---                  -----
token                2OggPNfha51VCgW1EQl1qb0F
token_accessor       CgqWqoZhsjSnkHi4myepMfyx
token_duration       ∞
token_renewable      false
token_policies       ["root"]
identity_policies    []
policies             ["root"]
Create a new secret:
$ vault kv put secret/precious foo=bar
Success! Data written to: secret/precious
Then read it back:
$ vault kv get secret/precious
Move on to UI:
We can signin with the token generated when we logged in first time:

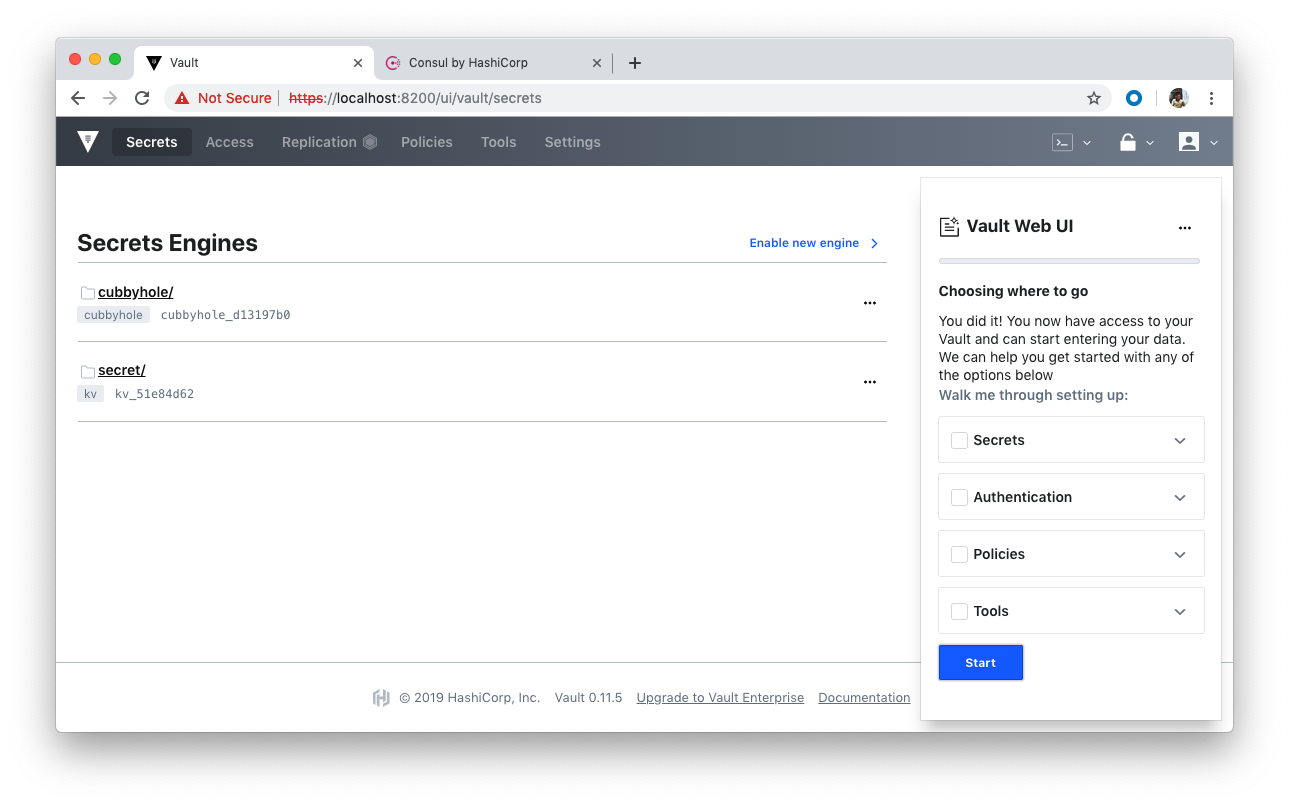
When we try to visit https://localhost:8200/ui/vault/init, we may get Error: Cannot read property 'value' of null. This is related to stored certs, so we can try Incognito or clear cache.
- Running Vault and Consul on Kubernetes
- Docker Compose - Hashicorp's Vault and Consul Part A (install vault, unsealing, static secrets, and policies)
- Docker Compose - Hashicorp's Vault and Consul Part B (EaaS, dynamic secrets, leases, and revocation)
- Docker Compose - Hashicorp's Vault and Consul Part C (Consul)
- HashiCorp Vault and Consul on AWS with Terraform
repo: HashCorp-Vault-and-Consul-on-Minikube
Docker & K8s
- Docker install on Amazon Linux AMI
- Docker install on EC2 Ubuntu 14.04
- Docker container vs Virtual Machine
- Docker install on Ubuntu 14.04
- Docker Hello World Application
- Nginx image - share/copy files, Dockerfile
- Working with Docker images : brief introduction
- Docker image and container via docker commands (search, pull, run, ps, restart, attach, and rm)
- More on docker run command (docker run -it, docker run --rm, etc.)
- Docker Networks - Bridge Driver Network
- Docker Persistent Storage
- File sharing between host and container (docker run -d -p -v)
- Linking containers and volume for datastore
- Dockerfile - Build Docker images automatically I - FROM, MAINTAINER, and build context
- Dockerfile - Build Docker images automatically II - revisiting FROM, MAINTAINER, build context, and caching
- Dockerfile - Build Docker images automatically III - RUN
- Dockerfile - Build Docker images automatically IV - CMD
- Dockerfile - Build Docker images automatically V - WORKDIR, ENV, ADD, and ENTRYPOINT
- Docker - Apache Tomcat
- Docker - NodeJS
- Docker - NodeJS with hostname
- Docker Compose - NodeJS with MongoDB
- Docker - Prometheus and Grafana with Docker-compose
- Docker - StatsD/Graphite/Grafana
- Docker - Deploying a Java EE JBoss/WildFly Application on AWS Elastic Beanstalk Using Docker Containers
- Docker : NodeJS with GCP Kubernetes Engine
- Docker : Jenkins Multibranch Pipeline with Jenkinsfile and Github
- Docker : Jenkins Master and Slave
- Docker - ELK : ElasticSearch, Logstash, and Kibana
- Docker - ELK 7.6 : Elasticsearch on Centos 7
- Docker - ELK 7.6 : Filebeat on Centos 7
- Docker - ELK 7.6 : Logstash on Centos 7
- Docker - ELK 7.6 : Kibana on Centos 7
- Docker - ELK 7.6 : Elastic Stack with Docker Compose
- Docker - Deploy Elastic Cloud on Kubernetes (ECK) via Elasticsearch operator on minikube
- Docker - Deploy Elastic Stack via Helm on minikube
- Docker Compose - A gentle introduction with WordPress
- Docker Compose - MySQL
- MEAN Stack app on Docker containers : micro services
- MEAN Stack app on Docker containers : micro services via docker-compose
- Docker Compose - Hashicorp's Vault and Consul Part A (install vault, unsealing, static secrets, and policies)
- Docker Compose - Hashicorp's Vault and Consul Part B (EaaS, dynamic secrets, leases, and revocation)
- Docker Compose - Hashicorp's Vault and Consul Part C (Consul)
- Docker Compose with two containers - Flask REST API service container and an Apache server container
- Docker compose : Nginx reverse proxy with multiple containers
- Docker & Kubernetes : Envoy - Getting started
- Docker & Kubernetes : Envoy - Front Proxy
- Docker & Kubernetes : Ambassador - Envoy API Gateway on Kubernetes
- Docker Packer
- Docker Cheat Sheet
- Docker Q & A #1
- Kubernetes Q & A - Part I
- Kubernetes Q & A - Part II
- Docker - Run a React app in a docker
- Docker - Run a React app in a docker II (snapshot app with nginx)
- Docker - NodeJS and MySQL app with React in a docker
- Docker - Step by Step NodeJS and MySQL app with React - I
- Installing LAMP via puppet on Docker
- Docker install via Puppet
- Nginx Docker install via Ansible
- Apache Hadoop CDH 5.8 Install with QuickStarts Docker
- Docker - Deploying Flask app to ECS
- Docker Compose - Deploying WordPress to AWS
- Docker - WordPress Deploy to ECS with Docker-Compose (ECS-CLI EC2 type)
- Docker - WordPress Deploy to ECS with Docker-Compose (ECS-CLI Fargate type)
- Docker - ECS Fargate
- Docker - AWS ECS service discovery with Flask and Redis
- Docker & Kubernetes : minikube
- Docker & Kubernetes 2 : minikube Django with Postgres - persistent volume
- Docker & Kubernetes 3 : minikube Django with Redis and Celery
- Docker & Kubernetes 4 : Django with RDS via AWS Kops
- Docker & Kubernetes : Kops on AWS
- Docker & Kubernetes : Ingress controller on AWS with Kops
- Docker & Kubernetes : HashiCorp's Vault and Consul on minikube
- Docker & Kubernetes : HashiCorp's Vault and Consul - Auto-unseal using Transit Secrets Engine
- Docker & Kubernetes : Persistent Volumes & Persistent Volumes Claims - hostPath and annotations
- Docker & Kubernetes : Persistent Volumes - Dynamic volume provisioning
- Docker & Kubernetes : DaemonSet
- Docker & Kubernetes : Secrets
- Docker & Kubernetes : kubectl command
- Docker & Kubernetes : Assign a Kubernetes Pod to a particular node in a Kubernetes cluster
- Docker & Kubernetes : Configure a Pod to Use a ConfigMap
- AWS : EKS (Elastic Container Service for Kubernetes)
- Docker & Kubernetes : Run a React app in a minikube
- Docker & Kubernetes : Minikube install on AWS EC2
- Docker & Kubernetes : Cassandra with a StatefulSet
- Docker & Kubernetes : Terraform and AWS EKS
- Docker & Kubernetes : Pods and Service definitions
- Docker & Kubernetes : Service IP and the Service Type
- Docker & Kubernetes : Kubernetes DNS with Pods and Services
- Docker & Kubernetes : Headless service and discovering pods
- Docker & Kubernetes : Scaling and Updating application
- Docker & Kubernetes : Horizontal pod autoscaler on minikubes
- Docker & Kubernetes : From a monolithic app to micro services on GCP Kubernetes
- Docker & Kubernetes : Rolling updates
- Docker & Kubernetes : Deployments to GKE (Rolling update, Canary and Blue-green deployments)
- Docker & Kubernetes : Slack Chat Bot with NodeJS on GCP Kubernetes
- Docker & Kubernetes : Continuous Delivery with Jenkins Multibranch Pipeline for Dev, Canary, and Production Environments on GCP Kubernetes
- Docker & Kubernetes : NodePort vs LoadBalancer vs Ingress
- Docker & Kubernetes : MongoDB / MongoExpress on Minikube
- Docker & Kubernetes : Load Testing with Locust on GCP Kubernetes
- Docker & Kubernetes : MongoDB with StatefulSets on GCP Kubernetes Engine
- Docker & Kubernetes : Nginx Ingress Controller on Minikube
- Docker & Kubernetes : Setting up Ingress with NGINX Controller on Minikube (Mac)
- Docker & Kubernetes : Nginx Ingress Controller for Dashboard service on Minikube
- Docker & Kubernetes : Nginx Ingress Controller on GCP Kubernetes
- Docker & Kubernetes : Kubernetes Ingress with AWS ALB Ingress Controller in EKS
- Docker & Kubernetes : Setting up a private cluster on GCP Kubernetes
- Docker & Kubernetes : Kubernetes Namespaces (default, kube-public, kube-system) and switching namespaces (kubens)
- Docker & Kubernetes : StatefulSets on minikube
- Docker & Kubernetes : RBAC
- Docker & Kubernetes Service Account, RBAC, and IAM
- Docker & Kubernetes - Kubernetes Service Account, RBAC, IAM with EKS ALB, Part 1
- Docker & Kubernetes : Helm Chart
- Docker & Kubernetes : My first Helm deploy
- Docker & Kubernetes : Readiness and Liveness Probes
- Docker & Kubernetes : Helm chart repository with Github pages
- Docker & Kubernetes : Deploying WordPress and MariaDB with Ingress to Minikube using Helm Chart
- Docker & Kubernetes : Deploying WordPress and MariaDB to AWS using Helm 2 Chart
- Docker & Kubernetes : Deploying WordPress and MariaDB to AWS using Helm 3 Chart
- Docker & Kubernetes : Helm Chart for Node/Express and MySQL with Ingress
- Docker & Kubernetes : Deploy Prometheus and Grafana using Helm and Prometheus Operator - Monitoring Kubernetes node resources out of the box
- Docker & Kubernetes : Deploy Prometheus and Grafana using kube-prometheus-stack Helm Chart
- Docker & Kubernetes : Istio (service mesh) sidecar proxy on GCP Kubernetes
- Docker & Kubernetes : Istio on EKS
- Docker & Kubernetes : Istio on Minikube with AWS EC2 for Bookinfo Application
- Docker & Kubernetes : Deploying .NET Core app to Kubernetes Engine and configuring its traffic managed by Istio (Part I)
- Docker & Kubernetes : Deploying .NET Core app to Kubernetes Engine and configuring its traffic managed by Istio (Part II - Prometheus, Grafana, pin a service, split traffic, and inject faults)
- Docker & Kubernetes : Helm Package Manager with MySQL on GCP Kubernetes Engine
- Docker & Kubernetes : Deploying Memcached on Kubernetes Engine
- Docker & Kubernetes : EKS Control Plane (API server) Metrics with Prometheus
- Docker & Kubernetes : Spinnaker on EKS with Halyard
- Docker & Kubernetes : Continuous Delivery Pipelines with Spinnaker and Kubernetes Engine
- Docker & Kubernetes : Multi-node Local Kubernetes cluster : Kubeadm-dind (docker-in-docker)
- Docker & Kubernetes : Multi-node Local Kubernetes cluster : Kubeadm-kind (k8s-in-docker)
- Docker & Kubernetes : nodeSelector, nodeAffinity, taints/tolerations, pod affinity and anti-affinity - Assigning Pods to Nodes
- Docker & Kubernetes : Jenkins-X on EKS
- Docker & Kubernetes : ArgoCD App of Apps with Heml on Kubernetes
- Docker & Kubernetes : ArgoCD on Kubernetes cluster
- Docker & Kubernetes : GitOps with ArgoCD for Continuous Delivery to Kubernetes clusters (minikube) - guestbook
Ph.D. / Golden Gate Ave, San Francisco / Seoul National Univ / Carnegie Mellon / UC Berkeley / DevOps / Deep Learning / Visualization