Docker - Deploying a Java EE JBoss/WildFly Application on AWS Elastic Beanstalk Using Docker Containers 2020
Here are the files we're going to use in this post:
.
├── javaee_demo
│   ├── Dockerfile
│   └── Dockerrun.aws.json
└── wildfly-admin
    ├── Dockerfile
    └── deploy
        ├── JavaEEDemo.war
        └── JavaEEDemo.war.deployed
We'll be creating the two "Dockerfile"s. The "Dockerrun.aws.json" will be used to deploy our container from an existing image onto Beanstalk.
Our initial playground is going to be local machine. Then, if we're confident, then we'll setup Beanstalk and then deploy the container to Beanstalk which will provide us infrastructure with load balancing, scaling, and monitoring for us.
We're not building any application. Instead, we'll download JavaEE demo application ("JavaEEDemo.war" which is a simple Greeter) for WildFly.
Following:
- Docker installed
- AWS cli installed. We need this to init Beanstalk,
be init.
WildFly is formerly known as JBoss AS, or simply JBoss. It is an application server authored by JBoss, now developed by Red Hat. WildFly is written in Java.
Pull the JBoss WildFly image from DockerHub:
$ docker pull jboss/wildfly
Using default tag: latest
latest: Pulling from jboss/wildfly
...

$ docker images
REPOSITORY            TAG                 IMAGE ID            CREATED             SIZE
jboss/wildfly         latest              5de2811bb236        3 weeks ago         745MB
Start a container:
$ docker run -it --rm 5de2811bb236
=========================================================================

  JBoss Bootstrap Environment

  JBOSS_HOME: /opt/jboss/wildfly

  JAVA: /usr/lib/jvm/java/bin/java

  JAVA_OPTS:  -server -Xms64m -Xmx512m -XX:MetaspaceSize=96M -XX:MaxMetaspaceSize=256m -Djava.net.preferIPv4Stack=true -Djboss.modules.system.pkgs=org.jboss.byteman -Djava.awt.headless=true  --add-exports=java.base/sun.nio.ch=ALL-UNNAMED --add-exports=jdk.unsupported/sun.misc=ALL-UNNAMED --add-exports=jdk.unsupported/sun.reflect=ALL-UNNAMED --add-modules=java.se

=========================================================================

00:14:34,179 INFO  [org.jboss.modules] (main) JBoss Modules version 1.9.0.Final
00:14:35,737 INFO  [org.jboss.msc] (main) JBoss MSC version 1.4.5.Final
00:14:35,765 INFO  [org.jboss.threads] (main) JBoss Threads version 2.3.3.Final
00:14:36,235 INFO  [org.jboss.as] (MSC service thread 1-2) WFLYSRV0049: WildFly Full 16.0.0.Final (WildFly Core 8.0.0.Final) starting
...
00:14:45,278 INFO  [org.jboss.as] (Controller Boot Thread) WFLYSRV0025: WildFly Full 16.0.0.Final (WildFly Core 8.0.0.Final) started in 12506ms - Started 305 of 531 services (324 services are lazy, passive or on-demand)
The "--rm" flag tells Docker to delete the container when no application is running on the container.
The JBoss WildFly Docker image is configured to start WildFly in standalone mode as we can see from the output.
Ctr^C will terminate the WildFly and remove the container.
Actually, simple customizing - adding "admin" user and setup the "password", which enables us to access WildFly Admin console.
We'll use the downloaded image as a base image and then create a new Dockerfile. We need to create directories as shown earlier in the files.
$ mkdir -p ./wildfly-admin/deploy
The new Dockerfile should look like this:
FROM jboss/wildfly
RUN /opt/jboss/wildfly/bin/add-user.sh admin welcome1 --silent
CMD ["/opt/jboss/wildfly/bin/standalone.sh", "-b", "0.0.0.0", "-bmanagement", "0.0.0.0"]
The "RUN" creates an "admin" user and set the password as "welcome1".
The CMD starts WildFly as soon as the container runs, and configures WildFly binds on "0.0.0.0" which makes the container accessible from outside.
Now that we creates a Dockerfile, it's time to build the image from it. We should be in "wildfly-admin" directory:
$ docker build -t wildfly-admin .
Sending build context to Docker daemon  20.99kB
Step 1/3 : FROM jboss/wildfly
 ---> 5de2811bb236
Step 2/3 : RUN /opt/jboss/wildfly/bin/add-user.sh admin welcome1 --silent
 ---> Using cache
 ---> e28c6e150697
Step 3/3 : CMD ["/opt/jboss/wildfly/bin/standalone.sh", "-b", "0.0.0.0", "-bmanagement", "0.0.0.0"]
 ---> Using cache
 ---> 3bd0faa37bfe
Successfully built 3bd0faa37bfe
Successfully tagged wildfly-admin:latest

$ docker images
REPOSITORY            TAG                 IMAGE ID            CREATED             SIZE
wildfly-admin         latest              3bd0faa37bfe        3 hours ago         745MB
jboss/wildfly         latest              5de2811bb236        3 weeks ago         745MB
Now, our new image with the "admin" user added is ready to run:
$ docker run -d -p 9990 -p 8080 \
 -v "$(pwd)"/deploy:/opt/jboss/wildfly/standalone/deployments \
 wildfly-admin
We used "-d" to run the container in detach-mode as a background daemon, the "-p" tells forward all traffic from the local ports to 9990 (WildFly web console) and 8080 (JavaEE application) inside the container. The "-v" maps the local directory ("./deploy") to the container, which will our "war" file deploy to the container.
$ docker ps
CONTAINER ID        IMAGE               COMMAND                  CREATED             STATUS              PORTS                                              NAMES
54db7c8535e8        wildfly-admin       "/opt/jboss/wildfly/…"   8 minutes ago       Up 8 minutes        0.0.0.0:32772->8080/tcp, 0.0.0.0:32771->9990/tcp   youthful_borg
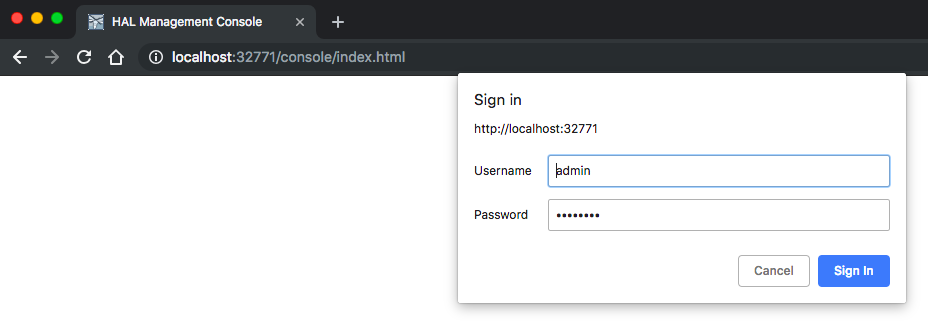
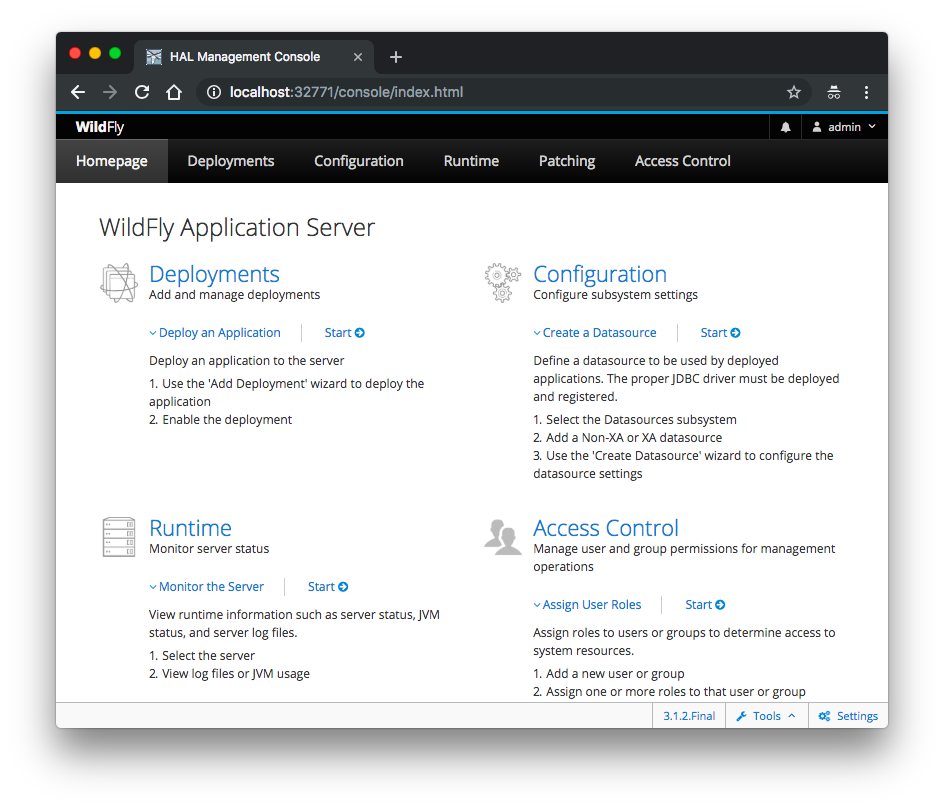
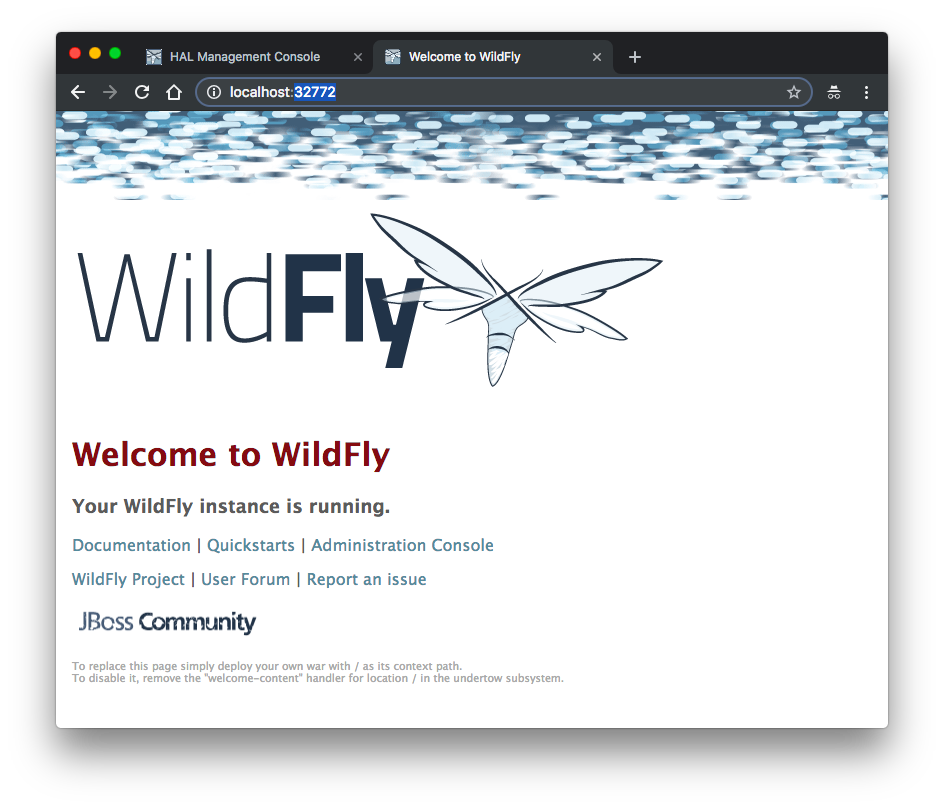
The traffic to the port 32772 will be forwarded to the container port 8080, and the traffic to the host port 32771 will be forwarded to container port 9990.
We may also want to make sure the WildFly started:
$ docker logs 54db7c8535e8
...
01:31:37,976 INFO  [org.jboss.as] (Controller Boot Thread) WFLYSRV0025: WildFly Full 16.0.0.Final (WildFly Core 8.0.0.Final) started in 11057ms - Started 305 of 531 services (324 services are lazy, passive or on-demand)
Let's try to access the container (9990 - WildFly web console):
We may also want to try 8080 (JavaEE application):
Earlier, we mapped local ./deploy folder to container's "/opt/jboss/wildfly/standalone/deployments" folder. With this mapping, the WildFly's Deployment Scanner enables automatic deploy. So, whenever it detects any "war" or "ear" file, automatic deploy will kick in and deploy the artifact to the running container which we can get via 9990 port (WildFly web console) of the container which gets the traffic from host (local)'s 32771 port.
All we have to do is to download a sample WildFly app and put that into the "deploy" folder:
$ wget https://s3-us-west-2.amazonaws.com/us-west-2-aws-training/awsu-spl/spl-49/scripts/JavaEEDemo.war

$ cp JavaEEDemo.war wildfly-admin/deploy/.
We can see it's been deployed to the running container:
└── wildfly-admin
    ├── Dockerfile
    └── deploy
        ├── JavaEEDemo.war
        └── JavaEEDemo.war.isdeploying


└── wildfly-admin
    ├── Dockerfile
    └── deploy
        ├── JavaEEDemo.war
        └── JavaEEDemo.war.deployed
We can check from the container log:
$ docker ps
CONTAINER ID        IMAGE               COMMAND                  CREATED             STATUS              PORTS                                              NAMES
a7625da2a49f        wildfly-admin       "/opt/jboss/wildfly/…"   10 minutes ago      Up 10 minutes       0.0.0.0:32776->8080/tcp, 0.0.0.0:32775->9990/tcp   friendly_bartik

$ docker logs a7625da2a49f
...
03:56:26,808 INFO  [javax.enterprise.resource.webcontainer.jsf.config] (ServerService Thread Pool -- 74) Initializing Mojarra 2.3.9.SP01 for context '/JavaEEDemo'
03:56:28,496 INFO  [org.wildfly.extension.undertow] (ServerService Thread Pool -- 74) WFLYUT0021: Registered web context: '/JavaEEDemo' for server 'default-server'
03:56:28,680 INFO  [org.jboss.as.server] (DeploymentScanner-threads - 2) WFLYSRV0010: (Deployed "JavaEEDemo.war" (runtime-name : "JavaEEDemo.war")
Let's access the newly deployed sample app:
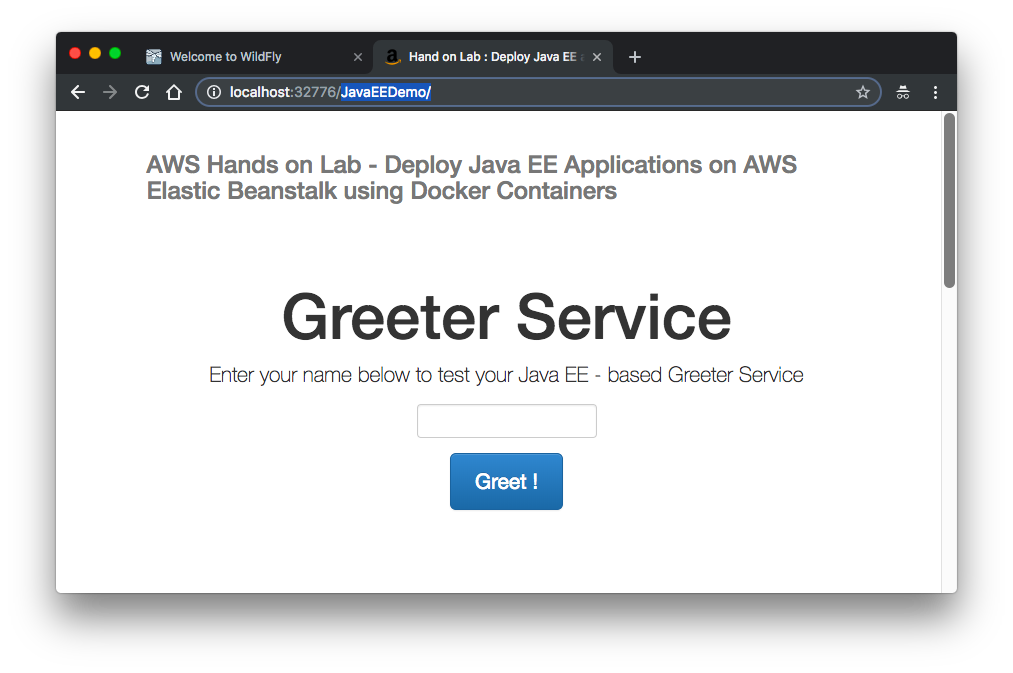
I had to recreate the container, so the host ports have been changed.
Stop the container:
$ docker stop a7625da2a49f
a7625da2a49f
This will terminate WildFly and the container. This will also release the network ports on the host and local directory mapping.
The main process inside the container will receive SIGTERM, and after a grace period, SIGKILL signals.
Because of those, all the container states will be load. So, even after we restarted the container, the sample app will no longer be there, and we'll need to re-deploy the sample app again.
We'll address the re-deploy issue in next section.
In the previous section, we run a JBoss WildFly container, and then deploy a sample app to the container after the container started.
In this section, we will build a container that has both (self-contained container) - JBoss WildFly + JavaEE application!
We'll create a new javaee_demo directory and another Dockerfile as shown below:
.
├── javaee_demo
│   └── Dockerfile
└── wildfly-admin
    ├── Dockerfile
    └── deploy
        ├── JavaEEDemo.war
        └── JavaEEDemo.war.deployed
Here is our new Dockerfile which has additional instructions to copy and deploy our JavaEE application:
FROM jboss/wildfly

# Deploy JavaEEDemo Application
ADD https://s3-us-west-2.amazonaws.com/us-west-2-aws-training/awsu-spl/spl-49/scripts/JavaEEDemo.war /opt/jboss/wildfly/standalone/deployments/

##  Change file WAR ownership to jboss:jboss
USER root
RUN chown jboss:jboss /opt/jboss/wildfly/standalone/deployments/JavaEEDemo.war
##  back to jboss user for subsequent commands
USER jboss

# Create a log directory to store log files
RUN mkdir /opt/jboss/wildfly/standalone/log

# Explicitly expose port 8080 (explicit is required by Elastic Beanstalk)
EXPOSE 8080
The ADD tells to copy the "war" from local host machine to the container image. Also, we the ADD runs as a "root" and WildFly is configured to run as a "jboss", we need to change the ownership before starting WildFly. The RUN is to save logs.
The EXPOSE 8080 is for Beanstalk not for the container. The container base image already exposes ports 8080 and 9990.
Now, let's build our 2nd Docker image from the new Dockerfile:
$ docker build -t wildfly-javaeedemo .
Sending build context to Docker daemon  6.144kB
Step 1/7 : FROM jboss/wildfly
 ---> 5de2811bb236
Step 2/7 : ADD https://s3-us-west-2.amazonaws.com/us-west-2-aws-training/awsu-spl/spl-49/scripts/JavaEEDemo.war /opt/jboss/wildfly/standalone/deployments/
Downloading [==================================================>]  16.73kB/16.73kB
 ---> Using cache
 ---> f6974d59c5f6
Step 3/7 : USER root
 ---> Using cache
 ---> 6e3754239cc6
Step 4/7 : RUN chown jboss:jboss /opt/jboss/wildfly/standalone/deployments/JavaEEDemo.war
 ---> Using cache
 ---> 6c47238cea07
Step 5/7 : USER jboss
 ---> Using cache
 ---> fb9ea30ebd73
Step 6/7 : RUN mkdir /opt/jboss/wildfly/standalone/log
 ---> Using cache
 ---> 14b19c339a3c
Step 7/7 : EXPOSE 8080
 ---> Using cache
 ---> 881377cb3208
Successfully built 881377cb3208
Successfully tagged wildfly-javaeedemo:latest

$ docker images
REPOSITORY           TAG                 IMAGE ID            CREATED             SIZE
wildfly-javaeedemo   latest              881377cb3208        6 hours ago         745MB
wildfly-admin        latest              3bd0faa37bfe        7 hours ago         745MB
Start the container:
$ docker run -d -p 8080 wildfly-javaeedemo

$ docker ps
CONTAINER ID        IMAGE                COMMAND                  CREATED             STATUS              PORTS                      NAMES
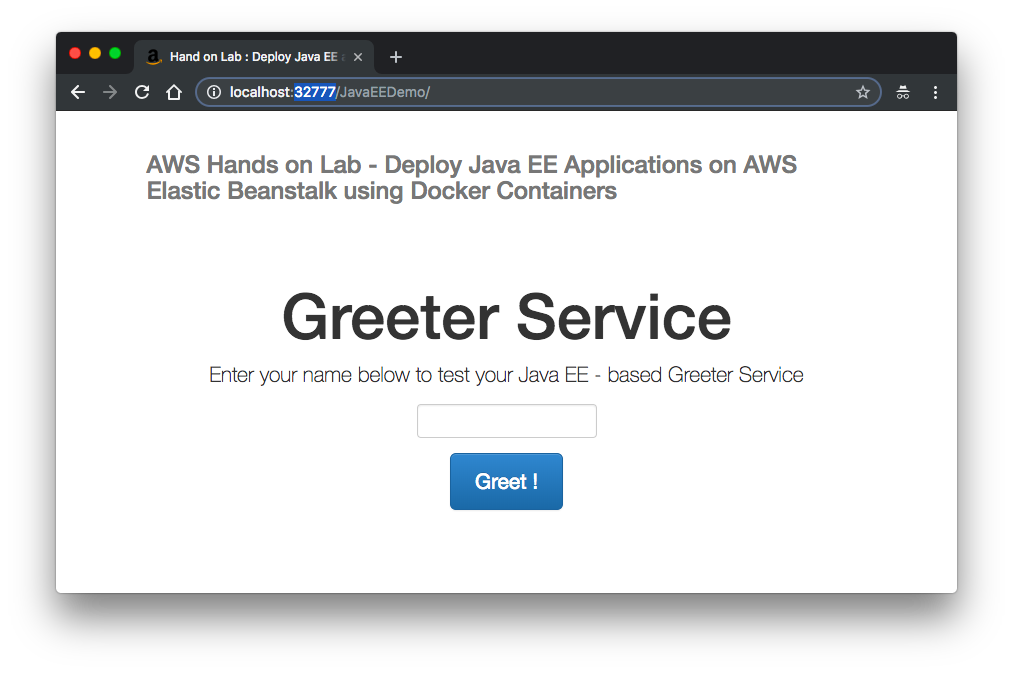
c77c20085710        wildfly-javaeedemo   "/opt/jboss/wildfly/…"   3 seconds ago       Up 2 seconds        0.0.0.0:32777->8080/tcp    clever_lalande
The "-p 8080" tells all traffic with port 8080 should be forwarded to the container port 8080. From now on, the port 9090 will not be used in this post (no 9090 in the output above, actually exposed from the base image but not mapped to host port).
We need to create Dockerrun.aws.json file. It describes how to deploy a Docker container as an AWS Elastic Beanstalk application.
We can provide BeanStalk with the Dockerrun.aws.json only or together with a Dockerfile in a .zip file.
When we provide both files, the Dockerfile builds the Docker image and the Dockerrun.aws.json file provides additional information for deployment.
We'll use the Dockerfile of the previous section.
The new javaee_demo/Dockerrun.aws.json should look like this:
{
  "AWSEBDockerrunVersion": "1",
  "Ports": [
    { "ContainerPort": "8080" }
  ],
  "Logging": "/opt/jboss/wildfly/standalone/log"
}
The { "ContainerPort": "8080" } tells BeanStalk which port to map local 80 port to. It has to match the port number used by the EXPOSE instruction in the Dockerfile.
Next, we want to initialize BeanStalk via command line tool (eb).
$ eb init

Select a default region
1) us-east-1 : US East (N. Virginia)
2) us-west-1 : US West (N. California)
3) us-west-2 : US West (Oregon)
4) eu-west-1 : EU (Ireland)
5) eu-central-1 : EU (Frankfurt)
6) ap-south-1 : Asia Pacific (Mumbai)
7) ap-southeast-1 : Asia Pacific (Singapore)
8) ap-southeast-2 : Asia Pacific (Sydney)
9) ap-northeast-1 : Asia Pacific (Tokyo)
10) ap-northeast-2 : Asia Pacific (Seoul)
11) sa-east-1 : South America (Sao Paulo)
12) cn-north-1 : China (Beijing)
13) cn-northwest-1 : China (Ningxia)
14) us-east-2 : US East (Ohio)
15) ca-central-1 : Canada (Central)
16) eu-west-2 : EU (London)
17) eu-west-3 : EU (Paris)
18) eu-north-1 : EU (Stockholm)
(default is 3): 1

Select an application to use
1) javaee_demo
2) my-bean
3) [ Create new Application ]
(default is 3): 1
The output should be similar to the above.
The next step is to start the environment we just initialized. Let's create the JavaEEDemo development environment. It may take couple of minutes:
$ eb create javaeedemo-de
Creating application version archive "app-190328_225152".
Uploading javaee_demo/app-190328_225152.zip to S3. This may take a while.
Upload Complete.
Environment details for: javaeedemo-dev
  Application name: javaee_demo
  Region: us-east-1
  Deployed Version: app-190328_225152
  Environment ID: e-nmpeq48h3g
  Platform: arn:aws:elasticbeanstalk:us-east-1::platform/Docker running on 64bit Amazon Linux/2.12.9
  Tier: WebServer-Standard-1.0
  CNAME: UNKNOWN
  Updated: 2019-03-29 05:51:57.424000+00:00
Printing Status:
2019-03-29 05:51:56    INFO    createEnvironment is starting.
2019-03-29 05:51:57    INFO    Using elasticbeanstalk-us-east-1-526262051452 as Amazon S3 storage bucket for environment data.
2019-03-29 05:52:18    INFO    Created load balancer named: awseb-e-n-AWSEBLoa-FLYB5S034NIC
2019-03-29 05:52:18    INFO    Created security group named: awseb-e-nmpeq48h3g-stack-AWSEBSecurityGroup-BW6DVMQF2OZL
2019-03-29 05:52:34    INFO    Created Auto Scaling launch configuration named: awseb-e-nmpeq48h3g-stack-AWSEBAutoScalingLaunchConfiguration-S5HX9PGP2GRF
2019-03-29 05:53:37    INFO    Created Auto Scaling group named: awseb-e-nmpeq48h3g-stack-AWSEBAutoScalingGroup-10A2VCZQ1HU4U
2019-03-29 05:53:37    INFO    Waiting for EC2 instances to launch. This may take a few minutes.
2019-03-29 05:53:37    INFO    Created Auto Scaling group policy named: arn:aws:autoscaling:us-east-1:526262051452:scalingPolicy:3d2fcad8-f3cb-4d60-9397-019639541898:autoScalingGroupName/awseb-e-nmpeq48h3g-stack-AWSEBAutoScalingGroup-10A2VCZQ1HU4U:policyName/awseb-e-nmpeq48h3g-stack-AWSEBAutoScalingScaleDownPolicy-16XE4C7OCMJUW
2019-03-29 05:53:37    INFO    Created Auto Scaling group policy named: arn:aws:autoscaling:us-east-1:526262051452:scalingPolicy:0e849b6d-35e7-4274-9719-b35223afb1f0:autoScalingGroupName/awseb-e-nmpeq48h3g-stack-AWSEBAutoScalingGroup-10A2VCZQ1HU4U:policyName/awseb-e-nmpeq48h3g-stack-AWSEBAutoScalingScaleUpPolicy-51CEFDUO065K
2019-03-29 05:53:37    INFO    Created CloudWatch alarm named: awseb-e-nmpeq48h3g-stack-AWSEBCloudwatchAlarmHigh-5A72CPJPNXAO
2019-03-29 05:53:37    INFO    Created CloudWatch alarm named: awseb-e-nmpeq48h3g-stack-AWSEBCloudwatchAlarmLow-JJTBVFF70ZT5
2019-03-29 05:54:19    INFO    Successfully pulled jboss/wildfly:latest
2019-03-29 05:54:35    INFO    Successfully built aws_beanstalk/staging-app
2019-03-29 05:54:45    INFO    Docker container b8899e784cd5 is running aws_beanstalk/current-app.
2019-03-29 05:55:21    INFO    Application available at javaeedemo-dev.us3kyfy4j8.us-east-1.elasticbeanstalk.com.
2019-03-29 05:55:22    INFO    Successfully launched environment: javaeedemo-dev
Here is the partial list what the BeanStalk does:
- Create a load balancer and autoscaling group
- Launch an EC2 instance
- Install and configure Docker
- Deploy our Dockerfile and Dockerrun.aws.json files
- Build a Docker image, and run the Docker container
- Install nginx as HTTP proxy and configure it to relay traffic on port 80 to the container
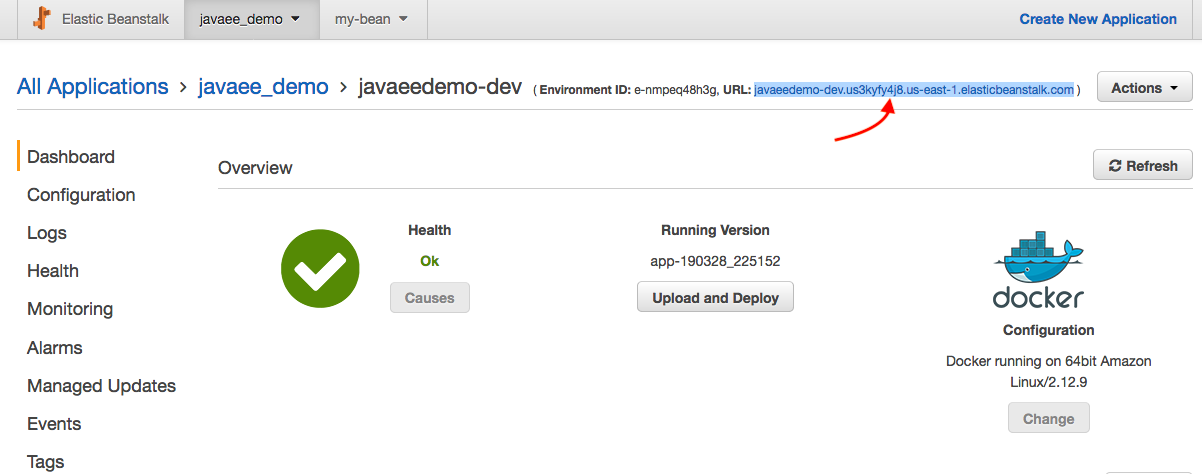
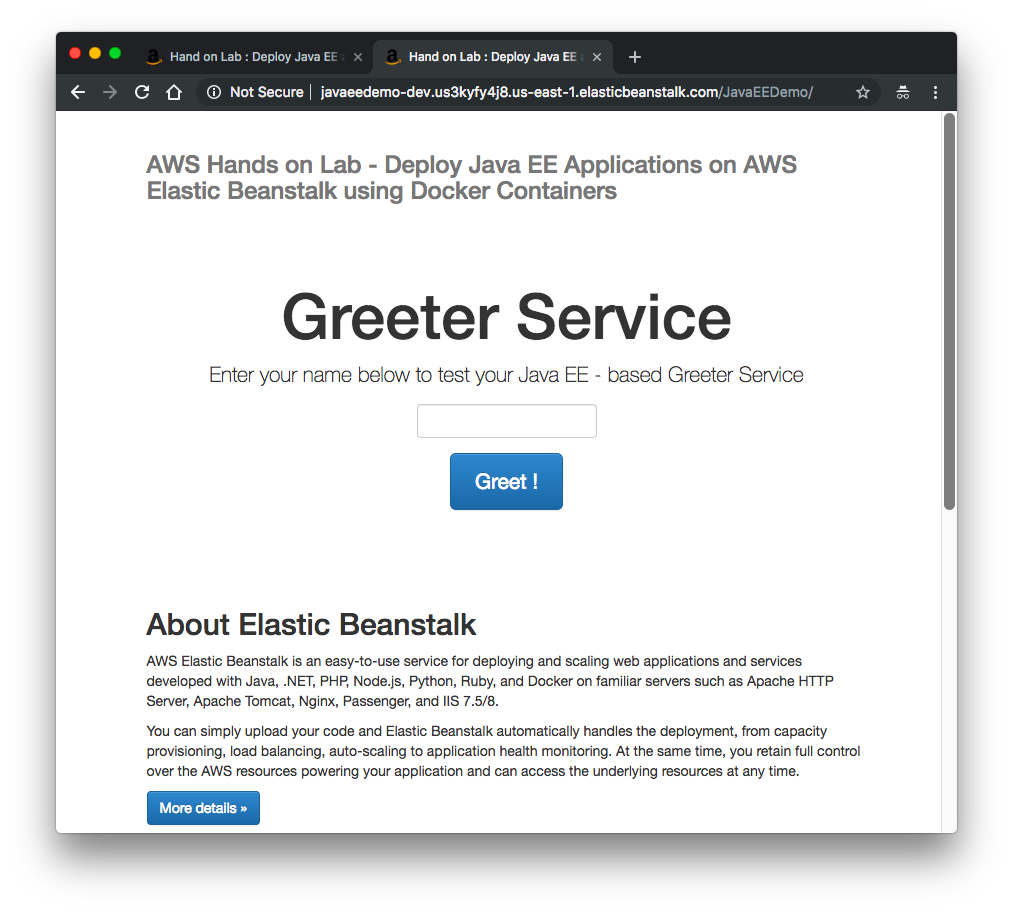
Construct url : grab the url and append /JavaEEDemo:
Docker & K8s
- Docker install on Amazon Linux AMI
- Docker install on EC2 Ubuntu 14.04
- Docker container vs Virtual Machine
- Docker install on Ubuntu 14.04
- Docker Hello World Application
- Nginx image - share/copy files, Dockerfile
- Working with Docker images : brief introduction
- Docker image and container via docker commands (search, pull, run, ps, restart, attach, and rm)
- More on docker run command (docker run -it, docker run --rm, etc.)
- Docker Networks - Bridge Driver Network
- Docker Persistent Storage
- File sharing between host and container (docker run -d -p -v)
- Linking containers and volume for datastore
- Dockerfile - Build Docker images automatically I - FROM, MAINTAINER, and build context
- Dockerfile - Build Docker images automatically II - revisiting FROM, MAINTAINER, build context, and caching
- Dockerfile - Build Docker images automatically III - RUN
- Dockerfile - Build Docker images automatically IV - CMD
- Dockerfile - Build Docker images automatically V - WORKDIR, ENV, ADD, and ENTRYPOINT
- Docker - Apache Tomcat
- Docker - NodeJS
- Docker - NodeJS with hostname
- Docker Compose - NodeJS with MongoDB
- Docker - Prometheus and Grafana with Docker-compose
- Docker - StatsD/Graphite/Grafana
- Docker - Deploying a Java EE JBoss/WildFly Application on AWS Elastic Beanstalk Using Docker Containers
- Docker : NodeJS with GCP Kubernetes Engine
- Docker : Jenkins Multibranch Pipeline with Jenkinsfile and Github
- Docker : Jenkins Master and Slave
- Docker - ELK : ElasticSearch, Logstash, and Kibana
- Docker - ELK 7.6 : Elasticsearch on Centos 7
- Docker - ELK 7.6 : Filebeat on Centos 7
- Docker - ELK 7.6 : Logstash on Centos 7
- Docker - ELK 7.6 : Kibana on Centos 7
- Docker - ELK 7.6 : Elastic Stack with Docker Compose
- Docker - Deploy Elastic Cloud on Kubernetes (ECK) via Elasticsearch operator on minikube
- Docker - Deploy Elastic Stack via Helm on minikube
- Docker Compose - A gentle introduction with WordPress
- Docker Compose - MySQL
- MEAN Stack app on Docker containers : micro services
- MEAN Stack app on Docker containers : micro services via docker-compose
- Docker Compose - Hashicorp's Vault and Consul Part A (install vault, unsealing, static secrets, and policies)
- Docker Compose - Hashicorp's Vault and Consul Part B (EaaS, dynamic secrets, leases, and revocation)
- Docker Compose - Hashicorp's Vault and Consul Part C (Consul)
- Docker Compose with two containers - Flask REST API service container and an Apache server container
- Docker compose : Nginx reverse proxy with multiple containers
- Docker & Kubernetes : Envoy - Getting started
- Docker & Kubernetes : Envoy - Front Proxy
- Docker & Kubernetes : Ambassador - Envoy API Gateway on Kubernetes
- Docker Packer
- Docker Cheat Sheet
- Docker Q & A #1
- Kubernetes Q & A - Part I
- Kubernetes Q & A - Part II
- Docker - Run a React app in a docker
- Docker - Run a React app in a docker II (snapshot app with nginx)
- Docker - NodeJS and MySQL app with React in a docker
- Docker - Step by Step NodeJS and MySQL app with React - I
- Installing LAMP via puppet on Docker
- Docker install via Puppet
- Nginx Docker install via Ansible
- Apache Hadoop CDH 5.8 Install with QuickStarts Docker
- Docker - Deploying Flask app to ECS
- Docker Compose - Deploying WordPress to AWS
- Docker - WordPress Deploy to ECS with Docker-Compose (ECS-CLI EC2 type)
- Docker - WordPress Deploy to ECS with Docker-Compose (ECS-CLI Fargate type)
- Docker - ECS Fargate
- Docker - AWS ECS service discovery with Flask and Redis
- Docker & Kubernetes : minikube
- Docker & Kubernetes 2 : minikube Django with Postgres - persistent volume
- Docker & Kubernetes 3 : minikube Django with Redis and Celery
- Docker & Kubernetes 4 : Django with RDS via AWS Kops
- Docker & Kubernetes : Kops on AWS
- Docker & Kubernetes : Ingress controller on AWS with Kops
- Docker & Kubernetes : HashiCorp's Vault and Consul on minikube
- Docker & Kubernetes : HashiCorp's Vault and Consul - Auto-unseal using Transit Secrets Engine
- Docker & Kubernetes : Persistent Volumes & Persistent Volumes Claims - hostPath and annotations
- Docker & Kubernetes : Persistent Volumes - Dynamic volume provisioning
- Docker & Kubernetes : DaemonSet
- Docker & Kubernetes : Secrets
- Docker & Kubernetes : kubectl command
- Docker & Kubernetes : Assign a Kubernetes Pod to a particular node in a Kubernetes cluster
- Docker & Kubernetes : Configure a Pod to Use a ConfigMap
- AWS : EKS (Elastic Container Service for Kubernetes)
- Docker & Kubernetes : Run a React app in a minikube
- Docker & Kubernetes : Minikube install on AWS EC2
- Docker & Kubernetes : Cassandra with a StatefulSet
- Docker & Kubernetes : Terraform and AWS EKS
- Docker & Kubernetes : Pods and Service definitions
- Docker & Kubernetes : Service IP and the Service Type
- Docker & Kubernetes : Kubernetes DNS with Pods and Services
- Docker & Kubernetes : Headless service and discovering pods
- Docker & Kubernetes : Scaling and Updating application
- Docker & Kubernetes : Horizontal pod autoscaler on minikubes
- Docker & Kubernetes : From a monolithic app to micro services on GCP Kubernetes
- Docker & Kubernetes : Rolling updates
- Docker & Kubernetes : Deployments to GKE (Rolling update, Canary and Blue-green deployments)
- Docker & Kubernetes : Slack Chat Bot with NodeJS on GCP Kubernetes
- Docker & Kubernetes : Continuous Delivery with Jenkins Multibranch Pipeline for Dev, Canary, and Production Environments on GCP Kubernetes
- Docker & Kubernetes : NodePort vs LoadBalancer vs Ingress
- Docker & Kubernetes : MongoDB / MongoExpress on Minikube
- Docker & Kubernetes : Load Testing with Locust on GCP Kubernetes
- Docker & Kubernetes : MongoDB with StatefulSets on GCP Kubernetes Engine
- Docker & Kubernetes : Nginx Ingress Controller on Minikube
- Docker & Kubernetes : Setting up Ingress with NGINX Controller on Minikube (Mac)
- Docker & Kubernetes : Nginx Ingress Controller for Dashboard service on Minikube
- Docker & Kubernetes : Nginx Ingress Controller on GCP Kubernetes
- Docker & Kubernetes : Kubernetes Ingress with AWS ALB Ingress Controller in EKS
- Docker & Kubernetes : Setting up a private cluster on GCP Kubernetes
- Docker & Kubernetes : Kubernetes Namespaces (default, kube-public, kube-system) and switching namespaces (kubens)
- Docker & Kubernetes : StatefulSets on minikube
- Docker & Kubernetes : RBAC
- Docker & Kubernetes Service Account, RBAC, and IAM
- Docker & Kubernetes - Kubernetes Service Account, RBAC, IAM with EKS ALB, Part 1
- Docker & Kubernetes : Helm Chart
- Docker & Kubernetes : My first Helm deploy
- Docker & Kubernetes : Readiness and Liveness Probes
- Docker & Kubernetes : Helm chart repository with Github pages
- Docker & Kubernetes : Deploying WordPress and MariaDB with Ingress to Minikube using Helm Chart
- Docker & Kubernetes : Deploying WordPress and MariaDB to AWS using Helm 2 Chart
- Docker & Kubernetes : Deploying WordPress and MariaDB to AWS using Helm 3 Chart
- Docker & Kubernetes : Helm Chart for Node/Express and MySQL with Ingress
- Docker & Kubernetes : Deploy Prometheus and Grafana using Helm and Prometheus Operator - Monitoring Kubernetes node resources out of the box
- Docker & Kubernetes : Deploy Prometheus and Grafana using kube-prometheus-stack Helm Chart
- Docker & Kubernetes : Istio (service mesh) sidecar proxy on GCP Kubernetes
- Docker & Kubernetes : Istio on EKS
- Docker & Kubernetes : Istio on Minikube with AWS EC2 for Bookinfo Application
- Docker & Kubernetes : Deploying .NET Core app to Kubernetes Engine and configuring its traffic managed by Istio (Part I)
- Docker & Kubernetes : Deploying .NET Core app to Kubernetes Engine and configuring its traffic managed by Istio (Part II - Prometheus, Grafana, pin a service, split traffic, and inject faults)
- Docker & Kubernetes : Helm Package Manager with MySQL on GCP Kubernetes Engine
- Docker & Kubernetes : Deploying Memcached on Kubernetes Engine
- Docker & Kubernetes : EKS Control Plane (API server) Metrics with Prometheus
- Docker & Kubernetes : Spinnaker on EKS with Halyard
- Docker & Kubernetes : Continuous Delivery Pipelines with Spinnaker and Kubernetes Engine
- Docker & Kubernetes : Multi-node Local Kubernetes cluster : Kubeadm-dind (docker-in-docker)
- Docker & Kubernetes : Multi-node Local Kubernetes cluster : Kubeadm-kind (k8s-in-docker)
- Docker & Kubernetes : nodeSelector, nodeAffinity, taints/tolerations, pod affinity and anti-affinity - Assigning Pods to Nodes
- Docker & Kubernetes : Jenkins-X on EKS
- Docker & Kubernetes : ArgoCD App of Apps with Heml on Kubernetes
- Docker & Kubernetes : ArgoCD on Kubernetes cluster
- Docker & Kubernetes : GitOps with ArgoCD for Continuous Delivery to Kubernetes clusters (minikube) - guestbook
Ph.D. / Golden Gate Ave, San Francisco / Seoul National Univ / Carnegie Mellon / UC Berkeley / DevOps / Deep Learning / Visualization