Jenkins: Jenkinsfile with Classsic / Blue Ocean

The definition of a Jenkins Pipeline is typically written into a text file (called a Jenkinsfile) which in turn is checked into a project's source control repository.
Now that Jenkins is running, go to localhost:8080, and create a basic Pipeline through the Jenkins classic UI:
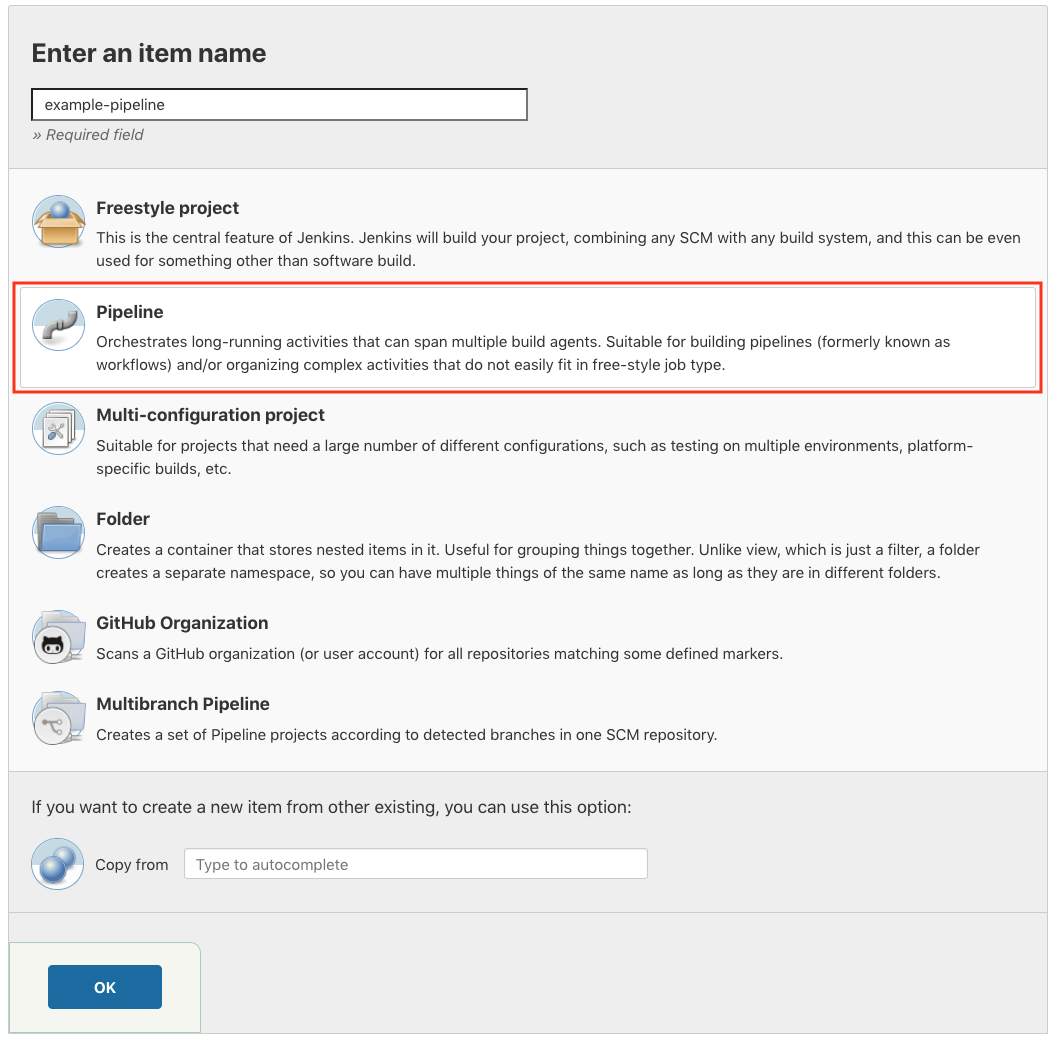
Scroll down and click Pipeline, then click OK at the end of the page to open the Pipeline configuration page.
In the Pipeline section, ensure that the Definition field indicates the "Pipeline script" option. Then, enter the following Pipeline Jenkinsfile into the Script text area:
pipeline {
    agent any
    stages {
        stage('Stage 1') {
            steps {
                echo 'Hello world!'
            }
        }
    }
}
The agent instructs Jenkins to allocate an executor (on any available agent/node in the Jenkins environment) and workspace for the entire Pipeline.
Note that we can also select from canned Scripted Pipeline examples from the "try sample Pipeline" option at the top right of the Script text area. Be aware that there are no canned Declarative Pipeline examples available from this field.
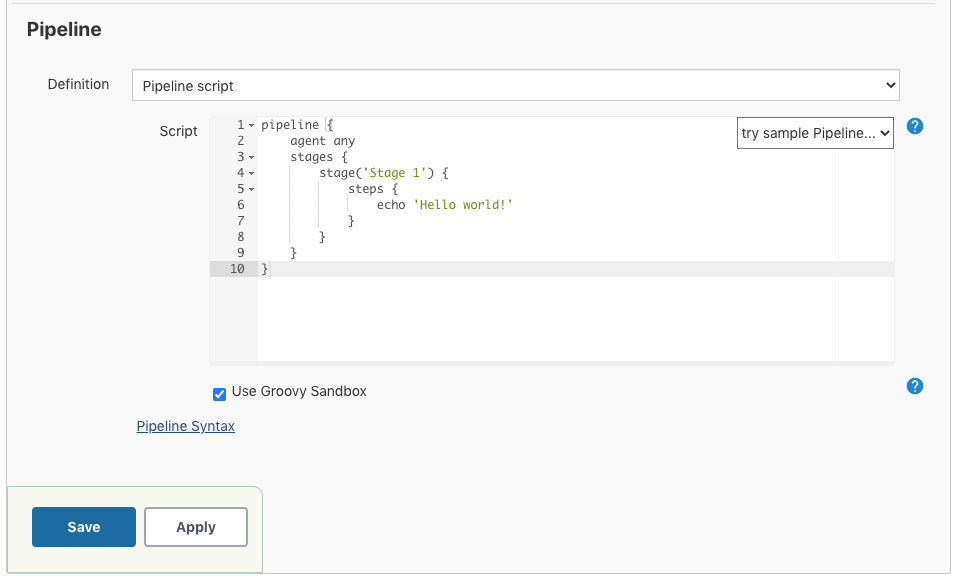
Click "Save" to open the Pipeline project/item view page.
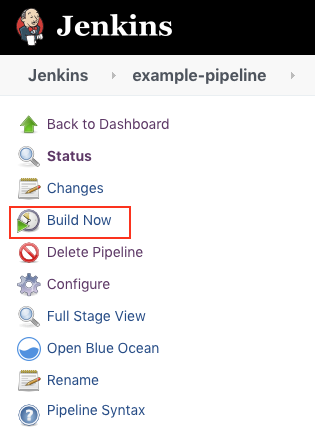
On this page, click "Build Now" on the left to run the Pipeline:
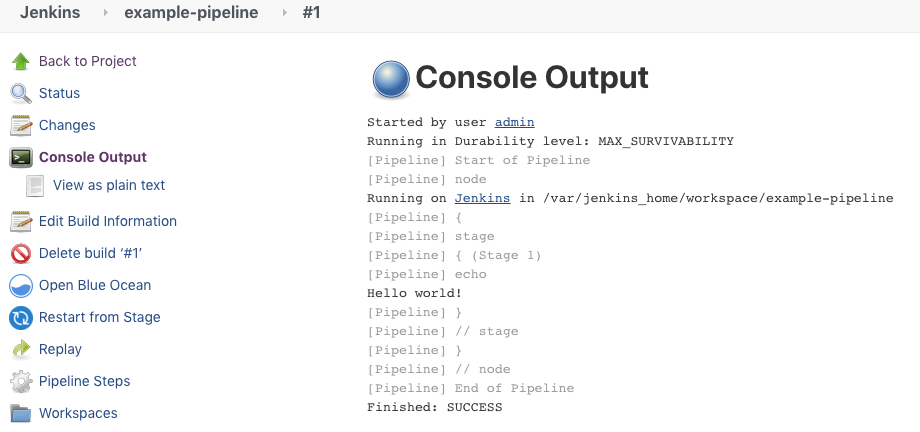
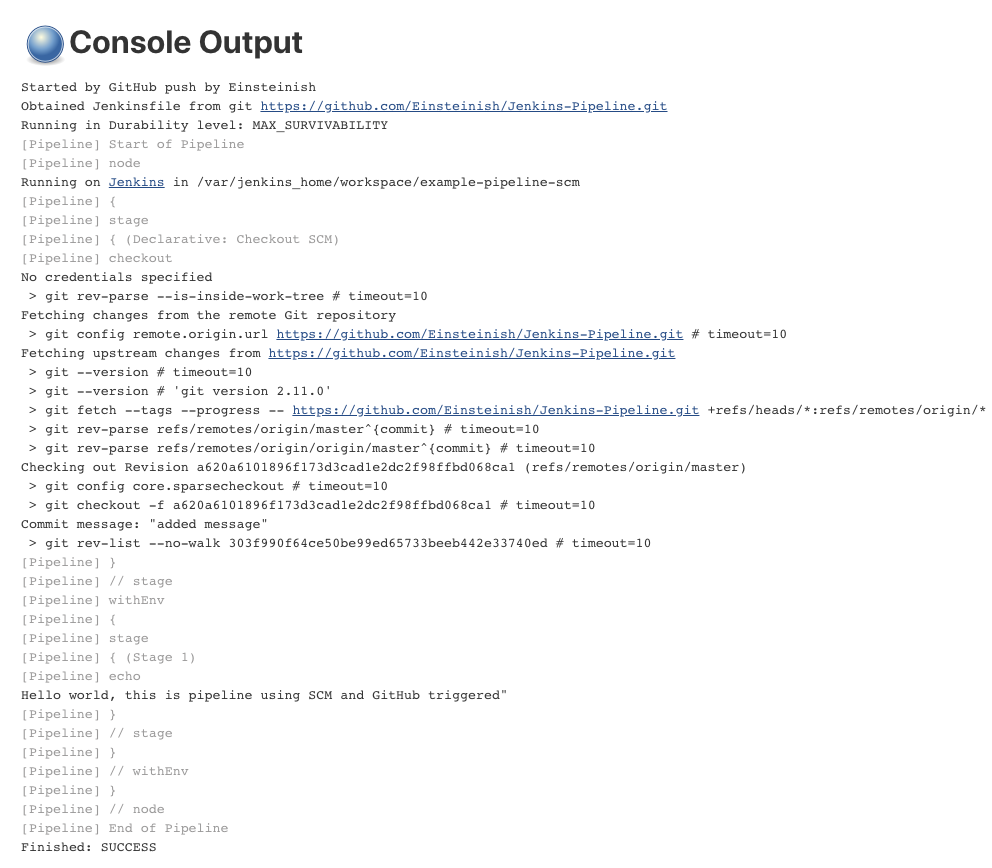
Under "Build History" on the left, click #1 to access the details for this particular Pipeline run. Then, click "Console Output" to see the full output from the Pipeline run. The following output shows a successful run of our Pipeline:
Note that it is recommended that we use Blue Ocean or source control to define our Jenkinsfile.
Complex Pipelines are difficult to write and maintain within the classic UI’s Script text area of the Pipeline configuration page.
Jenkinsfiles entered into the Script text area of Pipeline projects are stored by Jenkins itself, within the Jenkins home directory. So, for greater control and flexibility over our Pipeline, particularly for projects in source control, it is recommended that we use Blue Ocean or source control to define our Jenkinsfile.
To make this easier, Jenkins can then check out our Jenkinsfile from source control as part of our Pipeline project's build process and then proceed to execute our Pipeline.
To configure our Pipeline project to use a Jenkinsfile from source control:
- Follow the procedure above for defining our Pipeline through the classic UI until we reach step 5 (accessing the Pipeline section on the Pipeline configuration page).
- From the Definition field, choose the Pipeline script from SCM option.
- From the SCM field, choose the type of source control system of the repository containing our Jenkinsfile.
- Complete the fields specific to our repository’s source control system.
- In the Script Path field, specify the location (and name) of your Jenkinsfile. This location is the one that Jenkins checks out/clones the repository containing our Jenkinsfile, which should match that of the repository's file structure. The default value of this field assumes that our Jenkinsfile is named "Jenkinsfile" and is located at the root of the repository.
- We can manually build the project and get the Jenkinsfile from the git repo (clikc "Save" and then hit "Build Now").
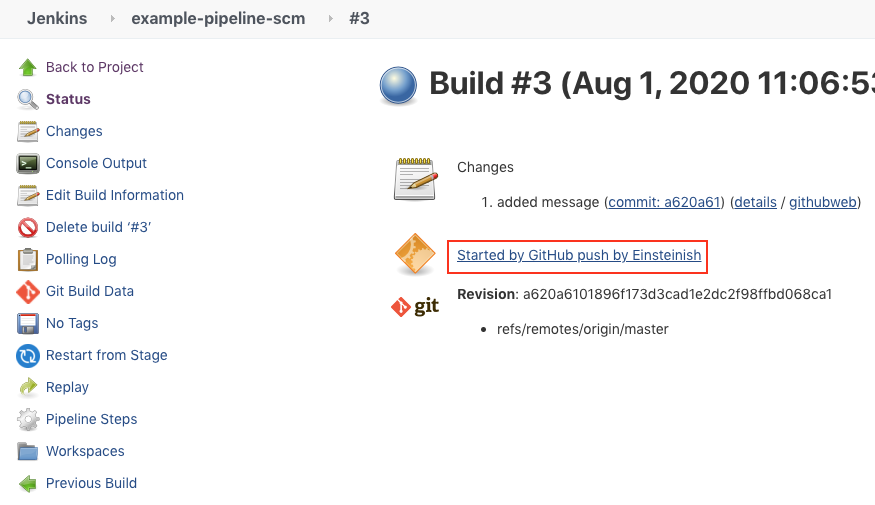
- Or the Pipeline is configured with an SCM polling trigger as we've done, the build starts whenever there is a push to our repository, a new build is triggered. To get things done this way, we need to setup 'github-webhook' in our GitHub:
- Here we can see it's been triggered successfully:
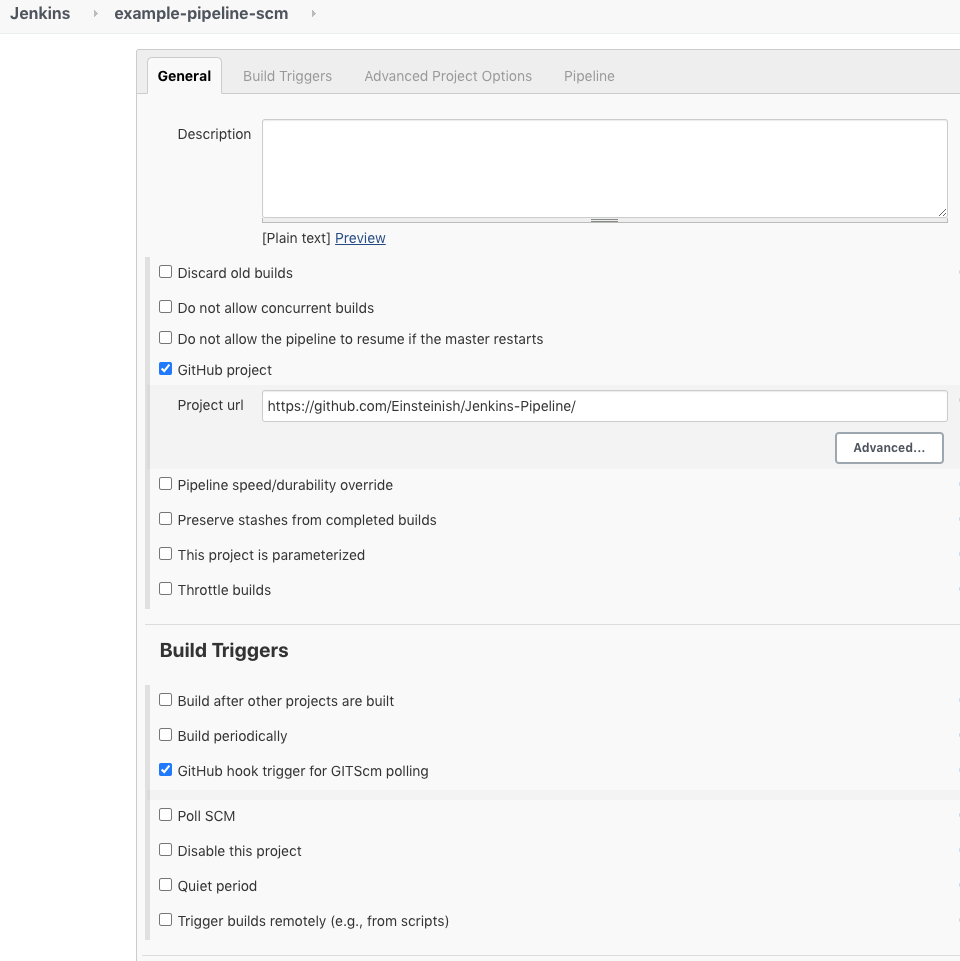
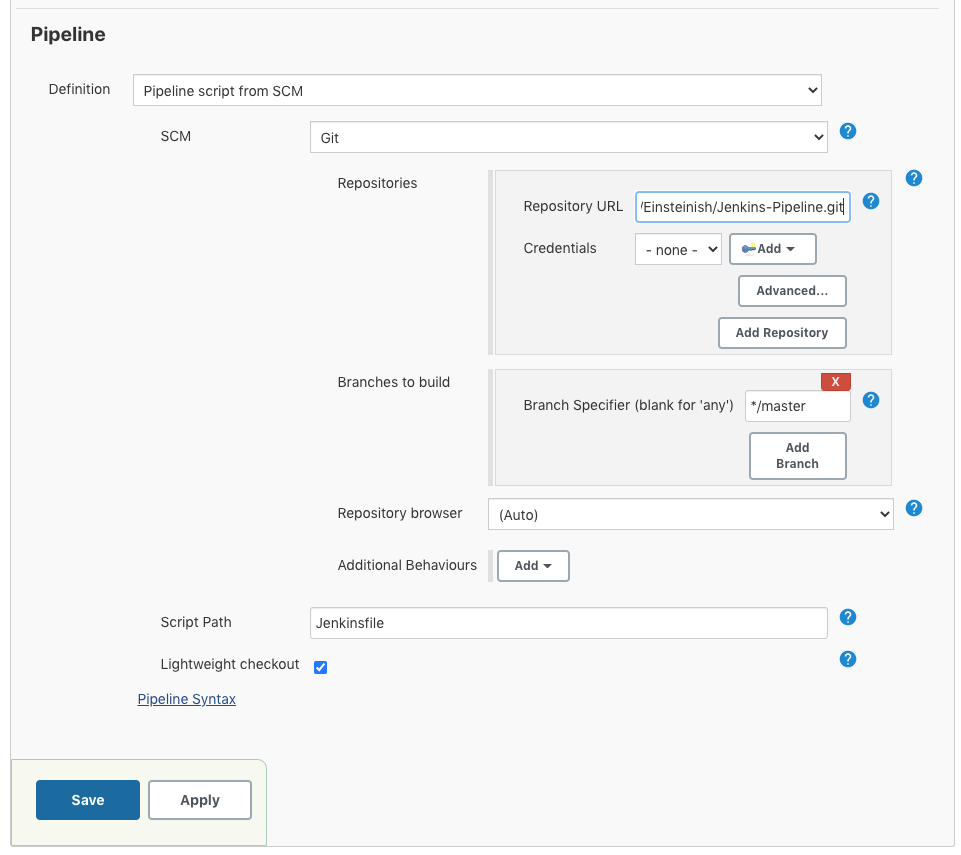
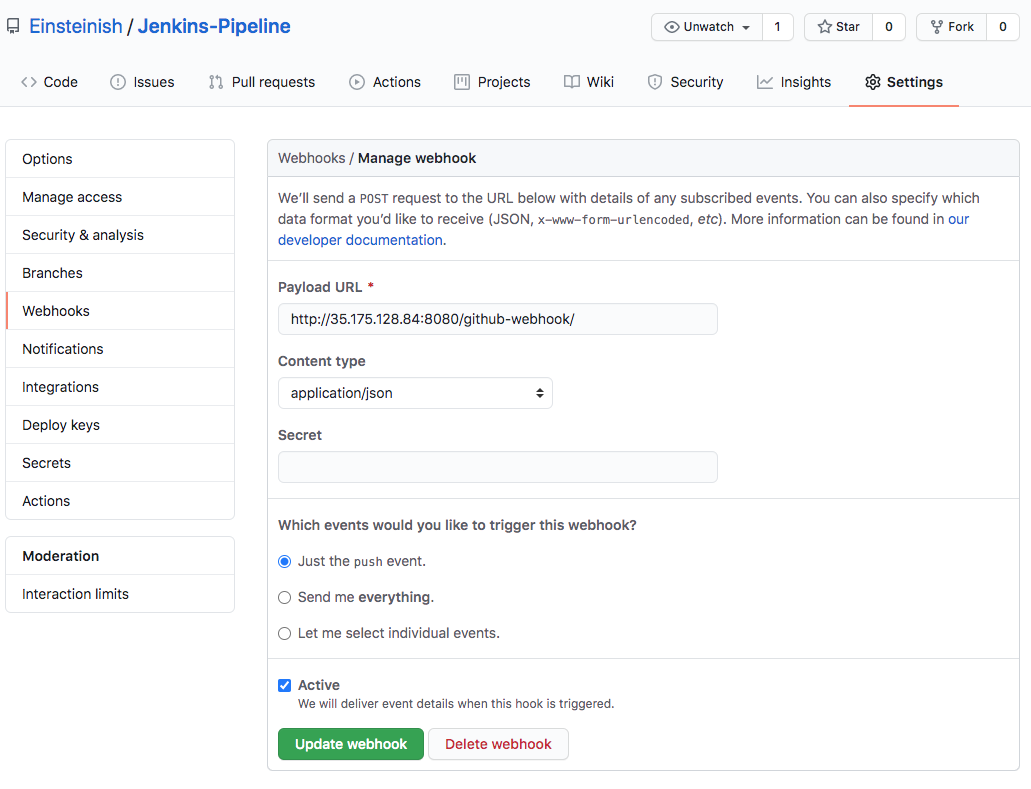
Note that in the "PayLoad URL" we put "jenkins url" + "'github-webhook'!
We need to install "Blue Ocean" from the "Plugin Manager":

After the installation, we should see it from the menu:
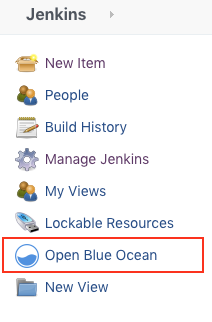
We can access the Blue Ocean UI by clicking "Open Blue Ocean".
The following steps are well explained in Getting started with Blue Ocean - Creating a Pipeline.
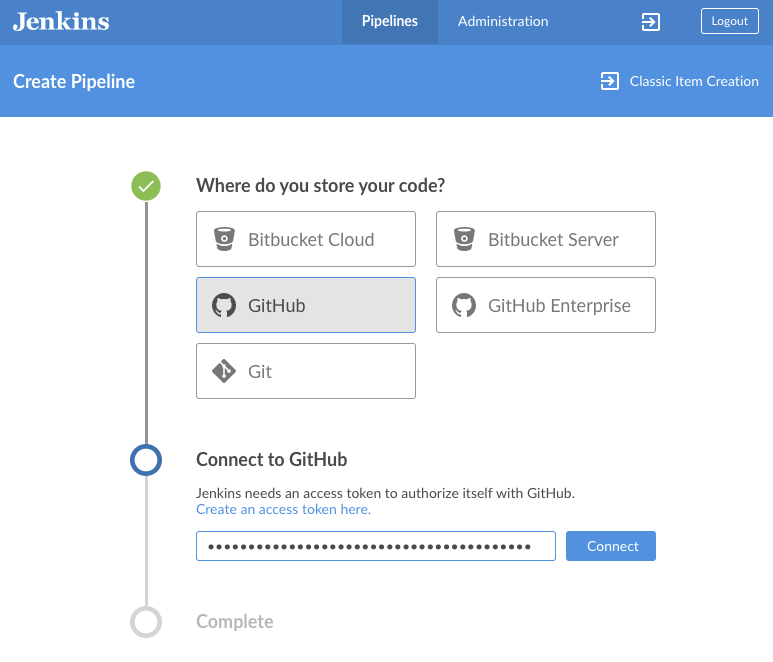
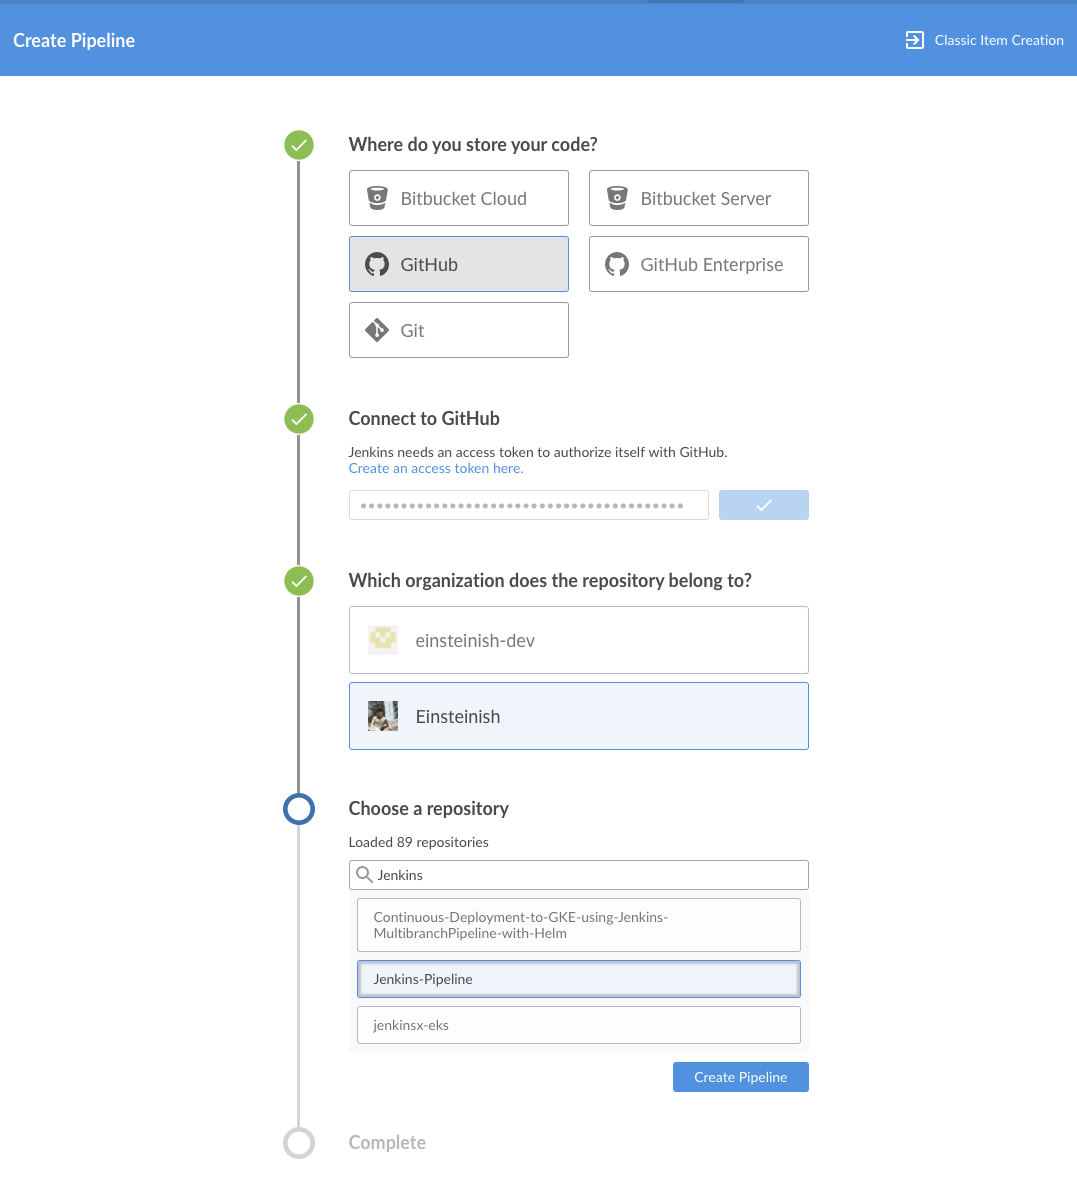

Initially, it failed (run #1), but I rerun it (run #2). Then, at a new push to Github, it ran automatically.
Jenkins
Ph.D. / Golden Gate Ave, San Francisco / Seoul National Univ / Carnegie Mellon / UC Berkeley / DevOps / Deep Learning / Visualization