Puppet with Amazon AWS I

Puppet
Puppet is produced by Puppet Labs, founded by Luke Kanies in 2005. It is written in Ruby.
Puppet arguably enjoys the biggest share among the big 4: Puppet, Chef, Ansible, Salt.
Most configuration tools (shell or Perl script) are imperative or procedural. They describe how things should be done rather than the desired end state-for example, most custom scripts used to manage configuration would be considered imperative.
However, Puppet uses a declarative language. Puppet just declares what the state of their hosts should be: what packages should be installed, what services should be running, and so on. With Puppet, the system administrator doesn't care how this state is achieved-that's Puppet's problem. Instead, we abstract our host's configuration into resources.
The following tutorials on Puppet will be focused on the puppet using Amazon AWS. We'll make two instances of puppet: master and agent. After setting up Puppet in an agent/master configuration, we run very simple HelloWorld config via Puppet manifests.
Puppet is usually deployed in a simple client-server model. The server is called a Puppet master, the
Puppet client software is called an agent, and the host itself is defined as a node.
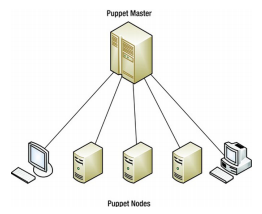
The Puppet master runs as a daemon on a host and contains the configuration required for the specific environment. The Puppet agents connect to the Puppet master through an encrypted and authenticated connection using standard SSL, and retrieve or pull any configuration to be applied.
Importantly, if the Puppet agent has no configuration available or already has the required configuration, Puppet will do nothing. Puppet will only make changes to our environment if they are required. This property is called idempotency and is a key feature of Puppet.
The usual practice is to run Puppet as a daemon and have it periodically check with the master to confirm that its configuration is up-to-date or to retrieve any new configuration. By default, the Puppet agent will check the master for new or changed configuration once every 30 minutes. We can configure this period to suit our needs.
We need to create our key pair so that we can connect to our Amazon EC2 instances. Public AMI (Amazon Machine Image) instances use a public/private key pair to log in rather than a password. The public key half of this pair is embedded in our instance, allowing us to use the private key to log in securely without a password. After we create our own AMIs, we can choose other mechanisms to securely log in to our new instances. In this step we will use AWS Management Console to create a key pair.
To generate a key pair:
- Open the Amazon EC2 console at https://console.aws.amazon.com/ec2/.
- In the top navigation bar, in the region selector, choose the region.
- In the left navigation pane, under Network and Security, click Key Pairs.
- Click Create Key Pair.
- Type 'bogo_puppet' in the new Key pair name box, and then click Yes.
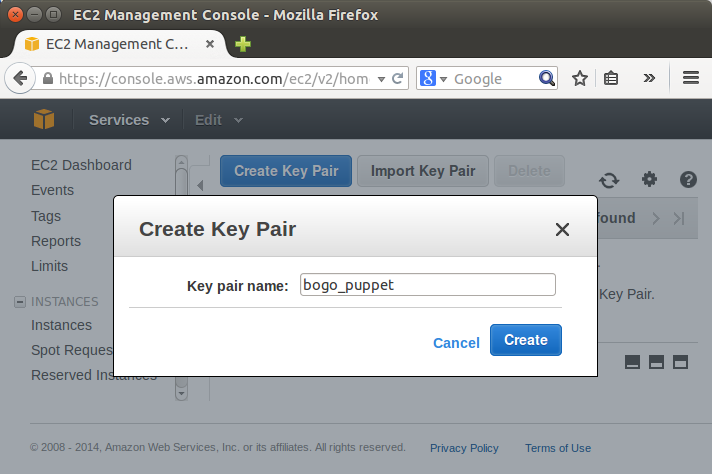
- Download the private key file, which is named bogo_puppet.pem, and keep it in a safe place. We will need it to access any instances that we launch with this key pair.
- Note:
If we lose the key pair, we cannot connect to our Amazon EC2 instances. - Puppet with Amazon AWS I - Puppet accounts
- Puppet with Amazon AWS II (ssh & puppetmaster/puppet install)
- Puppet with Amazon AWS III - Puppet running Hello World
- Puppet Code Basics - Terminology
- Puppet with Amazon AWS on CentOS 7 (I) - Master setup on EC2
- Puppet with Amazon AWS on CentOS 7 (II) - Configuring a Puppet Master Server with Passenger and Apache
- Puppet master /agent ubuntu 14.04 install on EC2 nodes
- Puppet master post install tasks - master's names and certificates setup,
- Puppet agent post install tasks - configure agent, hostnames, and sign request
- EC2 Puppet master/agent basic tasks - main manifest with a file resource/module and immediate execution on an agent node
- Setting up puppet master and agent with simple scripts on EC2 / remote install from desktop
- EC2 Puppet - Install lamp with a manifest ('puppet apply')
- EC2 Puppet - Install lamp with a module
- Puppet variable scope
- Puppet packages, services, and files
- Puppet packages, services, and files II with nginx
- Puppet templates
- Puppet creating and managing user accounts with SSH access
- Puppet Locking user accounts & deploying sudoers file
- Puppet exec resource
- Puppet classes and modules
- Puppet Forge modules
- Puppet Express
- Puppet Express 2
- Puppet 4 : Changes
- Puppet --configprint
- Puppet with Docker
- Puppet 6.0.2 install on Ubuntu 18.04
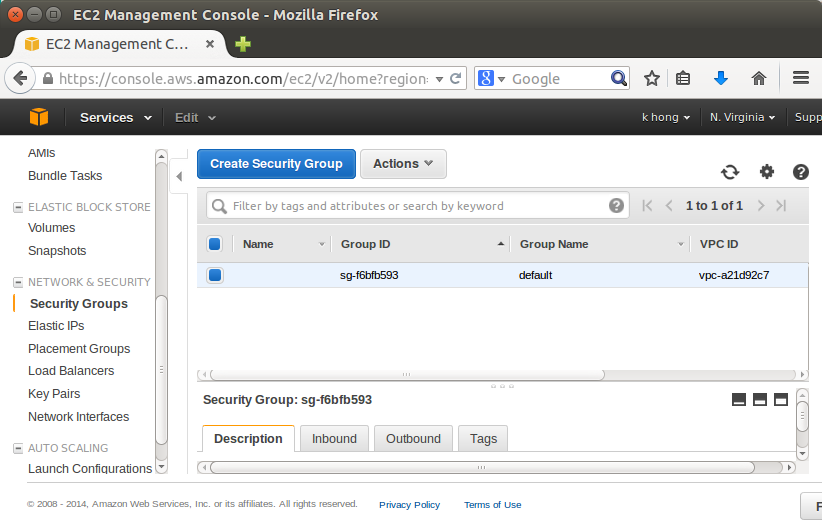
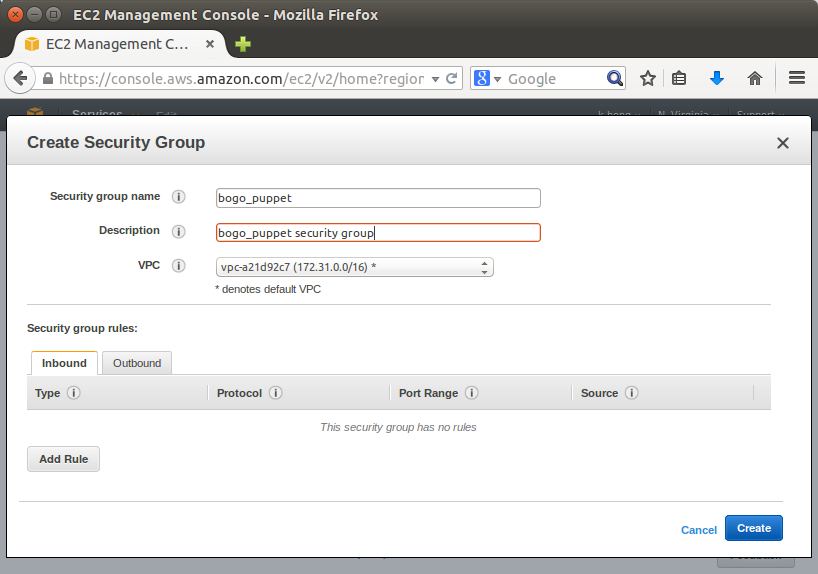
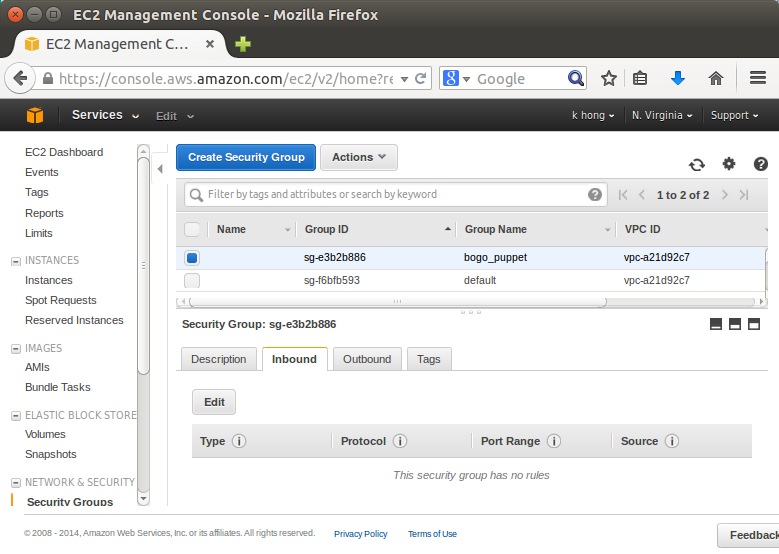
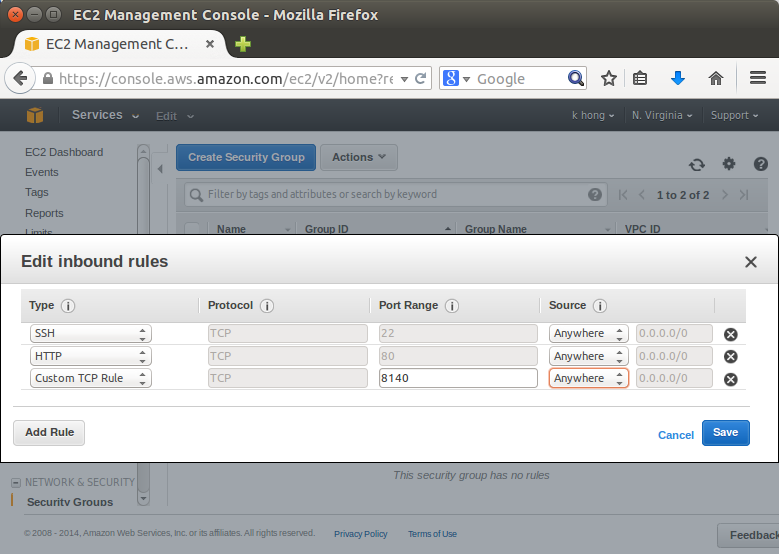
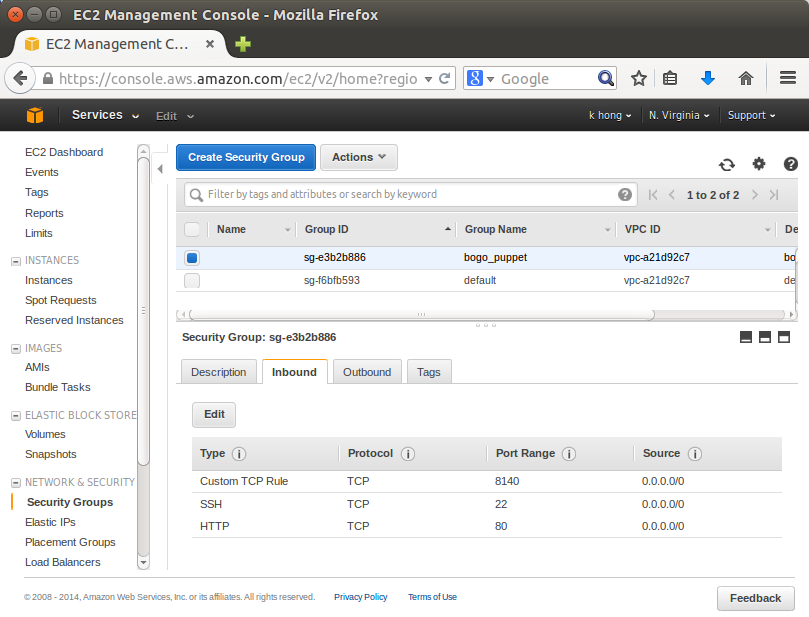
We add some ports: 22(SSH), 80(HTTP), 8140(Puppet):
Let's go to https://cloud-images.ubuntu.com/utopic/current/.
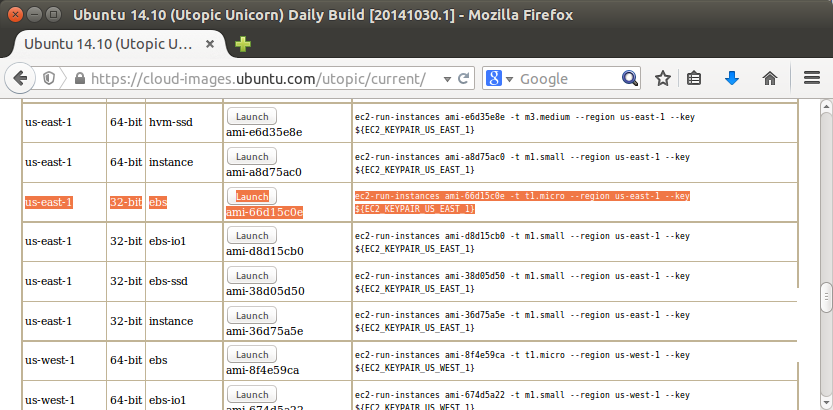
Select us-east-1 and 64 bit ebs and Launch:
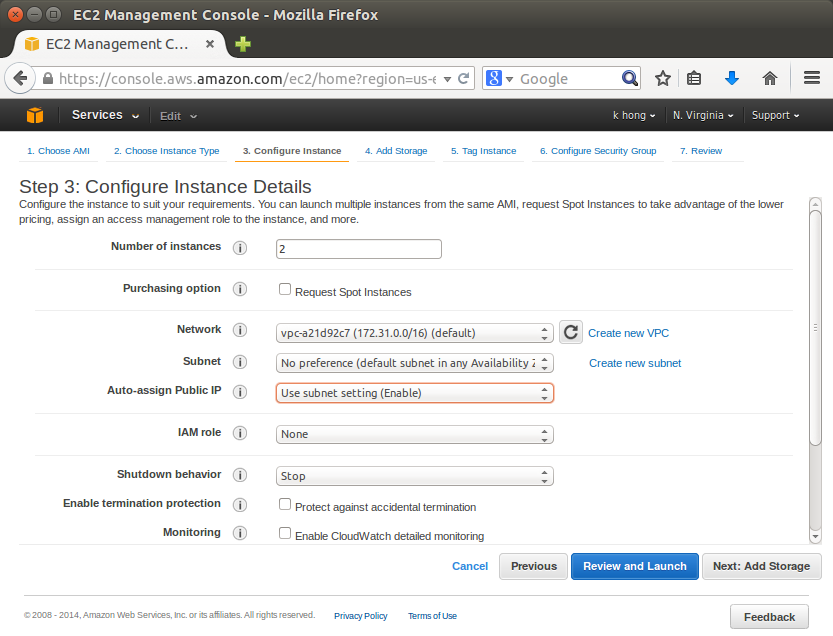
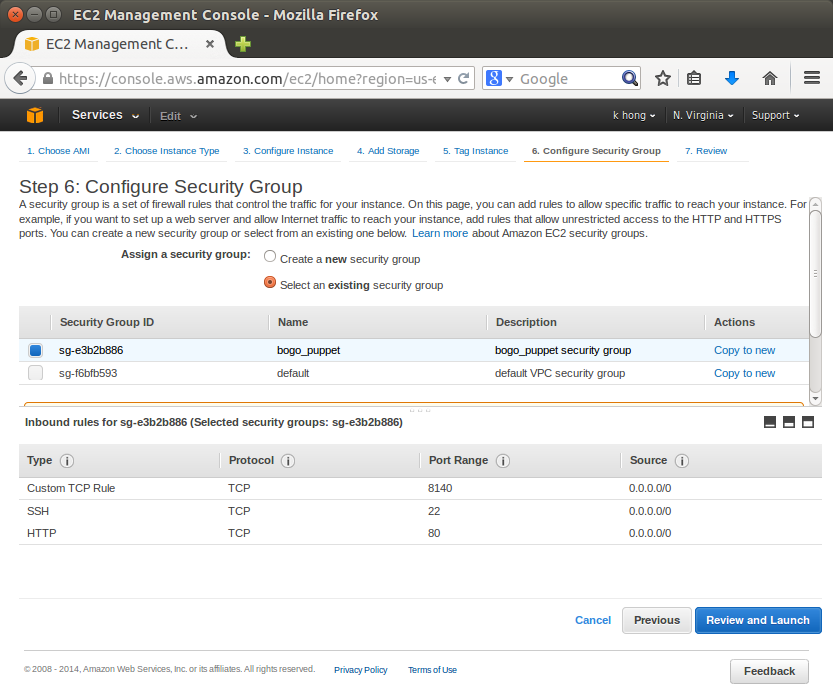
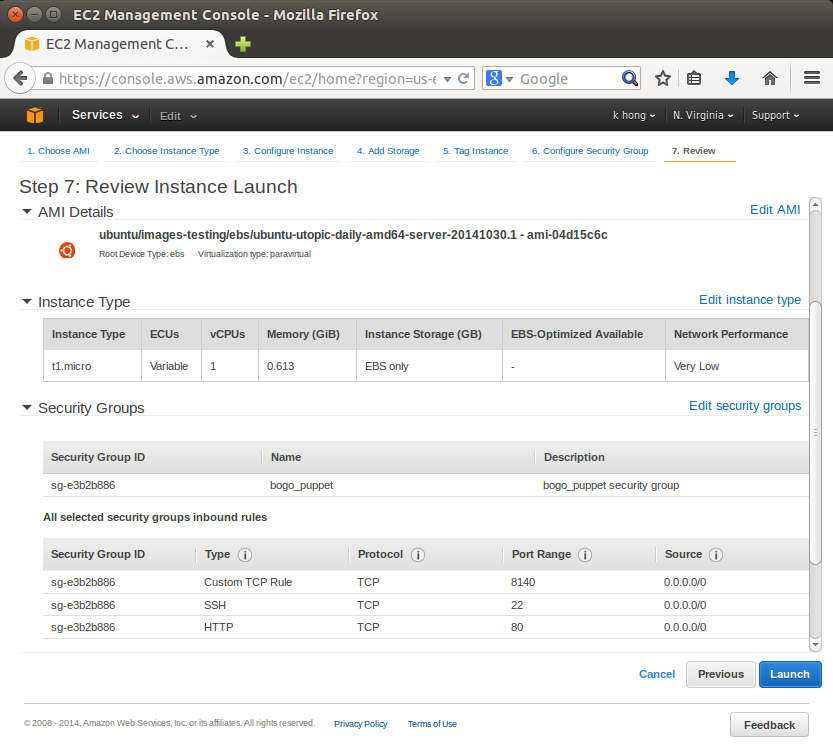
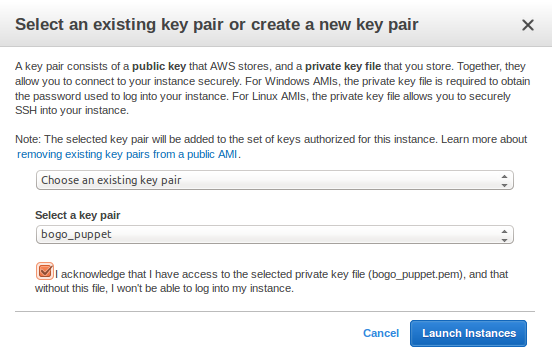
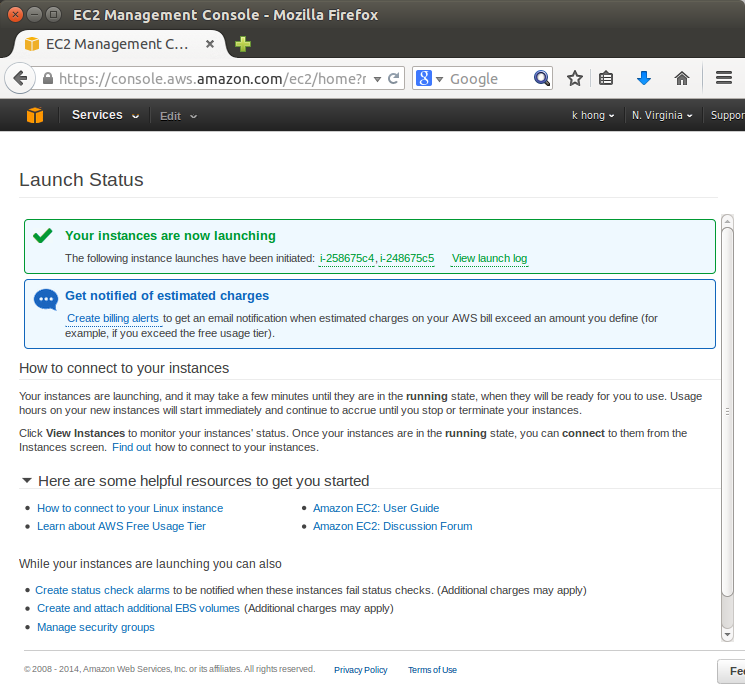
We can see our instances are currently running, and we need to name them:

To ssh to those instances, we need the following information:

By working with Amazon EC2 to manage our instances from the moment we launch them through their termination.
The following illustration represents the transitions between instance states. Notice that we can't stop and start an instance store-backed instance.
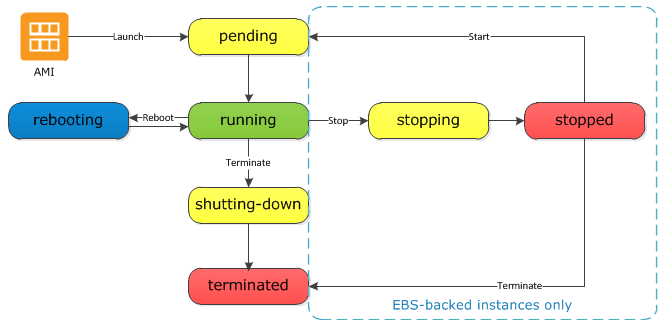
Picture from Instance Lifecycle.
When we launch an instance, it enters the pending state. The instance type that we specified at launch determines the hardware of the host computer for our instance. We use the Amazon Machine Image (AMI) we specified at launch to boot the instance. After the instance is ready for us, it enters the running state. We can connect to our running instance and use it the way that we'd use a computer sitting in front of us.
As soon as our instance starts to boot, we're billed for each hour or partial hour that we keep the instance running (even if the instance remains idle and we don't connect to it).
If our instance fails a status check or is not running our applications as expected, and if the root volume of our instance is an Amazon EBS volume, we can stop and start our instance to try to fix the problem.
When we stop our instance, it enters the stopping state, and then the stopped state. While our instance is in the stopped state, we can modify certain attributes of the instance, including the instance type.
When we start our instance, it enters the pending state, and the instance is moved to a new host computer. Therefore, when we stop and start our instance, we'll lose any data on the instance store volumes on the previous host computer.
If our instance is running in EC2-Classic, it receives a new private IP address, which means that an Elastic IP address (EIP) associated with the private IP address is no longer associated with our instance. If our instance is running in EC2-VPC, it retains its private IP address, which means that an EIP associated with the private IP address or network interface is still associated with our instance.
For more info, please visit Instance Lifecycle.
Puppet
Ph.D. / Golden Gate Ave, San Francisco / Seoul National Univ / Carnegie Mellon / UC Berkeley / DevOps / Deep Learning / Visualization