Chef Server Installation on EC2 Ubuntu 14.04

Chef
Official installation:
https://docs.getchef.com/install_server.html.
- In this chapter, we'll setup Chef server on an AWS EC2 Ubuntu 14.04 instance.
- This will work with a Workstation on an AWS EC2 Ubuntu 14.04 instance that we're going to setup in Chef workstation setup on EC2 Ubuntu 14.04.

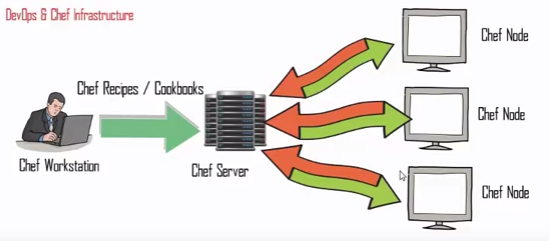
Picture source : Installing Chef Server, Workstation & Node - Creating & Uploading Chef Cookbooks
The Chef server is the hub of interaction between all workstations and nodes using Chef. Changes made through workstations are uploaded to the Chef server, which is then accessed by the chef-client and used to configure each individual node.
- Get Chef 12.2.0 package from https://downloads.chef.io/chef-server/ubuntu/

ubuntu@ip-172-31-10-101:~$ wget https://web-dl.packagecloud.io/chef/stable/packages/ubuntu/trusty/chef-server-core_12.2.0-1_amd64.deb
- Install the Chef server:
ubuntu@ip-172.31.10.101:~$ sudo dpkg -i chef-server*
This will install the base Chef 12 system onto the server. - Once the installation is complete, we should run
chef-server-ctl reconfigurecommand to start the Chef server services. It configures the components that make up the server to work together in our specific environment:ubuntu@ip-172.31.10.101:~$ sudo chef-server-ctl reconfigure ... Chef Server Reconfigured!
Once the installation is complete, you must call the command, which configures the components that make up the server to work together in your specific environment: -
ubuntu@ip-172.31.10.101:~$ sudo chef-server-ctl status
run: bookshelf: (pid 4486) 39s; run: log: (pid 4526) 39s
run: nginx: (pid 4269) 44s; run: log: (pid 4679) 35s
run: oc_bifrost: (pid 4199) 46s; run: log: (pid 4246) 45s
run: oc_id: (pid 4253) 45s; run: log: (pid 4258) 44s
run: opscode-erchef: (pid 4591) 36s; run: log: (pid 4580) 38s
run: opscode-expander: (pid 4367) 41s; run: log: (pid 4469) 40s
run: opscode-expander-reindexer: (pid 4435) 40s; run: log: (pid 4475) 40s
run: opscode-solr4: (pid 4308) 42s; run: log: (pid 4344) 42s
run: postgresql: (pid 4151) 46s; run: log: (pid 4174) 46s
run: rabbitmq: (pid 1685) 136s; run: log: (pid 4138) 47s
run: redis_lb: (pid 4086) 64s; run: log: (pid 4673) 35s
-
ubuntu@ip-172.31.10.101:~$ sudo chef-server-ctl test
The Chef core server is now installed and started. The next steps is to configure it to allow us to log in.
The next step is to create a default user and organization for the chef-server.
Next, we need to create an admin user. This will be the username that will have access to make changes to the infrastructure components in the organization we will be creating.
We can do this using the user-create subcommand of the chef-server-ctl command. The command requires a number of fields to be passed in during the creation process.
We will create a user with the following information:
- Username: admin
- First Name: admin
- Last Name: admin
- Email: admin@bogotobogo.com
- Password: password
- Filename: admin.pem
Also, we will create an organization with the following information:
- Short Name: bogotobogo
- Long Name: bogotobogo.com
- Association User: admin
- Filename: bogotobogo.pem
- In order to link workstations and nodes to the Chef server, an administrator and an organization need to be created with associated RSA private keys. From the home directory, create a .chef directory to store the keys:
ubuntu@ip-172-31-10-101:~$ mkdir .chef
-
Let's create an administrator:
ubuntu@ip-172-31-10-101:~$ sudo chef-server-ctl user-create admin admin admin admin@bogotobogo.com password -f ~/.chef/admin.pem

We should now have a private key called admin.pem in ~/.chef/ directory.
- Create an organization with the org-create subcommand:
ubuntu@ip-172-31-10-101:~$ sudo chef-server-ctl org-create bogotobogo "bogotobogo.com" --association_user admin -f ~/.chef/bogotobogo.pem
Now, we should have two .pem key files in ~/.chef/ directory:
ubuntu@ip-172-31-10-101:~/.chef$ ls
admin.pem  bogotobogo.pem
We will need to connect to this server and download these keys to our workstation momentarily. For now though, our Chef server installation is complete.
Let's install the GUI plugin for the Chef:
ubuntu@ip-172-31-10-101:~$ sudo chef-server-ctl install opscode-manage
ubuntu@ip-172-31-10-101:~$ sudo opscode-manage-ctl reconfigure
ubuntu@ip-172-31-10-101:~$ sudo chef-server-ctl reconfigure
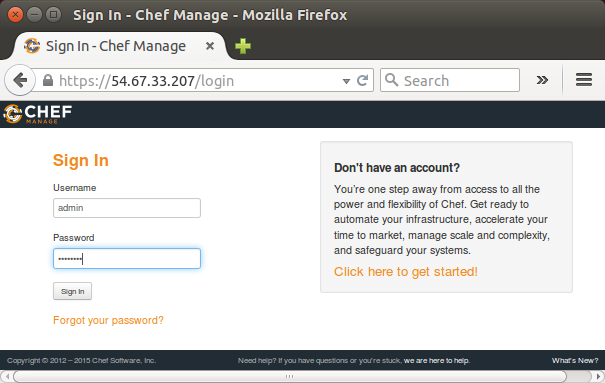
We can access the web interface by typing https://domain from our browser. Because the SSL certificate is signed by an authority not recognized by our browser, we may get a warning. Click on the "Proceed anyway" button.

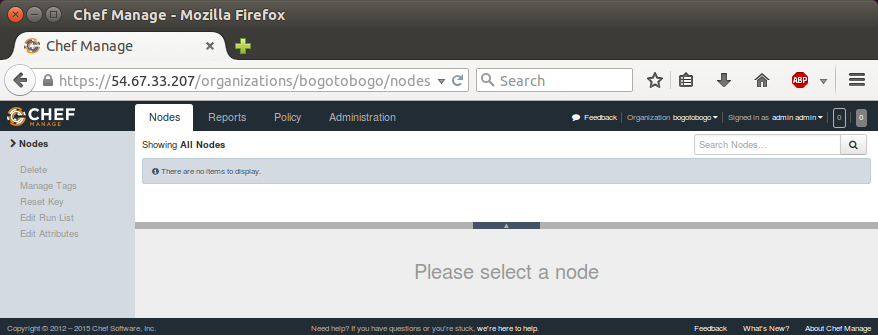
After login with admin credentials we setup earlier, we get "Chef Manage" page:

At this point, we do not have anything to display!
There are other useful plugins:
- Opscode Push Jobs plugin
$ sudo chef-server-ctl install opscode-push-jobs-server
$ sudo opscode-push-jobs-server-ctl reconfigure
$ sudo chef-server-ctl reconfigure
- Analytics plugin
$ sudo chef-server-ctl install opscode-analytics
$ echo 'analytics_fqdn "FQDN"' | sudo tee -a /etc/opscode-analytics/opscode-analytics.rb
$ sudo opscode-analytics-ctl reconfigure
$ sudo chef-server-ctl reconfigure
We can move on to configuring our workstation, where all major work will be performed for our Chef's nodes.
Next, we're going to setup workstation on an AWS EC2 Ubuntu 14.04 instance in Chef workstation setup on EC2 Ubuntu 14.04.
Now that our Chef server is up and running, our next course of action is to configure a workstation. The actual infrastructure coordination and configuration does not take place on the Chef server. This work is done on a workstation which then uploads the data to the server to influence the Chef environment.
Ph.D. / Golden Gate Ave, San Francisco / Seoul National Univ / Carnegie Mellon / UC Berkeley / DevOps / Deep Learning / Visualization