16B. Serving multiple domains using Virtual Hosts (Nginx)
Continued from (16) - Serving multiple domains using Virtual Hosts - Apache, this article will work on Nginx server.
In Nginx web server, server blocks can be used for configuration to host more than one domain off of a single server.
The server blocks is similar to the virtual hosts in Apache.
Let's install Apache:
$ sudo apt-get update
$ sudo apt-get install nginx
We'll use two domains:
- example.com
- example.org
Temporarily, we'll access the site from our local machine after setting up /etc/hosts. In production, we may want to set CNAMES for those sites.
Ubuntu's Nginx package does not use /var/www as its document root by default. Instead it's using /usr/share/nginx/html as Doucment Root.
We'll use /var/www directory for each of our sites to hold our actual files.
$ sudo mkdir -p /var/www/example.com/html
$ sudo mkdir -p /var/www/example.org/html
Permission setup:
$ sudo chmod -R 755 /var/www
Create /var/www/example.com/html/index.html:
<html>
  <body>
    <title>Example.com</title>
  </head>
  <body>
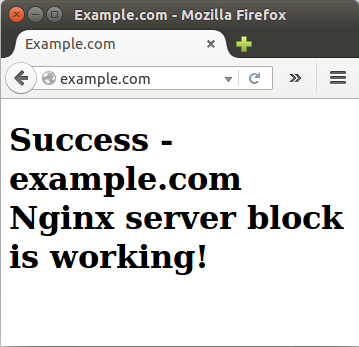
    <h1>Success - example.com Nginx server block is working!</h1>
  </body>
</html>
/var/www/example.org/html/index.html:
<html>
  <body>
    <title>Example.org</title>
  </head>
  <body>
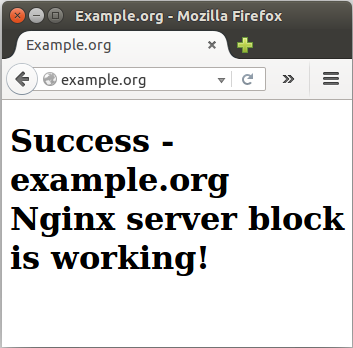
    <h1>Success - example.org Nginx server block is working!</h1>
  </body>
</html>
By default, Nginx contains one server block called /etc/nginx/sites-available/default:
server {
        listen 80 default_server;
        listen [::]:80 default_server ipv6only=on;

        root /usr/share/nginx/html;
        index index.html index.htm;

        server_name localhost;

        location / {
                try_files $uri $uri/ =404;
        }
}
We will create our first server block config file by copying over the default file:
$ sudo cp /etc/nginx/sites-available/default /etc/nginx/sites-available/example.com
First, we need to look at the listen directives. Only one of our server blocks can have the default_server specification. This specifies which block should server a request if the server_name requested does not match any of the available server blocks.
We're going to leave the default_server option enabled in this server block.
Next we want to adjust is the document root, specified by the root directive. Point it to the site's document root that we created:
root /var/www/example.com/html;
Then, we want to modify the server_name to match requests for our first domain. We can additionally add any aliases that we want to match. We will add a www.example.com alias:
server_name example.com www.example.com;
So, the final version (/etc/nginx/sites-available/example.com) looks like this:
server {
    listen 80 default_server;
    listen [::]:80 default_server ipv6only=on;

    root /var/www/example.com/html;
    index index.html index.htm;

    server_name example.com www.example.com;

    location / {
        try_files $uri $uri/ =404;
    }
}
Now, we'll work on example.org site. Let's copy the example.com's server block:
$ sudo cp /etc/nginx/sites-available/example.com /etc/nginx/sites-available/example.org
In this new file, we're going to have to look at the listen directives again. Since we left the default_server option enabled in the file for example.com site, we'll have to remove it in this file. Furthermore, we'll have to get rid of the ipv6only=on option, as it can only be specified once per address/port combination.
So, our 2nd Nginx server block, /etc/nginx/sites-available/example.org, should look like this:
server {
    listen 80;
    listen [::]:80;

    root /var/www/example.org/html;
    index index.html index.htm;

    server_name example.org www.example.org;

    location / {
        try_files $uri $uri/ =404;
    }
}
Now that we have created our server blocks, we must enable them by creating symbolic links from these files to the sites-enabled directory, which Nginx reads from during startup:
$ sudo ln -s /etc/nginx/sites-available/example.com /etc/nginx/sites-enabled/
$ sudo ln -s /etc/nginx/sites-available/example.org /etc/nginx/sites-enabled/
We can check the links:
$ ls -la /etc/nginx/sites-enabled/
total 8
drwxr-xr-x 2 root root 4096 Dec  3 05:28 .
drwxr-xr-x 5 root root 4096 Nov 30 07:25 ..
lrwxrwxrwx 1 root root   34 Nov 30 07:25 default -> /etc/nginx/sites-available/default
lrwxrwxrwx 1 root root   38 Dec  3 05:27 example.com -> /etc/nginx/sites-available/example.com
lrwxrwxrwx 1 root root   38 Dec  3 05:28 example.org -> /etc/nginx/sites-available/example.org
These files are now in the /etc/nginx/sites-available/ directory. However, the default server block file we used as a template is also enabled currently and will conflict with our file that has the default_server parameter set.
We can disable the default server block file by simply removing the symbolic link:
$ sudo rm /etc/nginx/sites-enabled/default
It will still be available for reference in the sites-available directory, but it won't be read by Nginx on startup:
We need to adjust one setting in the default Nginx configuration file (/etc/nginx/nginx.conf). We just need to uncomment one line:
server_names_hash_bucket_size 64;
So, the final file looks like this:
user www-data;
worker_processes 4;
pid /run/nginx.pid;

events {
        worker_connections 768;
}

http {
        sendfile on;
        tcp_nopush on;
        tcp_nodelay on;
        keepalive_timeout 65;
        types_hash_max_size 2048;
        # server_tokens off;

        server_names_hash_bucket_size 64;
        # server_name_in_redirect off;

        include /etc/nginx/mime.types;
        default_type application/octet-stream;

        access_log /var/log/nginx/access.log;
        error_log /var/log/nginx/error.log;

        gzip on;
        gzip_disable "msie6";

        include /etc/nginx/conf.d/*.conf;
        include /etc/nginx/sites-enabled/*;
}
Let's restart our server:
$ sudo service nginx restart
Because we're not using actual domain names, we need to setup our local host file (/etc/hosts):
127.0.0.1       localhost
54.153.24.251   example.com
54.153.24.251   example.org
Type http://example.com on our local browser:

For http://example.org:

Here is a sample from Securing HTTP Traffic to Upstream Servers:
http {
    #...
    upstream backend.example.com {
        server backend1.example.com:443;
        server backend2.example.com:443;
   }

    server {
        listen      80;
        server_name www.example.com;
        #...

        location /upstream {
            proxy_pass                    https://backend.example.com;
            proxy_ssl_certificate         /etc/nginx/client.pem;
            proxy_ssl_certificate_key     /etc/nginx/client.key;
            proxy_ssl_protocols           TLSv1 TLSv1.1 TLSv1.2;
            proxy_ssl_ciphers             HIGH:!aNULL:!MD5;
            proxy_ssl_trusted_certificate /etc/nginx/trusted_ca_cert.crt;

            proxy_ssl_verify        on;
            proxy_ssl_verify_depth  2;
            proxy_ssl_session_reuse on;
        }
    }

    server {
        listen      443 ssl;
        server_name backend1.example.com;

        ssl_certificate        /etc/ssl/certs/server.crt;
        ssl_certificate_key    /etc/ssl/certs/server.key;
        ssl_client_certificate /etc/ssl/certs/ca.crt;
        ssl_verify_client      optional;

        location /yourapp {
            proxy_pass http://url_to_app.com;
        #...
        }

    server {
        listen      443 ssl;
        server_name backend2.example.com;

        ssl_certificate        /etc/ssl/certs/server.crt;
        ssl_certificate_key    /etc/ssl/certs/server.key;
        ssl_client_certificate /etc/ssl/certs/ca.crt;
        ssl_verify_client      optional;

        location /yourapp {
            proxy_pass http://url_to_app.com;
        #...
        }
    }
}
DevOps
DevOps / Sys Admin Q & A
Linux - system, cmds & shell
- Linux Tips - links, vmstats, rsync
- Linux Tips 2 - ctrl a, curl r, tail -f, umask
- Linux - bash I
- Linux - bash II
- Linux - Uncompressing 7z file
- Linux - sed I (substitution: sed 's///', sed -i)
- Linux - sed II (file spacing, numbering, text conversion and substitution)
- Linux - sed III (selective printing of certain lines, selective definition of certain lines)
- Linux - 7 File types : Regular, Directory, Block file, Character device file, Pipe file, Symbolic link file, and Socket file
- Linux shell programming - introduction
- Linux shell programming - variables and functions (readonly, unset, and functions)
- Linux shell programming - special shell variables
- Linux shell programming : arrays - three different ways of declaring arrays & looping with $*/$@
- Linux shell programming : operations on array
- Linux shell programming : variables & commands substitution
- Linux shell programming : metacharacters & quotes
- Linux shell programming : input/output redirection & here document
- Linux shell programming : loop control - for, while, break, and break n
- Linux shell programming : string
- Linux shell programming : for-loop
- Linux shell programming : if/elif/else/fi
- Linux shell programming : Test
- Managing User Account - useradd, usermod, and userdel
- Linux Secure Shell (SSH) I : key generation, private key and public key
- Linux Secure Shell (SSH) II : ssh-agent & scp
- Linux Secure Shell (SSH) III : SSH Tunnel as Proxy - Dynamic Port Forwarding (SOCKS Proxy)
- Linux Secure Shell (SSH) IV : Local port forwarding (outgoing ssh tunnel)
- Linux Secure Shell (SSH) V : Reverse SSH Tunnel (remote port forwarding / incoming ssh tunnel) /)
- Linux Processes and Signals
- Linux Drivers 1
- tcpdump
- Linux Debugging using gdb
- Embedded Systems Programming I - Introduction
- Embedded Systems Programming II - gcc ARM Toolchain and Simple Code on Ubuntu/Fedora
- LXC (Linux Container) Install and Run
- Linux IPTables
- Hadoop - 1. Setting up on Ubuntu for Single-Node Cluster
- Hadoop - 2. Runing on Ubuntu for Single-Node Cluster
- ownCloud 7 install
- Ubuntu 14.04 guest on Mac OSX host using VirtualBox I
- Ubuntu 14.04 guest on Mac OSX host using VirtualBox II
- Windows 8 guest on Mac OSX host using VirtualBox I
- Ubuntu Package Management System (apt-get vs dpkg)
- RPM Packaging
- How to Make a Self-Signed SSL Certificate
- Linux Q & A
- DevOps / Sys Admin questions
Ph.D. / Golden Gate Ave, San Francisco / Seoul National Univ / Carnegie Mellon / UC Berkeley / DevOps / Deep Learning / Visualization