Tutorial: GIT and GitHub 2. add/status/log - 2020
This is the continuation from the previous tutorial: GIT and GitHub - 1. Installation.
Let's start with Git Bash.
First, I created a new directory C:\MyGit. Then, issue a command "git init GitProjects", and it will generate a subdirectory named GitProject:
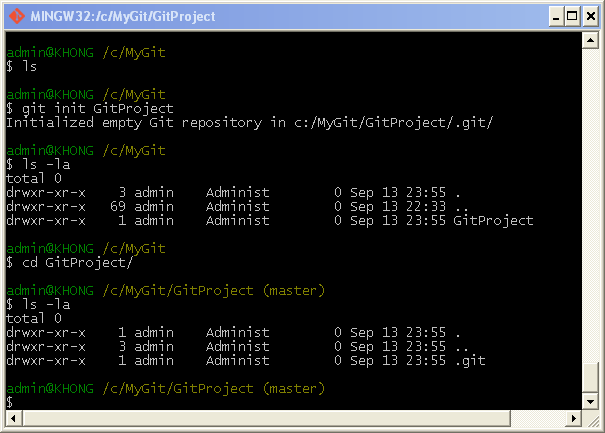
The GitProject contains all of our necessary repository files - a Git repository skeleton. At this point, nothing in our project is tracked yet.
Note that we could have issued the "git init" command within the directory, "GitProject", then it would have created .git subdirectory.
Now, we may want to create some files:
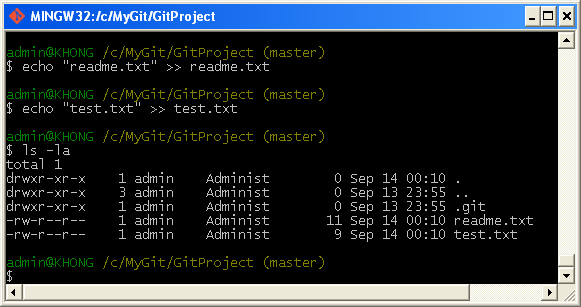
Let's go into the GitProject directory where we have two files: readme.txt and test.txt.
To check the status of git, we issue "git status".
The status is the main tool we use to determine which files are in which state is the git status command. If we run this command directly after a clone, we should see something like this:
$ git status
# On branch master
nothing to commit (working directory clean)
This means we have a clean working directory - in other words, no tracked files are modified. Git also doesn't see any untracked files, or they would be listed here. Finally, the command tells us which branch we're on.
In our case, we get:
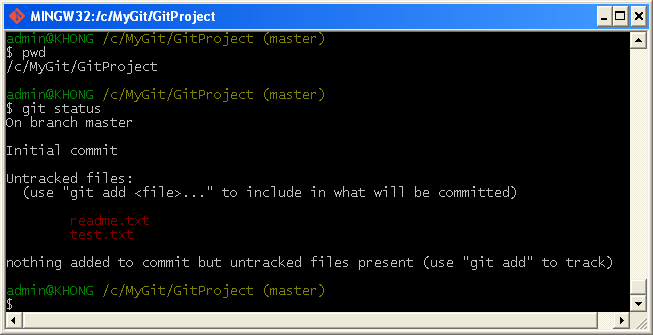
We can see we are on master branch and we have untracked two files (in red color). Untracked basically means that Git sees a file we didn't have in the previous snapshot (commit); Git won't include it in our commit snapshots until we explicitly tell it to do so. It does this so that we don't accidentally begin including generated binary files or other files that we did not mean to include. Let's start tracking the files.
If we want to version-control existing files (as opposed to an empty directory), we should probably begin tracking those files and do an initial commit. We can accomplish that with a few git add commands that specify the files we want to track, followed by a commit:
With "git add .", we can add all files in the folder and make them be tracked.
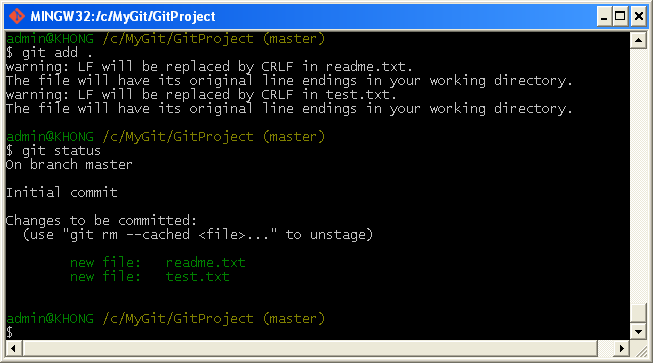
Now the files are displayed in green and git tells us both of them are new and they are now tracked and staged. Note that the two files are before the commit and the snapshot hasn't occurred yet.
We can tell that they staged because they're under the "Changes to be committed" heading. If we commit at this point, the version of the files at the time we ran 'git add' are what will be in the historical snapshot.
We may recall that when we ran 'git init' earlier, we then ran git add (files) - that was to begin tracking files in our directory. The git add command takes a path name for either a file or a directory; if it's a directory, the command adds all the files in that directory recursively.
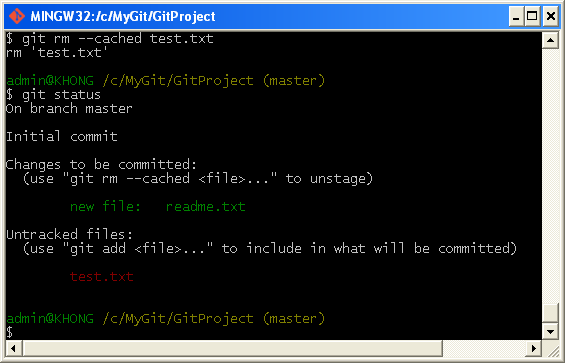
If we want to remove "test.txt", we do git rm --cached test.txt:
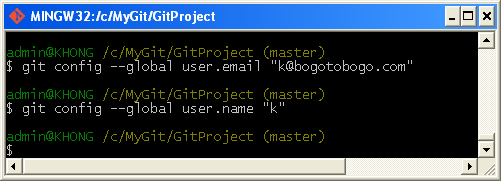
Before we commit, we need to configure email and name:
We now want to commit:

We can check what's been done so far by issuing log:
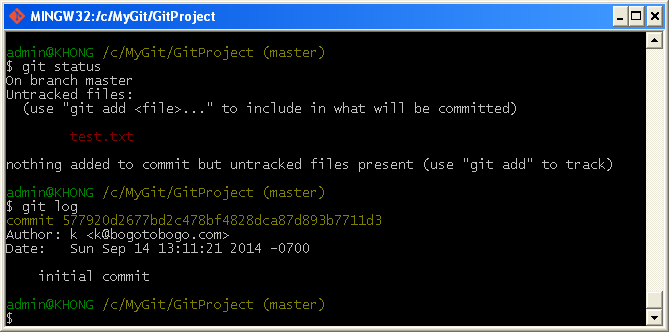
Git shows the name, email, and the message for the operation.
The other file, "test.txt" is not yet being tracked, so we want add that in.
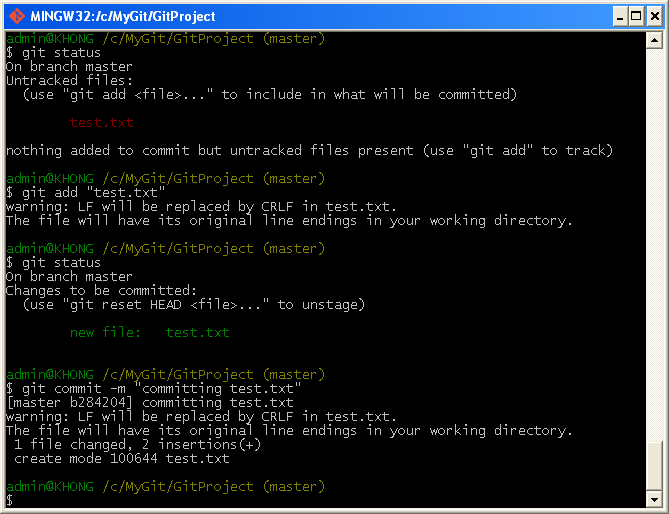
If we do "git log" again, it will show two commits we've made so far:
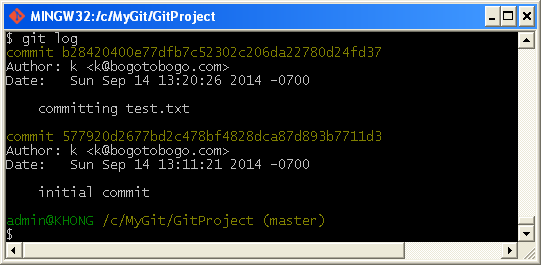
Now, let's modify "readme.txt", and run status:
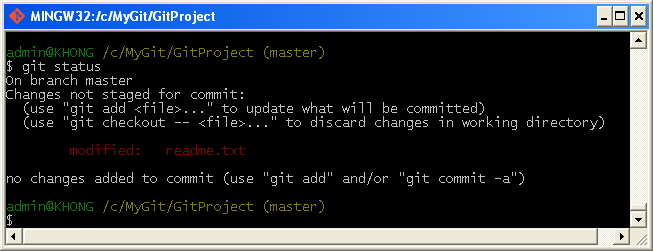
In this case, we changed a file that was already tracked.
If we change a previously tracked file and then run our status command again, we get something that looks like the picture above:
The "readme.txt" file appears under a section named "Changes not staged for commit" - which means that a file that is tracked has been modified in the working directory but not yet staged.
At this point, if we run commit, it will fail:
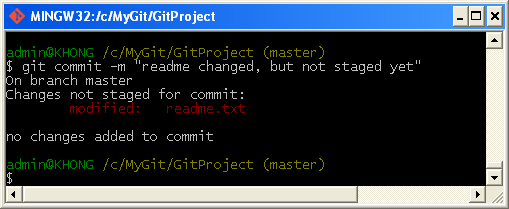
It failed because it's not at staging area. So, whenever we do commit, we should put a file at the staging area bef the commit.
In other words, to stage it, we run the git add command (it's a multipurpose command - we use it to begin tracking new files, to stage files, and to do other things like marking merge - conflicted files as resolved).
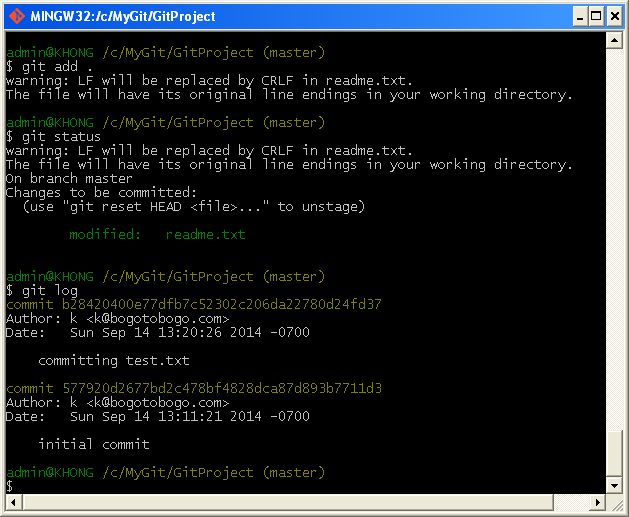
By running add, we did put the file into the staging area:
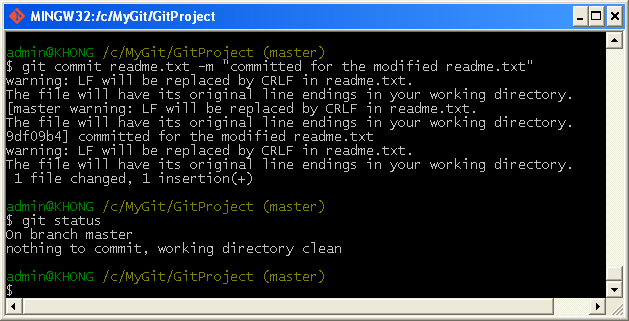
Now, we can commit the changes made to the "readme.txt" file:
For git commit and diff, please go to GIT and GitHub - 3. commit and diff.
Git/GitHub Tutorial
Ph.D. / Golden Gate Ave, San Francisco / Seoul National Univ / Carnegie Mellon / UC Berkeley / DevOps / Deep Learning / Visualization