Tutorial: GIT and GitHub 3. commit and diff - 2020
This is the continuation from the previous tutorial: GIT and GitHub - 2. add/status/log.
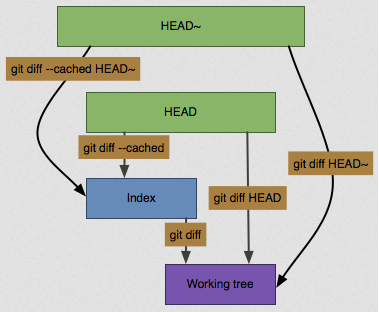
Picture source: How do I show the changes which have been staged?
Usually, since the git status command is too vague and does not give enough information about the change, when we want to know exactly what we changed not just which files were changed, we can use the git diff command. We'll probably use it most often to answer these two questions: What have we changed but not yet staged? And what have we staged that we are about to commit? Although git status answers those questions very generally, git diff shows us the exact lines added and removed.
Let's say we edit and stage the readme file again and then edit the readme file without staging it. If we run status command, we see something like this:
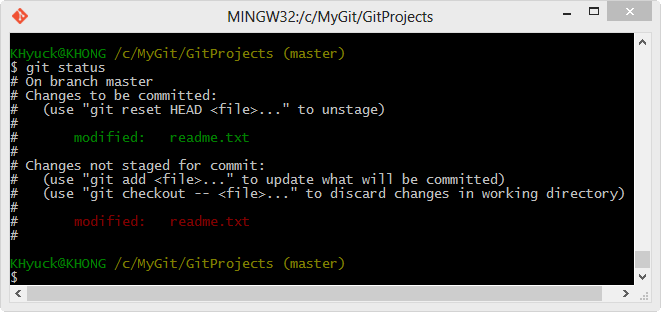
If we want to see what we've changed but not yet staged, type git diff with no other arguments:
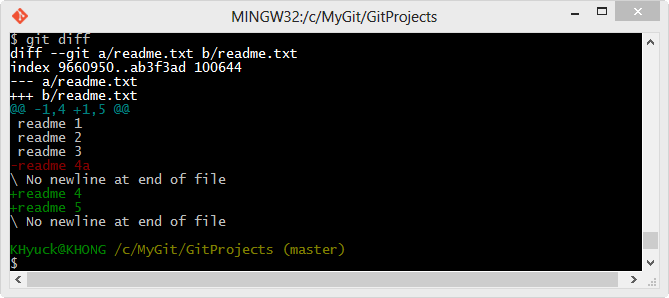
git diff command compares what is in our working directory with what is in our staging area. The result tells us the changes we've made that we haven't yet staged.
If we want to see what we've staged that will go into our next commit, we can use git diff --cached. (In Git versions 1.6.1 and later, we can also use git diff --staged, which may be easier to remember.) This command compares our staged changes to our last commit:
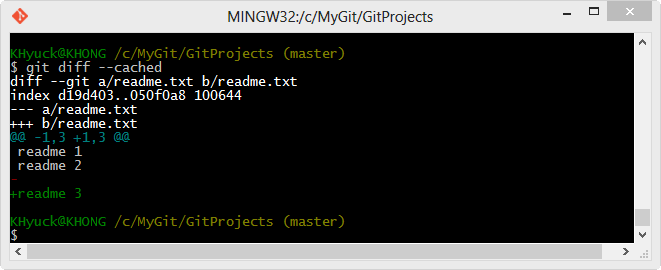
It's important to note that git diff by itself doesn't show all changes made since our last commit - only changes that are still unstaged. This can be confusing, because if we've staged all of our changes, git diff will give us no output as shown in the picture below:

Though we learned how we commit in the previous chapter, in this chapter, we'll review it again.
Now that our staging area is set up the way we want it, we can commit our changes. Remember that anything that is still unstaged - any files we have created or modified but we haven't run git add after we edited them - won't go into this commit. They will stay as modified files on our disk.
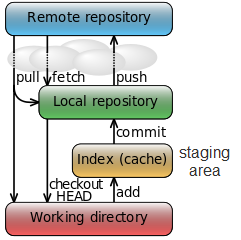
When we run git status, if we see that everything has been staged, then we're ready to commit our changes. The simplest way to commit is to type git commit:
$ git commit
The commit gives us some output about itself: which branch we committed to (master), what SHA-1 checksum the commit has (463dc4f), how many files were changed, and statistics about lines added and removed in the commit.
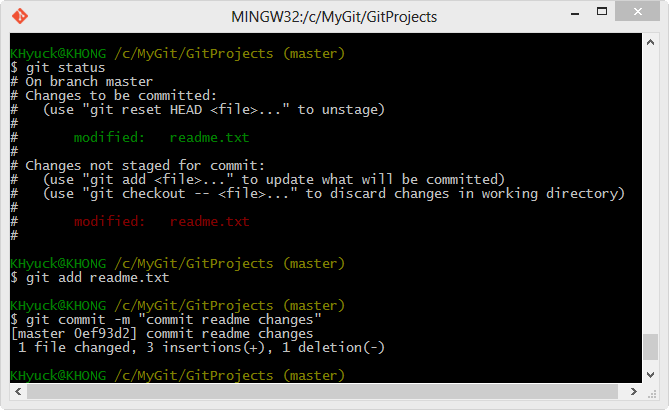
Remember that the commit records the snapshot we set up in our staging area. Anything we didn't stage is still sitting there modified; we can do another commit to add it to our history. Every time we perform a commit, we're recording a snapshot of our project that we can revert to or compare to later.
Continued to: GIT and GitHub - 4. GitHub Account and SSH.
Git/GitHub Tutorial
Ph.D. / Golden Gate Ave, San Francisco / Seoul National Univ / Carnegie Mellon / UC Berkeley / DevOps / Deep Learning / Visualization