Vagrant and Ansible
In this tutorial, we'll install our Flask app into a virtual machine with Vagrant using Ansible.
Vagrant is a tool to manage virtual machine environments, and allows us to configure and use reproducible work environments on top of various virtualization and cloud platforms.
Though Vagrant handles the generation and basic imaging of virtual machines to form isolated development environments, it doesn't do the provisioning of these virtual machines. So, it's up to us to handle the installation and configuration of the packages we want to work. Fortunately, Vagrant is easily integrates with existing provisioners such as Chef, Puppet, and Ansible. In this tutorial, we'll use Ansible for the configuration.
Once a virtual machine is generated and a provisioner is ready, we can quickly start a development environment on our machine without having to worry about finding, installing, and configuring project dependencies. Any developer can pickup a project and start working on it with little work with the same environment as everyone else.
In this tutorial, we'll go through the stages of setting up a Vagrant configuration for a virtual machine, and how to provision the virtual machine using Ansible playbooks.
We installed Vagrant and VirtualBox in VirtualBox and Vagrant.
Among popular configuration management tools such as Chef, Puppet, Salt, and Ansible, we chose Ansible because it has a much smaller overhead to get started. Ansible is agent-less which means no need of any agent installation on remote nodes, so with Ansible, there are no any background daemons or programs are executing for Ansible.
Ansible does not require any additional software to be installed on the client computers since Ansible communicates over normal SSH channels in order to retrieve information from remote machines, issue commands, and copy files. So, any computer that you can administer through SSH, we can also administer through Ansible. In other words, the controlling machine, where Ansible is installed and clients (nodes) are managed by this controlling machine over SSH. The location of nodes are specified by controlling machine through its inventory.
Ansible can interact with clients through either command line tools or through its configuration scripts called Playbooks.
The controlling machine deploys modules to nodes using SSH protocol and these modules are stored temporarily on remote nodes and communicate with the Ansible machine through a JSON connection over the standard output.
We installed Vagrant and VirtualBox in VirtualBox and Vagrant.
Let's install Ansible.
$ sudo apt-get update
$ sudo apt-get install ansible

$ ansible --version
ansible 2.0.0.2
  config file = /etc/ansible/ansible.cfg
  configured module search path = Default w/o overrides
As mentioned earlier, there will be no daemons to start or keep running. We only needed to install it on one machine (my laptop), and it can manage an entire fleet of remote machines (or VirtualBox, in our case) from that central point.
The first step once we've installed Vagrant is to create a Vagrantfile and customize it to use the Ansible provisioner to manage a single machine:
# This guide is optimized for Vagrant 1.7 and above.
# Although versions 1.6.x should behave very similarly, it is recommended
# to upgrade instead of disabling the requirement below.
Vagrant.require_version ">= 1.7.0"

Vagrant.configure(2) do |config|

  config.vm.box = "ubuntu/trusty64"

  config.vm.network "private_network", ip: "192.168.33.15"

  config.vm.provision "ansible" do |ansible|
    ansible.verbose = "v"
    ansible.playbook = "playbook.yml"
  end
end
A private network is created by VirtualBox between our host machine and the guest machine. The guest is assigned an IP address of 192.168.33.15 and our host machine is able to access it on that IP. An access from outside devices to this IP address is not available as the network interface is private to our host machine.
Notice the config.vm.provision section that refers to an Ansible playbook called playbook.yml in the same directory as the Vagrantfile. Vagrant runs the provisioner once the virtual machine has booted and is ready for SSH access.
Let's start the VM, and run the provisioning playbook (on the first VM startup):
$ vagrant up
It downloads the Ubuntu image that we specified as the config.vm.box value and create our server as a virtual machine.
To re-run a playbook on an existing VM, just run:
$ vagrant provision
This will re-run the playbook against the existing VM.
Note that having the ansible.verbose option enabled will instruct Vagrant to show the full ansible-playbook command used behind the scene.
To automate the steps for deploying an app to a virtual machine, we will use Ansible. Essentially, it will log in to servers that we specify using 'ssh' and run commands on them.
Let's create a file called site.yml in the same folder as our Vagrantfile. This will be our Ansible playbook, and it will contain our automation steps. The 'site' implies that this is the only file needed to get a successful version of our site up and running. The '.yml' extension tells us that it's a YAML-formatted file which is Ansible's preference.
- name: Configure application
  hosts: all
  become: true
  become_method: sudo
  vars:
      repository_url: https://github.com/Einsteinish/flask-vagrant-ansible
      repository_path: /home/vagrant/flask-vagrant-ansible

  tasks:
    - name: Install packages
      apt: update_cache=yes name={{ item }} state=present
      with_items:
        - git
        - python-pip
        - nginx

    - name: Clone repository
      git: repo='{{ repository_url }}' dest='{{ repository_path }}'

    - name: Install requirements
      pip: requirements='{{ repository_path }}/requirements.txt'
Here are the description of the "site.yml" line by line:
- Give a human readable name to the overall step. This shows up in the terminal when we run it.
- Apply this playbook to all hosts that we know about.
- Run these commands as the superuser.
- Define some variables to use for the rest of the playbook. Ansible uses a template engine called Jinja2, so we can use these later to prevent repeating ourselves.
- The tasks directive is the meat of what we're actually doing.
- We're telling our package manager (apt) to install a set of packages. Jinja will replace the item variable (indicated by the braces in Jinja) with each of the items in the with_items block right below.
- Use git to clone our application to a directory of our choosing.
- Install the Python requirements from the "requirements.txt file".
Now that we defined out playbook for Ansible, we need to tell our VM to use it when setting itself up. Here is our Vagrantfile:
# Although Vagrant versions 1.6.x should behave very similarly, it is recommended
# to upgrade instead of disabling the requirement below.
Vagrant.require_version ">= 1.7.0"

Vagrant.configure(2) do |config|

  config.vm.box = "ubuntu/trusty64"

  config.vm.network "private_network", ip: "192.168.33.15"

  config.vm.provision "ansible" do |ansible|
    ansible.verbose = "v"
    ansible.playbook = "site.yml"
  end
end
The "Vagrantfile" is telling Vagrant to use the site.yml file we created and to use verbose output.
To check that our automation works, let's redo our VM from scratch. Tearing things down and reprovisioning them is a good way to make sure our automation completes all the necessary steps.
To destroy our VM, run vagrant destroy. After it's destroyed, type vagrant up to recreate the VM and to provision it in one go.
When it comes back up, we should be able to vagrant ssh into our VM and run the following to get our server up and going again:
vagrant@vagrant-ubuntu-trusty-64:~$ cd flask-hello-world
vagrant@vagrant-ubuntu-trusty-64:~$ python app.py
 * Running on http://0.0.0.0:5000/ (Press CTRL+C to quit)
Gunicorn 'Green Unicorn' is a Python WSGI HTTP Server and we're going to use it.
Since we've already installed gunicorn via requirements.txt file, we should be able to run the following:
vagrant@vagrant-ubuntu-trusty-64:~$ cd flask-vagrant-ansible/

vagrant@vagrant-ubuntu-trusty-64:~$ gunicorn --bind 0.0.0.0:8000 app:app
[2017-02-09 19:25:15 +0000] [1746] [INFO] Starting gunicorn 19.4.5
[2017-02-09 19:25:15 +0000] [1746] [INFO] Listening at: http://0.0.0.0:8000 (1746)
[2017-02-09 19:25:15 +0000] [1746] [INFO] Using worker: sync
[2017-02-09 19:25:15 +0000] [1751] [INFO] Booting worker with pid: 1751
This will use gunicorn to serve our application through WSGI, which is the common way that Python web apps are served. It replaces our usual python app.py step, which is the simplest way to serve our application for now:

Now we want to set up a script so that we can run our server automatically when our server restarts, crashes or is killed.
We'll do that with an upstart script. Upstart handles starting and stopping tasks.
In the VM, let's create /etc/init/hello-world.conf:
description "hello-world"

start on (filesystem)
stop on runlevel [016]

respawn
setuid nobody
setgid nogroup
chdir /home/vagrant/flask-vagrant-ansible

exec gunicorn app:app --bind 0.0.0.0:8000
Now that we've created the file, we should be able to run sudo service hello-world start to start the task, go to browser, and then view the service at http://192.168.33.10:8000, as before. The big difference is now we have something that will run it for us, so we don't need to SSH in to run our server.
Log out and issue vagrant up command on host machine:
$ vagrant up
Bringing machine 'default' up with 'virtualbox' provider...
==> default: Checking if box 'ubuntu/trusty64' is up to date...
==> default: A newer version of the box 'ubuntu/trusty64' is available! You currently
==> default: have version '20170202.0.0'. The latest is version '20170202.1.0'. Run
==> default: `vagrant box update` to update.
==> default: Machine already provisioned. Run `vagrant provision` or use the `--provision`
==> default: flag to force provisioning. Provisioners marked to run always will still run.
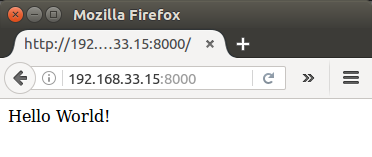
Now we don't have to do 'ssh' into virtual machine. Instead we can directly go to the browser and check if our app is running:

Now that we have that set up, let's automate that process.
To automate the step for upstart script, we need to modify our site.yml file.
We want to copy the hello-world.conf file that we created above onto our servers. In order to do that, we need a local copy using a variable instead of hard coding the path to our repository.
In the same directory as our site.yml file, create a new file: hello-world.upstart.j2. The .j2 extension indicates that we're going to be using it as a Jinja2 template.
Here is the new template file we'll write:
description "hello-world"

start on (filesystem)
stop on runlevel [016]

respawn
setuid nobody
setgid nogroup
chdir /home/vagrant/flask-vagrant-ansible

exec gunicorn app:app --bind 0.0.0.0:8000
Now that we have this template file, we'll need to set up Ansible to copy it into the same directory as we used when doing it manually.
Let's add a section to the bottom of our site.yml file in the tasks section:
    - name: Copy Upstart configuration
      template: src=hello-world.upstart.j2 dest=/etc/init/hello-world.conf

    - name: Make sure our server is running
      service: name=hello-world state=started
Note that we're using Ansible's template and service modules to accomplish our task. It's telling that we want to copy the template file that we defined into the directory that we used before. It will use the variables we have defined in our file, inject them into the template, and write them to the destination path we have defined.
Then, we want to make sure our service has started by running another vagrant provision on our host machine.
$ vagrant provision
==> default: Running provisioner: ansible...
    default: Running ansible-playbook...
PYTHONUNBUFFERED=1 ANSIBLE_FORCE_COLOR=true ANSIBLE_HOST_KEY_CHECKING=false ANSIBLE_SSH_ARGS='-o UserKnownHostsFile=/dev/null -o IdentitiesOnly=yes -o ControlMaster=auto -o ControlPersist=60s' ansible-playbook --connection=ssh --timeout=30 --limit="default" --inventory-file=/home/k/TEST/my_vagrant/.vagrant/provisioners/ansible/inventory -v site.yml
Using /etc/ansible/ansible.cfg as config file

PLAY [Configure application] ***************************************************

TASK [setup] *******************************************************************
ok: [default]

TASK [Install packages] ********************************************************
ok: [default] => (item=[u'git', u'python-pip', u'nginx']) => {"cache_update_time": 1486678781, "cache_updated": true, "changed": false, "item": ["git", "python-pip", "nginx"]}

TASK [Clone repository] ********************************************************
ok: [default] => {"after": "e660d88117debc864c3f988af18f966324851b04", "before": "e660d88117debc864c3f988af18f966324851b04", "changed": false}

TASK [Install requirements] ****************************************************
ok: [default] => {"changed": false, "cmd": "/usr/bin/pip install -r /home/vagrant/flask-vagrant-ansible/requirements.txt", "name": null, "requirements": "/home/vagrant/flask-vagrant-ansible/requirements.txt", "state": "present", "stderr": "", "stdout": "Requirement already satisfied (use --upgrade to upgrade): Flask==0.10.1 in /usr/local/lib/python2.7/dist-packages (from -r /home/vagrant/flask-vagrant-ansible/requirements.txt (line 1))\nRequirement already satisfied (use --upgrade to upgrade): gunicorn==19.4.5 in /usr/local/lib/python2.7/dist-packages (from -r /home/vagrant/flask-vagrant-ansible/requirements.txt (line 2))\nRequirement already satisfied (use --upgrade to upgrade): Werkzeug>=0.7 in /usr/local/lib/python2.7/dist-packages (from Flask==0.10.1->-r /home/vagrant/flask-vagrant-ansible/requirements.txt (line 1))\nRequirement already satisfied (use --upgrade to upgrade): Jinja2>=2.4 in /usr/local/lib/python2.7/dist-packages (from Flask==0.10.1->-r /home/vagrant/flask-vagrant-ansible/requirements.txt (line 1))\nRequirement already satisfied (use --upgrade to upgrade): itsdangerous>=0.21 in /usr/local/lib/python2.7/dist-packages (from Flask==0.10.1->-r /home/vagrant/flask-vagrant-ansible/requirements.txt (line 1))\nCleaning up...\n", "stdout_lines": ["Requirement already satisfied (use --upgrade to upgrade): Flask==0.10.1 in /usr/local/lib/python2.7/dist-packages (from -r /home/vagrant/flask-vagrant-ansible/requirements.txt (line 1))", "Requirement already satisfied (use --upgrade to upgrade): gunicorn==19.4.5 in /usr/local/lib/python2.7/dist-packages (from -r /home/vagrant/flask-vagrant-ansible/requirements.txt (line 2))", "Requirement already satisfied (use --upgrade to upgrade): Werkzeug>=0.7 in /usr/local/lib/python2.7/dist-packages (from Flask==0.10.1->-r /home/vagrant/flask-vagrant-ansible/requirements.txt (line 1))", "Requirement already satisfied (use --upgrade to upgrade): Jinja2>=2.4 in /usr/local/lib/python2.7/dist-packages (from Flask==0.10.1->-r /home/vagrant/flask-vagrant-ansible/requirements.txt (line 1))", "Requirement already satisfied (use --upgrade to upgrade): itsdangerous>=0.21 in /usr/local/lib/python2.7/dist-packages (from Flask==0.10.1->-r /home/vagrant/flask-vagrant-ansible/requirements.txt (line 1))", "Cleaning up..."], "version": null, "virtualenv": null}

PLAY RECAP *********************************************************************
default                    : ok=4    changed=0    unreachable=0    failed=0
We can see it is working!

Just to make it sure we can check if /etc/init/hello-world.conf file has been written.
For reference, here is our site.xml on our host machine:
- name: Configure application
  hosts: all
  become: true
  become_method: sudo
  vars:
      repository_url: https://github.com/Einsteinish/flask-vagrant-ansible
      repository_path: /home/vagrant/flask-vagrant-ansible

  tasks:
    - name: Install packages
      apt: update_cache=yes name={{ item }} state=present
      with_items:
        - git
        - python-pip
        - nginx

    - name: Clone repository
      git: repo='{{ repository_url }}' dest='{{ repository_path }}'

    - name: Install requirements
      pip: requirements='{{ repository_path }}/requirements.txt'

    - name: Copy Upstart configuration
      template: src=hello-world.upstart.j2 dest=/etc/init/hello-world.conf

    - name: Make sure our server is running
      service: name=hello-world state=started
With a new nginx configuration, we'll be able to access our server directly at 192.168.33.10 without specifying a port (8000) via proxy setup.
We'll write our file to /etc/nginx/sites-enabled/hello-world and it looks like this:
server {
    listen 80;

    location / {
        include proxy_params;
        proxy_pass http://unix:/tmp/hello_world.sock;
    }
}
The file tells nginx to look for our server a unix socket.
Let's kill any 'gunicorn' processes, and run it with the following:
vagrant@vagrant-ubuntu-trusty-64:~/flask-vagrant-ansible$ sudo gunicorn app:app --bind unix:/tmp/hello_world.sock --workers 3
[2017-02-10 00:15:51 +0000] [7456] [INFO] Starting gunicorn 19.4.5
[2017-02-10 00:15:51 +0000] [7456] [INFO] Listening at: unix:/tmp/hello_world.sock (7456)
[2017-02-10 00:15:51 +0000] [7456] [INFO] Using worker: sync
[2017-02-10 00:15:51 +0000] [7461] [INFO] Booting worker with pid: 7461
[2017-02-10 00:15:51 +0000] [7462] [INFO] Booting worker with pid: 7462
[2017-02-10 00:15:51 +0000] [7463] [INFO] Booting worker with pid: 7463
Since our gunicorn server will be running, the unix socket should be accessible.
Let's restart nginx server:
vagrant@vagrant-ubuntu-trusty-64:~$ sudo service nginx restart

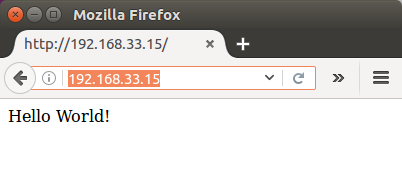
Now we can access our app not specifying a port!
We need to modify /etc/init/hello-world.conf accordingly. Here is our new upstart template file (hello-world.upstart.j2) that should be placed on our host machine:
description "hello-world"

start on (filesystem)
stop on runlevel [016]

respawn
setuid nobody
setgid nogroup
chdir /home/vagrant/flask-vagrant-ansible

exec gunicorn app:app --bind unix:/tmp/hello_world.sock --workers 3
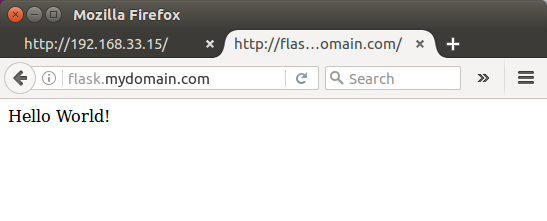
If we want to access our app via domain name such as "flask.mydomain.com", we may want to define it in Vagrantfile like this:
config.vm.hostname = "flask.mydomain.com"
In my case, accessing my app using domain name only works only if I set it in /etc/hosts:
192.168.33.15 flask.mydomain.com
After "vagrant reload", we can visit our app to check if it works:

To get the max CPUs from host:
  config.vm.provider :virtualbox do |vb|
    # cpu_exec_cap = 50
    cpus = `nproc`.to_i
    vb.customize ["modifyvm", :id, "--cpus", cpus]
    #vb.customize ["modifyvm", :id, "--cpus", "2"]
  end
Then, we can check if we got the max cpu of host which is 2:
$ vagrant reload
$ vagrant ssh

vagrant@flask:~$ lscpu
Architecture:          x86_64
CPU op-mode(s):        32-bit, 64-bit
Byte Order:            Little Endian
CPU(s):                2
On-line CPU(s) list:   0,1
Thread(s) per core:    1
Core(s) per socket:    2
...
As an example, we set the timezone to US/Eastern:
    - name: set locale
      command: /usr/sbin/update-locale LANG=en_US.UTF-8 LC_ALL=en_US.UTF-8

    - name: set /etc/localtime
      file: src=/usr/share/zoneinfo/US/Eastern dest=/etc/localtime state=link force=yes

    - name: Update Timezone to America/New_York
      copy: content="America/New_York\n" dest=/etc/timezone owner=root group=root mode=0644
      register: timezone
      notify: update tzdata

  handlers:

    - name: update timezone
      command: dpkg-reconfigure --frontend noninteractive tzdata
      when: timezone.changed
Then provision the box:
$ vagrant provision
$ vagrant ssh
vagrant@flask:~$ date
Fri Feb 10 05:02:59 EST 2017
In our directory where site.xml is, we should have the following files:
$ ls
hello-world.nginx.j2  hello-world.upstart.j2  site.yml  Vagrantfile
site.xml:
- name: Configure application
  hosts: all
  become: true
  become_method: sudo
  vars:
      repository_url: https://github.com/Einsteinish/flask-vagrant-ansible
      repository_path: /home/vagrant/flask-vagrant-ansible

  tasks:
    - name: Install packages
      apt: update_cache=yes name={{ item }} state=present
      with_items:
        - git
        - python-pip
        - nginx

    - name: Clone repository
      git: repo='{{ repository_url }}' dest='{{ repository_path }}'

    - name: Install requirements
      pip: requirements='{{ repository_path }}/requirements.txt'

    - name: Copy Upstart configuration
      template: src=hello-world.upstart.j2 dest=/etc/init/hello-world.conf

    - name: Make sure our server is running
      service: name=hello-world state=started

    - name: Copy Nginx site
      template: src=hello-world.nginx.j2 dest=/etc/nginx/sites-enabled/hello-world
      notify:
        - restart nginx

    - name: Remove any default sites
      file: path=/etc/nginx/sites-enabled/default state=absent
      notify:
        - restart nginx

    - name: Make sure nginx is running
      service: name=nginx state=started

  handlers:
    - name: restart nginx
      service: name=nginx state=restarted
hello-world.nginx.j2:
server {
    listen 80;

    location / {
        include proxy_params;
        proxy_pass http://unix:/tmp/hello_world.sock;
    }
}
hello-world.upstart.j2:
description "hello-world"

start on (filesystem)
stop on runlevel [016]

respawn
setuid nobody
setgid nogroup
chdir {{repository_path}}

exec gunicorn app:app --bind unix:/tmp/hello_world.sock --workers 3
Vagrantfile:
# This guide is optimized for Vagrant 1.7 and above.
# Although versions 1.6.x should behave very similarly, it is recommended
# to upgrade instead of disabling the requirement below.
Vagrant.require_version ">= 1.7.0"

Vagrant.configure(2) do |config|

  config.vm.box = "ubuntu/trusty64"

  config.vm.network "private_network", ip: "192.168.33.15"

  config.vm.provision "ansible" do |ansible|
    ansible.verbose = "v"
    ansible.playbook = "site.yml"
  end
end
Ph.D. / Golden Gate Ave, San Francisco / Seoul National Univ / Carnegie Mellon / UC Berkeley / DevOps / Deep Learning / Visualization