Datadog v.5 - Monitoring with PagerDuty/HipChat and APM
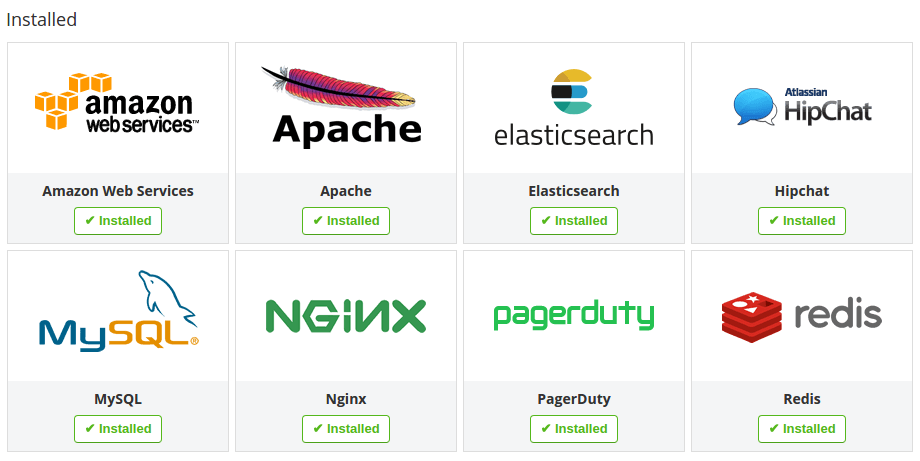
In this article, we'll install datadog agent on 3 hosts and will integrate the services such as PagerDuty, HipChat, AWS, nginx, apache, mysql, redis, and elasticsearch.
Here is the preview of screen shots after all done:

We'll use trial version of Datadog v.5.12.3.
Depending on the agent, it will give us url that we can use for our installation:
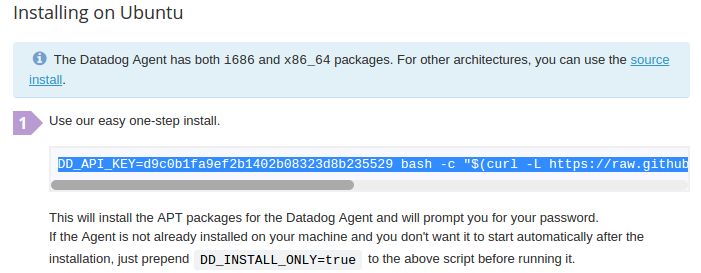
The Datadog Agent collects metrics and events from our systems and apps. Install at least one Agent anywhere, even on our workstation.
Let's install it using the url provided and following the instructions for a given OS:
$ DD_API_KEY=d9c0b1fa9ef2b1402b08323d8b235529 bash -c "$(curl -L https://raw.githubusercontent.com/DataDog/dd-agent/master/packaging/datadog-agent/source/install_agent.sh)"
...
* Installing apt-transport-https
...
* Installing APT package sources for Datadog
...
* Installing the Datadog Agent package
...
Enabling service datadog-agent
Creating dd-agent group
Creating dd-agent user
...
* Adding your API key to the Agent configuration: /etc/dd-agent/datadog.conf

* Starting the Agent...


Your Agent has started up for the first time. We're currently verifying that
data is being submitted. You should see your Agent show up in Datadog shortly
at:

    https://app.datadoghq.com/infrastructure

Waiting for metrics.................................

Your Agent is running and functioning properly. It will continue to run in the
background and submit metrics to Datadog.

If you ever want to stop the Agent, run:

    sudo /etc/init.d/datadog-agent stop

And to run it again run:

    sudo /etc/init.d/datadog-agent start
We installed the Datadog on Ubuntu desktop. Now, we want to install it on other server nodes running CentOS and Ubuntu. For these, we'll prepend "DD_INSTALL_ONLY=true" to the command since we don't want it to start automatically after the installation:
$ DD_INSTALL_ONLY=true DD_API_KEY=d9c0b1fa9ef2b1402b08323d8b235529 bash -c "$(curl -L https://raw.githubusercontent.com/DataDog/dd-agent/master/packaging/datadog-agent/source/install_agent.sh)"
...
* DD_INSTALL_ONLY environment variable set: the newly installed version of the agent
will not start by itself. You will have to do it manually using the following
command:

    sudo /etc/init.d/datadog-agent restart
Let's start it on CentOS node:
$ sudo /etc/init.d/datadog-agent restart
...
Restarting datadog-agent (via systemctl):                  [  OK  ]
On another Ubuntu node:
$ DD_INSTALL_ONLY=true DD_API_KEY=d9c0b1fa9ef2b1402b08323d8b235529 bash -c "$(curl -L https://raw.githubusercontent.com/DataDog/dd-agent/master/packaging/datadog-agent/source/install_agent.sh)"
...* Adding your API key to the Agent configuration: /etc/dd-agent/datadog.conf


* DD_INSTALL_ONLY environment variable set: the newly installed version of the agent
will not start by itself. You will have to do it manually using the following
command:

    sudo invoke-rc.d datadog-agent restart
$ sudo /etc/init.d/datadog-agent restart
[ ok ] Restarting datadog-agent (via systemctl): datadog-agent.service.
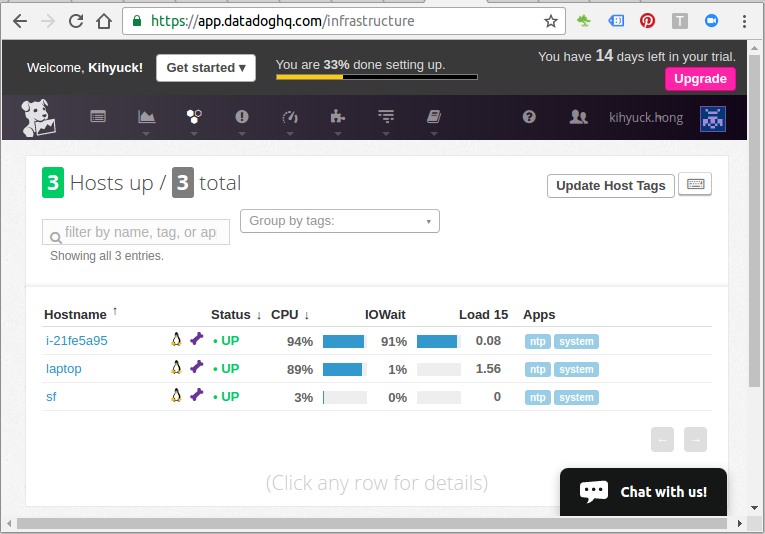
Type https://app.datadoghq.com/infrastructure into a browser. We can see the initial dashboard for our three nodes, and it shows us our "Infrastructure List" under "Infrastructure" menu:
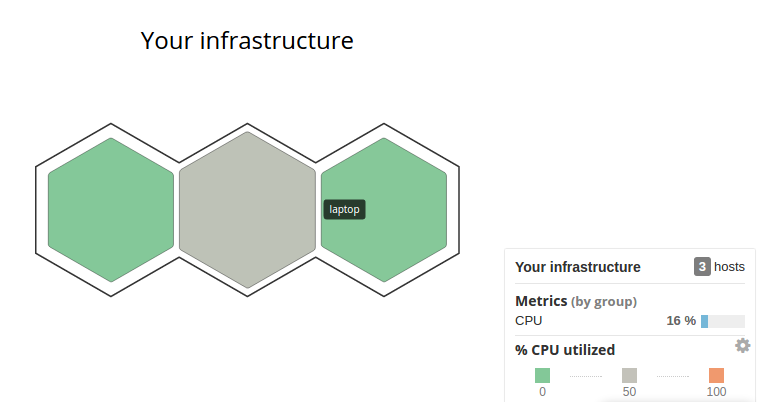
We can select "Host Map" instead of "List":
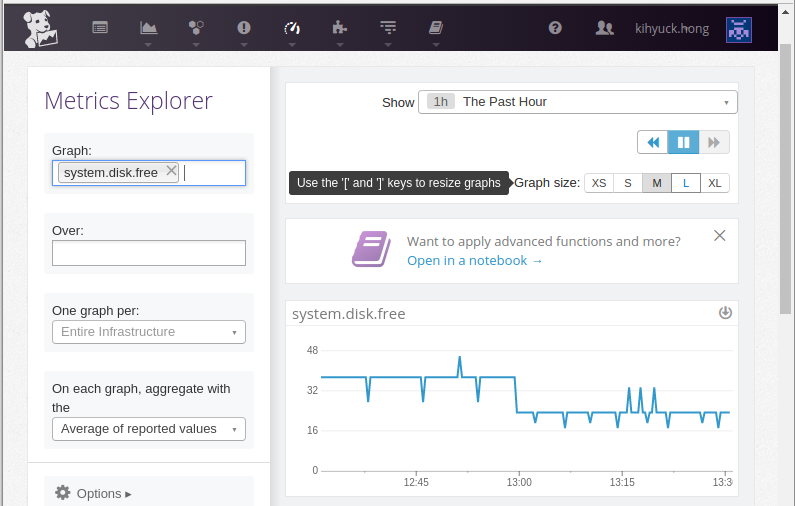
Metrics Explorer:
HipChat is hosted group chat and IM for companies and teams. We want to integrate with HipChat to:
- be notified when someone posts on our stream
- be notified when a metric alert is triggered
Here is the integration page:
On the page, type in the token from HipCHat and set the name of the room. Then, select "install integration".
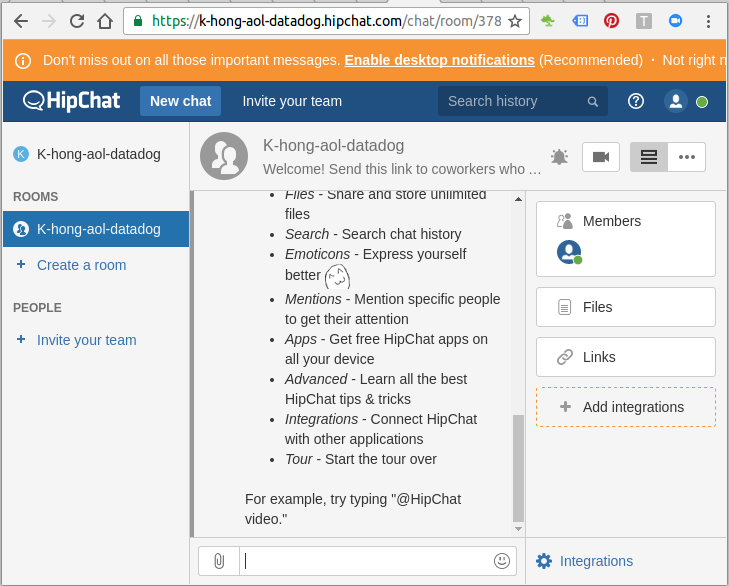
Here is the the chat room:
We can post a new comment on the Event pane:
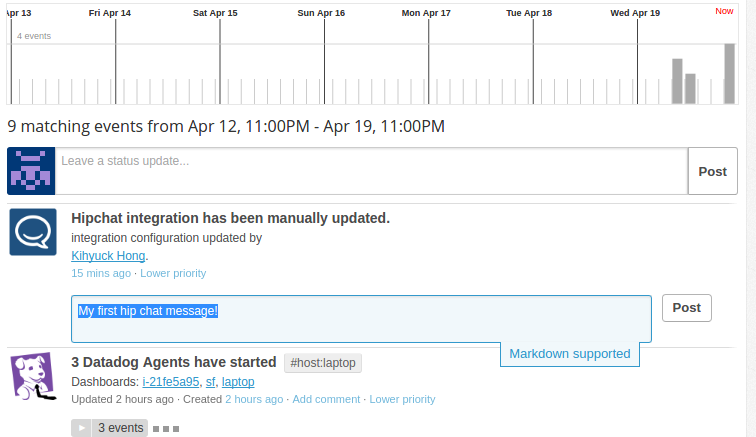
We'll get popup notice for the post, and we can check if from our HipChat room.
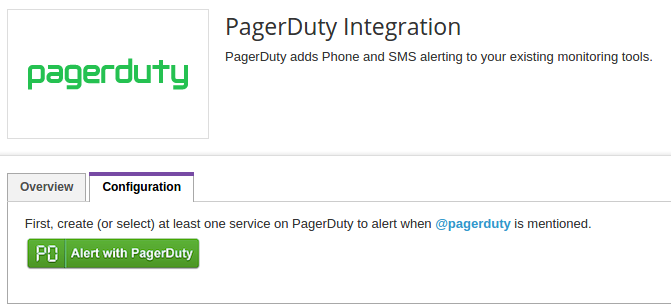
PagerDuty adds Phone and SMS alerting to our existing monitoring tools.
Integrate with PagerDuty to:
- Trigger and resolve incidents from our stream by mentioning @pagerduty in our post
- See incidents and escalations in our stream as they occur
- Get a daily reminder of who's on-call
Check Datadog Integration Guide
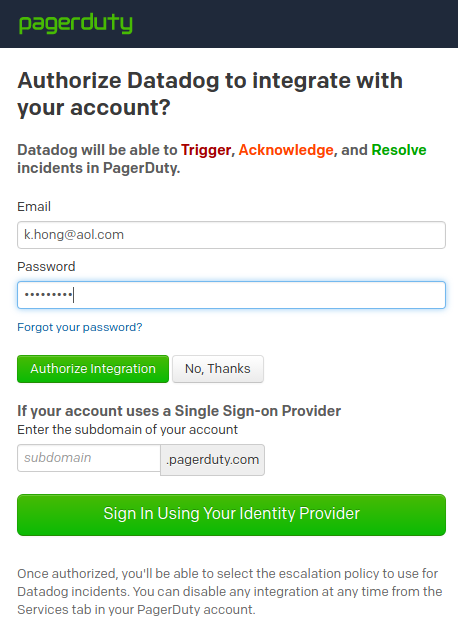
After giving email/password, select "Authorize Integration"
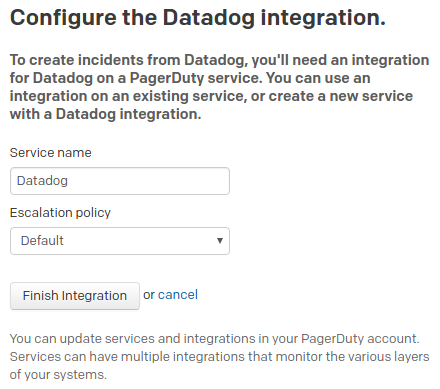
Click "Finish Integration"
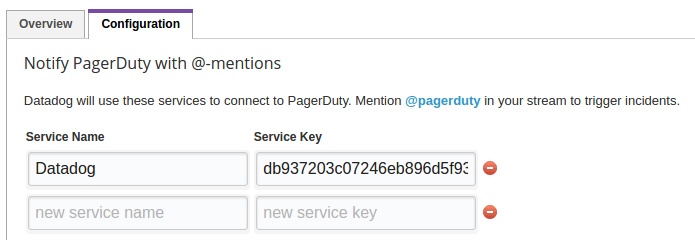
We also need to fill in the PagerDuty service:
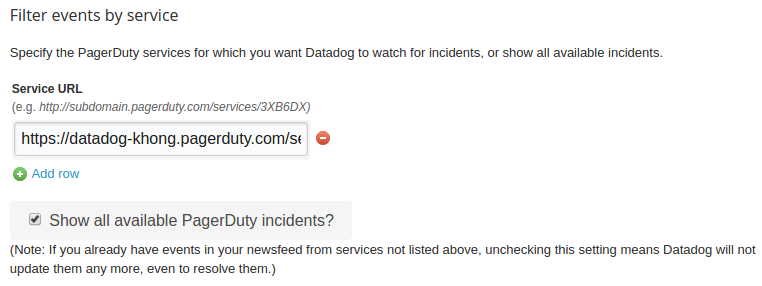
Datadog will use these services to connect to PagerDuty.
Click "Update Configuration"
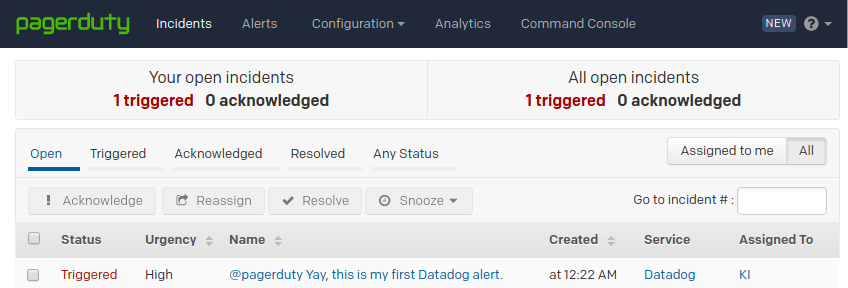
To test the integration, simply make a post with @pagerduty (i.e. @pagerduty Yay, this is my first Datadog alert.) in our newsfeed:

This will create an incident in PagerDuty and will show up in our Datadog newsfeed:
Provide AWS Access Key and AWS Secret Key, then click "Install Integration"
Setting up the Datadog integration with Amazon Web Services requires configuring role delegation using AWS IAM and it is the recommended way of configuration.
Although we could give Datadog access to an IAM user and its long-term credentials in our AWS account, we should choose instead to go with the highly recommended best practice of using an IAM role. An IAM role provides a mechanism to allow a third party to access our AWS resources without needing to share long-term credentials (for example, an IAM user's access key).
We can use an IAM role to establish a trusted relationship between our AWS account and the account belonging to Datadog. After this relationship is established, one of Datadog's IAM users or applications in the trusted AWS account can call the AWS STS AssumeRole API to obtain temporary security credentials that can then be used to access AWS resources in our account.
So, let's use IAM user/role (Role Delegation) as shown below (follow the instruction from http://docs.datadoghq.com/integrations/aws/):
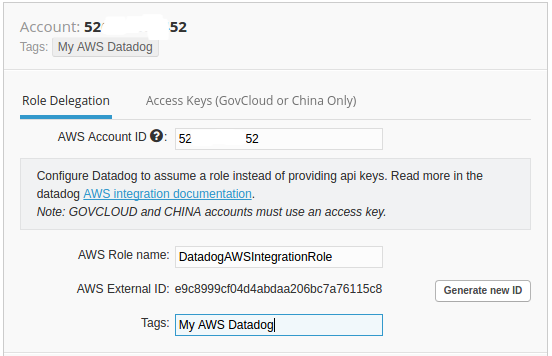
The steps were:
- Open the AWS Integration tile.
- Select the Role Delegation tab.
- Enter our AWS Account ID which can be found in the ARN of the newly created role. Then enter the name of the role we just created. Finally enter the External ID we specified above.
- Choose the services we want to collect metrics for on the left side of the dialog. We can optionally add tags to all hosts and metrics. Also if we want to only monitor a subset of EC2 instances on AWS, tag them and specify the tag in the limit textbox here.
After setting up AWS Account, click "Install Integration".
ssh into the instance where the Elasticsearch is installed:
$ /etc/dd-agent/conf.d
$ sudo cp elastic.yaml.example elastic.yaml
Make sure the following line is not commented:
- url: http://localhost:9200
Then, restart dd agent:
$ sudo /etc/init.d/datadog-agent restart
Click "Install Integration"
So far, we integrated the following:

First, copy the sample:
$ sudo cp mysql.yaml.example mysql.yaml
/etc/dd-agent/conf.d/mysql.yaml:
instances:
  - server: 127.0.0.1
    user: datadog
    pass: mypassword
Note that we may want to use 127.0.0.1 instead of localhost.
On mysql console:
mysql> create user 'datadog'@'127.0.0.1' identified by 'password';
mysql> grant all privileges on * . * to 'datadog'@'127.0.0.1';
mysql> flush privileges;

mysql> select user, host from mysql.user;
+----------------+-----------+
| user           | host      |
+----------------+-----------+
| datadog        | 127.0.0.1 |
Then, restart dd-agent:
$ sudo /etc/init.d/datadog-agent restart
Ref: http://docs.datadoghq.com/integrations/nginx/
The default agent checks require the "NGINX stub status module", which is not compiled by default. In debian/ubuntu, this module is enabled in the nginx-extras package. To check if the version of nginx has the stub status module support compiled in, we can run:
$ nginx -V |& grep http_stub_status_module
configure arguments: --with-cc-opt='-g -O2 -fPIE -fstack-protector-strong
-Wformat -Werror=format-security -
...
--with-http_stub_status_module
 --with-threads
/etc/dd-agent/conf.d/nginx.yaml
- nginx_status_url: http://localhost/nginx_status/
If we see some output with configure arguments: and lots of options, then we have it enabled. Once we have a status-enabled version of nginx, we can set up a URL for the status module:
server {
  listen 80;
  server_name localhost;

  access_log off;
  allow 127.0.0.1;
  deny all;

  location /nginx_status {
    stub_status on;
  }
}
If we're using name based virtualhost, we need to modify all conf files for each domain!
Then, restart datadog agent:
$ sudo /etc/init.d/datadog-agent restart
Ref: http://docs.datadoghq.com/integrations/apache/ and How to collect Apache performance metrics.
In order to collect metrics from Apache, we need to enable the status module and make sure that ExtendedStatus is on.
Let's check if mod_status is installed on our Apache server:
$ grep -irn status_module /etc/httpd
/etc/httpd/conf.modules.d/00-base.conf:55:LoadModule status_module modules/mod_status.so
Apache conf file:
<Location /server-status>
    SetHandler server-status
    Require local
    Require ip 45.79.90.218
</Location>
After we're done making changes, save and exit. We can check our configuration file for errors with the following command:
$ apachectl configtest
Perform a graceful restart to apply the changes without interrupting live connections (apachectl -k graceful or service apache2 graceful):
$ sudo service httpd graceful
/etc/dd-agent/conf.d/apache.yaml
instances:
  - apache_status_url: http://localhost/server-status?auto
Then, restart datadog agent:
$ sudo /etc/init.d/datadog-agent restart
Restarting datadog-agent (via systemctl):                  [  OK  ]
We can validate the integration by running the agent info command:
$ sudo /etc/init.d/datadog-agent info
We can enable APM by modifying the Datadog Agent configuration file /etc/dd-agent/datadog.conf (see Report your first traces and Datadog Trace Client):
[Main]
# Enable the trace agent.
apm_enabled: true
Then, we need to restart the Agent:
$ sudo /etc/init.d/datadog-agent restart
[ ok ] Restarting datadog-agent (via systemctl): datadog-agent.service.
Depending on the language, we may have to install different tracing client.
- Python client: ddtrace is Datadog's Python tracing client. It is used to trace requests as they flow across web servers, databases and microservices so developers have great visibility into bottlenecks and troublesome requests.
$ pip install ddtrace
- Ruby client:
Install the tracing client, adding the following gem in Gemfile:
source 'https://rubygems.org'
# tracing gem
gem 'ddtrace'
If we're not using Bundler to manage our dependencies, we can install ddtrace with:$ gem install ddtrace
Now we want to enable integrations with our app, and the easiest way to get started with the tracing client is to instrument our web application. Follow the relevant instructions for the integrations.
Here is a sample Flask app (hello.py) doing "Hello World!":
from flask import Flask
import blinker as _

from ddtrace import tracer
from ddtrace.contrib.flask import TraceMiddleware

app = Flask(__name__)

traced_app = TraceMiddleware(app, tracer, service="my-flask-app")

@app.route("/")
def hello():
    return "Hello World!"

if __name__ == "__main__":
    app.run()
Run the application:
$ python hello.py
 * Running on http://127.0.0.1:5000/ (Press CTRL+C to quit)
127.0.0.1 - - [20/Apr/2017 22:05:25] "GET / HTTP/1.1" 200 -
127.0.0.1 - - [20/Apr/2017 22:05:26] "GET /favicon.ico HTTP/1.1" 404 -

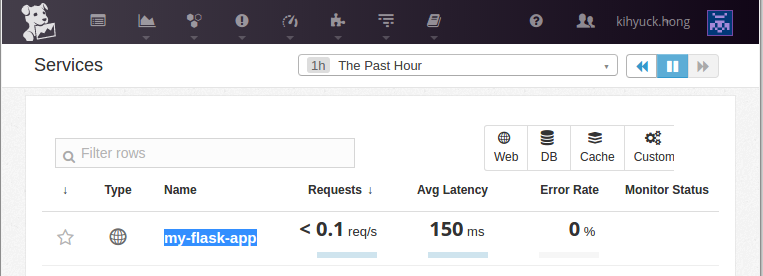
Go to APM=>Services:
AWS (Amazon Web Services)
- AWS : EKS (Elastic Container Service for Kubernetes)
- AWS : Creating a snapshot (cloning an image)
- AWS : Attaching Amazon EBS volume to an instance
- AWS : Adding swap space to an attached volume via mkswap and swapon
- AWS : Creating an EC2 instance and attaching Amazon EBS volume to the instance using Python boto module with User data
- AWS : Creating an instance to a new region by copying an AMI
- AWS : S3 (Simple Storage Service) 1
- AWS : S3 (Simple Storage Service) 2 - Creating and Deleting a Bucket
- AWS : S3 (Simple Storage Service) 3 - Bucket Versioning
- AWS : S3 (Simple Storage Service) 4 - Uploading a large file
- AWS : S3 (Simple Storage Service) 5 - Uploading folders/files recursively
- AWS : S3 (Simple Storage Service) 6 - Bucket Policy for File/Folder View/Download
- AWS : S3 (Simple Storage Service) 7 - How to Copy or Move Objects from one region to another
- AWS : S3 (Simple Storage Service) 8 - Archiving S3 Data to Glacier
- AWS : Creating a CloudFront distribution with an Amazon S3 origin
- AWS : Creating VPC with CloudFormation
- AWS : WAF (Web Application Firewall) with preconfigured CloudFormation template and Web ACL for CloudFront distribution
- AWS : CloudWatch & Logs with Lambda Function / S3
- AWS : Lambda Serverless Computing with EC2, CloudWatch Alarm, SNS
- AWS : Lambda and SNS - cross account
- AWS : CLI (Command Line Interface)
- AWS : CLI (ECS with ALB & autoscaling)
- AWS : ECS with cloudformation and json task definition
- AWS Application Load Balancer (ALB) and ECS with Flask app
- AWS : Load Balancing with HAProxy (High Availability Proxy)
- AWS : VirtualBox on EC2
- AWS : NTP setup on EC2
- AWS: jq with AWS
- AWS & OpenSSL : Creating / Installing a Server SSL Certificate
- AWS : OpenVPN Access Server 2 Install
- AWS : VPC (Virtual Private Cloud) 1 - netmask, subnets, default gateway, and CIDR
- AWS : VPC (Virtual Private Cloud) 2 - VPC Wizard
- AWS : VPC (Virtual Private Cloud) 3 - VPC Wizard with NAT
- DevOps / Sys Admin Q & A (VI) - AWS VPC setup (public/private subnets with NAT)
- AWS - OpenVPN Protocols : PPTP, L2TP/IPsec, and OpenVPN
- AWS : Autoscaling group (ASG)
- AWS : Setting up Autoscaling Alarms and Notifications via CLI and Cloudformation
- AWS : Adding a SSH User Account on Linux Instance
- AWS : Windows Servers - Remote Desktop Connections using RDP
- AWS : Scheduled stopping and starting an instance - python & cron
- AWS : Detecting stopped instance and sending an alert email using Mandrill smtp
- AWS : Elastic Beanstalk with NodeJS
- AWS : Elastic Beanstalk Inplace/Rolling Blue/Green Deploy
- AWS : Identity and Access Management (IAM) Roles for Amazon EC2
- AWS : Identity and Access Management (IAM) Policies, sts AssumeRole, and delegate access across AWS accounts
- AWS : Identity and Access Management (IAM) sts assume role via aws cli2
- AWS : Creating IAM Roles and associating them with EC2 Instances in CloudFormation
- AWS Identity and Access Management (IAM) Roles, SSO(Single Sign On), SAML(Security Assertion Markup Language), IdP(identity provider), STS(Security Token Service), and ADFS(Active Directory Federation Services)
- AWS : Amazon Route 53
- AWS : Amazon Route 53 - DNS (Domain Name Server) setup
- AWS : Amazon Route 53 - subdomain setup and virtual host on Nginx
- AWS Amazon Route 53 : Private Hosted Zone
- AWS : SNS (Simple Notification Service) example with ELB and CloudWatch
- AWS : Lambda with AWS CloudTrail
- AWS : SQS (Simple Queue Service) with NodeJS and AWS SDK
- AWS : Redshift data warehouse
- AWS : CloudFormation
- AWS : CloudFormation Bootstrap UserData/Metadata
- AWS : CloudFormation - Creating an ASG with rolling update
- AWS : Cloudformation Cross-stack reference
- AWS : OpsWorks
- AWS : Network Load Balancer (NLB) with Autoscaling group (ASG)
- AWS CodeDeploy : Deploy an Application from GitHub
- AWS EC2 Container Service (ECS)
- AWS EC2 Container Service (ECS) II
- AWS Hello World Lambda Function
- AWS Lambda Function Q & A
- AWS Node.js Lambda Function & API Gateway
- AWS API Gateway endpoint invoking Lambda function
- AWS API Gateway invoking Lambda function with Terraform
- AWS API Gateway invoking Lambda function with Terraform - Lambda Container
- Amazon Kinesis Streams
- AWS: Kinesis Data Firehose with Lambda and ElasticSearch
- Amazon DynamoDB
- Amazon DynamoDB with Lambda and CloudWatch
- Loading DynamoDB stream to AWS Elasticsearch service with Lambda
- Amazon ML (Machine Learning)
- Simple Systems Manager (SSM)
- AWS : RDS Connecting to a DB Instance Running the SQL Server Database Engine
- AWS : RDS Importing and Exporting SQL Server Data
- AWS : RDS PostgreSQL & pgAdmin III
- AWS : RDS PostgreSQL 2 - Creating/Deleting a Table
- AWS : MySQL Replication : Master-slave
- AWS : MySQL backup & restore
- AWS RDS : Cross-Region Read Replicas for MySQL and Snapshots for PostgreSQL
- AWS : Restoring Postgres on EC2 instance from S3 backup
- AWS : Q & A
- AWS : Security
- AWS : Security groups vs. network ACLs
- AWS : Scaling-Up
- AWS : Networking
- AWS : Single Sign-on (SSO) with Okta
- AWS : JIT (Just-in-Time) with Okta
Ph.D. / Golden Gate Ave, San Francisco / Seoul National Univ / Carnegie Mellon / UC Berkeley / DevOps / Deep Learning / Visualization