Nagios - The Industry Standard in IT Infrastructure Monitoring on Ubuntu 2020
This page is based on How To Install Nagios 4 and Monitor Your Servers on Ubuntu 14.04.
We may also want to watch following two videos (a little more than half an hour):
Nagios is a very popular open source monitoring system, and it is an essential tool for any production server environment.
We will install Nagios 4 on Ubuntu (Nagios Core, Plugins, and NRPE). After some basic configuration, we will be able to monitor host resources via the web interface.
On remote hosts, Nagios Remote Plugin Executor (NRPE) and plugins will be installed as an agent to monitor their local resources.
NRPE agent needs to be installed and configured on the remote machines. The NRPE requires Nagios Plugins, so the Pluggins must be installed on the remote Linux machine. Without these, the NRPE daemon will not work and will not monitor anything.
We also need to install a LAMP stack to make the Web Interface to work.
Let's install Apache using Ubuntu's package manager:
$ sudo apt-get update
$ sudo apt-get install apache2
$ sudo service apache2 restart
We can see the default Ubuntu 14.04 Apache web page:
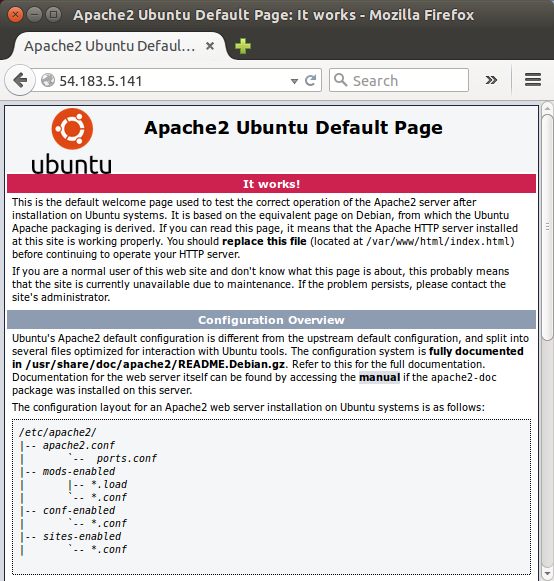
Now that we have our web server is running, it's time to install MySQL.
$ sudo apt-get install mysql-server php5-mysql
After the installation, we need to tell MySQL to create its database directory structure:
$ sudo mysql_install_db
Then, we want to run a security script that will remove some dangerous defaults and lock down access to our database system a little bit. Start the interactive script by running:
$ sudo mysql_secure_installation
PHP will process code to display dynamic content. It can run scripts, connect to our MySQL databases to get information, and hand the processed content over to our web server to display.
$ sudo apt-get install php5 libapache2-mod-php5 php5-mcrypt
If a user requests a directory from the server, Apache will first look for index.html. We need to tell our web server to prefer PHP files, so we'll make Apache look for an index.php file first.
To do this, we need to edit /etc/apache2/mods-enabled/dir.conf file:
<IfModule mod_dir.c>
    DirectoryIndex index.php index.html index.cgi index.pl index.xhtml index.htm
</IfModule>
Now, we need to restart the Apache web server:
$ sudo service apache2 restart
In order to test that our system is configured properly for PHP, we can create a very basic PHP script (/var/www/html/info.php):
<?php
phpinfo();
?>
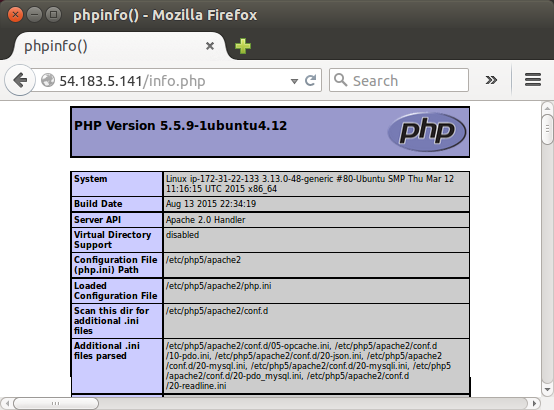
Our PHP is working as expected!
We need to create a user and group that will run the Nagios process. Create a nagios user and nagcmd group, then add the user to the group with these commands:
$ sudo useradd nagios
$ sudo groupadd nagcmd
$ sudo usermod -a -G nagcmd nagios
Let's check the swap size:
$ grep SwapTotal /proc/meminfo
SwapTotal:             0 kB
Because our server does not have a swap device, add 2 GB swap memory with these commands:
$ sudo dd if=/dev/zero of=/swap bs=1024 count=2097152
The command writes 2097152 blocks of 1024 bytes length (= 2GB bytes in total) of binary zeros into /swap.
$ sudo mkswap /swap && sudo chown root. /swap && sudo chmod 0600 /swap && sudo swapon /swap
$ sudo sh -c "echo /swap swap swap defaults 0 0 >> /etc/fstab"
$ sudo sh -c "echo vm.swappiness = 0 >> /etc/sysctl.conf && sysctl -p"
Because we are building Nagios Core from source, we need to install a few libraries that will allow us to complete the build. We will also install apache2-utils to set up the Nagios web interface.
Let's install the required packages:
$ sudo apt-get install build-essential libgd2-xpm-dev openssl libssl-dev xinetd apache2-utils
Download the source code for the latest stable release of Nagios Core from .
$ cd ~
$ curl -L -O https://assets.nagios.com/downloads/nagioscore/releases/nagios-4.1.1.tar.gz
Extract the Nagios archive with this command:
$ tar xvzf nagios-*.tar.gz

$ cd nagios-*
We must configure it before building Nagios. If we want to configure it to use postfix (which we can install with apt-get), add --with-mail=/usr/sbin/sendmail to the following command:
$ ./configure --with-nagios-group=nagios --with-command-group=nagcmd
...
*** Configuration summary for nagios 4.1.1 08-19-2015 ***:

 General Options:
 -------------------------
        Nagios executable:  nagios
        Nagios user/group:  nagios,nagios
       Command user/group:  nagios,nagcmd
             Event Broker:  yes
        Install ${prefix}:  /usr/local/nagios
    Install ${includedir}:  /usr/local/nagios/include/nagios
                Lock file:  ${prefix}/var/nagios.lock
   Check result directory:  ${prefix}/var/spool/checkresults
           Init directory:  /etc/init.d
  Apache conf.d directory:  /etc/apache2/conf.d
             Mail program:  /bin/mail
                  Host OS:  linux-gnu
          IOBroker Method:  epoll

 Web Interface Options:
 ------------------------
                 HTML URL:  http://localhost/nagios/
                  CGI URL:  http://localhost/nagios/cgi-bin/
 Traceroute (used by WAP):  /usr/sbin/traceroute
Now compile Nagios:
$ make all
We can now run these make commands to install Nagios including init scripts and sample configuration files:
$ sudo make install
$ sudo make install-commandmode
$ sudo make install-init
$ sudo make install-config
$ sudo /usr/bin/install -c -m 644 sample-config/httpd.conf /etc/apache2/sites-available/nagios.conf
In order to issue external commands via the web interface to Nagios, we must add the web server user, www-data, to the nagcmd group:
$ sudo usermod -G nagcmd www-data
Download the latest release of Nagios Plugins:
$ cd ~
$ curl -L -O http://nagios-plugins.org/download/nagios-plugins-2.1.1.tar.gz
$ tar xvf nagios-plugins-*.tar.gz
$ cd nagios-plugins-*
We must configure Nagios Plugins before building it:
$ ./configure --with-nagios-user=nagios --with-nagios-group=nagios --with-openssl
Now compile Nagios Plugins with this command:
$ make
Then, install it with this command:
$ sudo make install
We can check what's been configured and see if there are any errors:
$ sudo /usr/local/nagios/bin/nagios -v /usr/local/nagios/etc/nagios.cfg
...
Running pre-flight check on configuration data...

Checking objects...
	Checked 8 services.
	Checked 1 hosts.
	Checked 1 host groups.
	Checked 0 service groups.
	Checked 1 contacts.
	Checked 1 contact groups.
	Checked 24 commands.
	Checked 5 time periods.
	Checked 0 host escalations.
	Checked 0 service escalations.
Checking for circular paths...
	Checked 1 hosts
	Checked 0 service dependencies
	Checked 0 host dependencies
	Checked 5 timeperiods
Checking global event handlers...
Checking obsessive compulsive processor commands...
Checking misc settings...

Total Warnings: 0
Total Errors:   0
Install the latest stable release of Nagios Remote Plugin Executor (NRPE):
$ cd ~
$ curl -L -O http://downloads.sourceforge.net/project/nagios/nrpe-2.x/nrpe-2.15/nrpe-2.15.tar.gz
$ tar xvf nrpe-*.tar.gz
$ cd nrpe-*
$ ./configure --enable-command-args --with-nagios-user=nagios --with-nagios-group=nagios --with-ssl=/usr/bin/openssl --with-ssl-lib=/usr/lib/x86_64-linux-gnu
Let's build and install NRPE and its xinetd startup script:
$ make all
$ sudo make install
$ sudo make install-xinetd
$ sudo make install-daemon-config
Modify the xinetd startup script (/etc/xinetd.d/nrpe) by adding the private IP address of the our Nagios server to the end:
only_from = 127.0.0.1 172.31.22.133
Only the Nagios server will be allowed to communicate with NRPE. Restart the xinetd service to start NRPE:
$ sudo service xinetd restart
Here is the modified file:
# default: on
# description: NRPE (Nagios Remote Plugin Executor)
service nrpe
{
        flags           = REUSE
        socket_type     = stream
        port            = 5666
        wait            = no
        user            = nagios
        group           = nagios
        server          = /usr/local/nagios/bin/nrpe
        server_args     = -c /usr/local/nagios/etc/nrpe.cfg --inetd
        log_on_failure  += USERID
        disable         = no
        only_from       = 127.0.0.1 172.31.22.133
}
- The lines with the "#" character at the beginning are comments without any effect on the service.
- The socket_type determines the way of data transmission through the service. There are three types: stream, dgram and raw. This last one is useful, when we want to establish a service based on a non-standard protocol.
- With the user option it is possible to choose a user to be the owner of the running service. It is highly recommended to choose a non-root user for security reasons.
- The disable option is a switch to run a service or not. In most cases the default state is yes. To activate the service change it to no.
- When the wait is on yes the xinetd will not receive request for the service if it has a connection. So the number of connections is limited to one. It provides very good protection when we want to establish only one connection per time..
Now that Nagios 4 is installed, we need to configure it. Let's edit main Nagios configuration file (/usr/local/nagios/etc/nagios.cfg):
cfg_dir=/usr/local/nagios/etc/servers
#cfg_dir=/usr/local/nagios/etc/printers
#cfg_dir=/usr/local/nagios/etc/switches
#cfg_dir=/usr/local/nagios/etc/routers
Let's create the directory that will store the configuration file for each server that we will monitor:
$ sudo mkdir /usr/local/nagios/etc/servers
Edit Nagios contacts configuration file (/usr/local/nagios/etc/objects/contacts.cfg), and replace the email value:
email k@bogotobogo ; <<***** CHANGE THIS TO YOUR EMAIL ADDRESS ******
For systemd init, we may need to add the following lines to /etc/systemd/system/nagios.service:
[Unit]
Description=Nagios
BindTo=network.target


[Install]
WantedBy=multi-user.target

[Service]
User=nagios
Group=nagios
Type=simple
ExecStart=/usr/local/nagios/bin/nagios /usr/local/nagios/etc/nagios.cfg
We need to add a new command (check_nrpe) to the end of our Nagios configuration (/usr/local/nagios/etc/objects/commands.cfg):
define command{
        command_name check_nrpe
        command_line $USER1$/check_nrpe -H $HOSTADDRESS$ -c $ARG1$
}
We need to enable the Apache rewrite and cgi modules:
$ sudo a2enmod rewrite
$ sudo a2enmod cgi
Use htpasswd to create an admin user, called "nagiosadmin", that can access the Nagios web interface:
$ sudo htpasswd -c /usr/local/nagios/etc/htpasswd.users nagiosadmin
New password:
Re-type new password:
Adding password for user nagiosadmin
Here, we can type in "nagiosadmin" for password.
Just for reference, here is the nagios.conf:
ScriptAlias /nagios/cgi-bin "/usr/local/nagios/sbin"

<Directory "/usr/local/nagios/sbin">
#  SSLRequireSSL
   Options ExecCGI
   AllowOverride None
   <IfVersion >= 2.3>
      <RequireAll>
         Require all granted
#        Require host 127.0.0.1

         AuthName "Nagios Access"
         AuthType Basic
         AuthUserFile /usr/local/nagios/etc/htpasswd.users
         Require valid-user
      </RequireAll>
   </IfVersion>
   <IfVersion < 2.3>
      Order allow,deny
      Allow from all
#     Order deny,allow
#     Deny from all
#     Allow from 127.0.0.1

      AuthName "Nagios Access"
      AuthType Basic
      AuthUserFile /usr/local/nagios/etc/htpasswd.users
      Require valid-user
   </IfVersion>
</Directory>


Alias /nagios "/usr/local/nagios/share"

<Directory "/usr/local/nagios/share">
#  SSLRequireSSL
   Options None
   AllowOverride None
   <IfVersion >= 2.3>
      <RequireAll>
         Require all granted
#        Require host 127.0.0.1

         AuthName "Nagios Access"
         AuthType Basic
         AuthUserFile /usr/local/nagios/etc/htpasswd.users
         Require valid-user
      </RequireAll>
   </IfVersion>
   <IfVersion < 2.3>
      Order allow,deny
      Allow from all
#     Order deny,allow
#     Deny from all
#     Allow from 127.0.0.1

      AuthName "Nagios Access"
      AuthType Basic
      AuthUserFile /usr/local/nagios/etc/htpasswd.users
      Require valid-user
   </IfVersion>
</Directory>
Let's create a symbolic link of nagios.conf to the sites-enabled directory:
$ sudo ln -s /etc/apache2/sites-available/nagios.conf /etc/apache2/sites-enabled/

$ ls -la /etc/apache2/sites-enabled/
...
lrwxrwxrwx 1 root root   40 Sep 30 00:35 nagios.conf -> /etc/apache2/sites-available/nagios.conf
Let's start nagios and apache2:
$ sudo service nagios start
$ sudo service apache2 restart
Run the following command to enable Nagios to start on server boot:
$ sudo ln -s /etc/init.d/nagios /etc/rcS.d/S99nagios

$ ls -la /etc/rcS.d/S99nagios
lrwxrwxrwx 1 root root 18 Sep 30 00:41 /etc/rcS.d/S99nagios -> /etc/init.d/nagios
For systemd init:
$ sudo systemctl start nagios
For auto-reboot for systemd:
$ sudo systemctl enable /etc/systemd/system/nagios.service
Let's go to our Nagios home page:

Click on the Hosts link, in the left navigation bar, to see which hosts Nagios is monitoring:
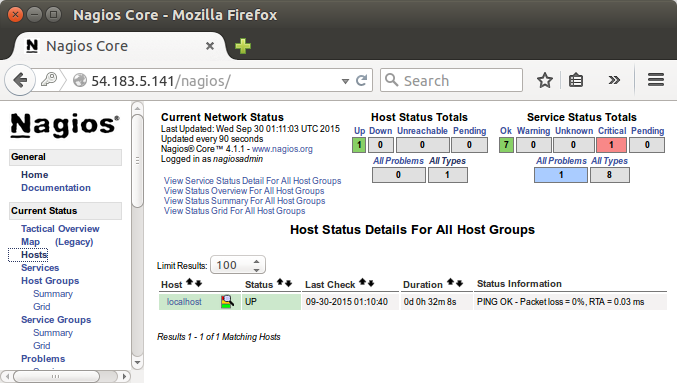
We'll see how to add a new host to Nagios. On a new server that we want to monitor, update apt-get:
$ sudo apt-get update
Now we need to install Nagios Plugins and Nagios Remote Plugin Executor (NRPE):
$ sudo apt-get install nagios-plugins nagios-nrpe-server
Now, let's update the NRPE configuration file (/etc/nagios/nrpe.cfg), find the allowed_hosts directive, and add the private IP address of our Nagios server to the comma-delimited list:
allowed_hosts=127.0.0.1,172.31.22.133
Now, we configured NRPE to accept requests from our Nagios server, via its private IP address (we need to replace the IPs and disk).
server_address=client_private_IP
allowed_hosts=nagios_server_private_IP
command[check_hda1]=/usr/lib/nagios/plugins/check_disk -w 20% -c 10% -p /dev/xvda1
Note that there are several other "commands" defined in this file that will run if the Nagios server is configured to use them. Also note that NRPE will be listening on port 5666 because server_port=5666.
Let's restart NRPE:
$ sudo service nagios-nrpe-server restart
Now that we've done installing and configuring NRPE on the hosts that we want to monitor, we will have to add these hosts to our Nagios server configuration before it will start monitoring them.
On our Nagios server, create a new configuration file for each of the remote hosts that we want to monitor in /usr/local/nagios/etc/servers/agent1.cfg. Replace the highlighted word, "agent1", with the name of your host:
Add the following host definition to the configuration file (/usr/local/nagios/etc/servers/agent1.cfg), replacing the host_name value with our remote hostname, the alias value with a description of the host, and the address value with the private IP address of the remote host:
define host {
        use                             linux-server
        host_name                       agent1
        alias                           Nagios Agent 1
        address                         172.31.27.202
        max_check_attempts              5
        check_period                    24x7
        notification_interval           30
        notification_period             24x7
}
Note that the "agent1" is a network hostname. So, for example, in AWS, we may want to use something like "ip-172-31-3-54" unless we've change the hostname.
With the configuration file above, Nagios will only monitor if the host is up or down. Save and exit then restart Nagios:
$ sudo service nagios start
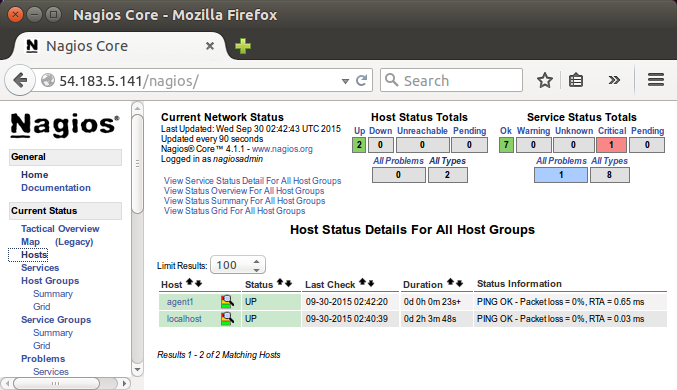
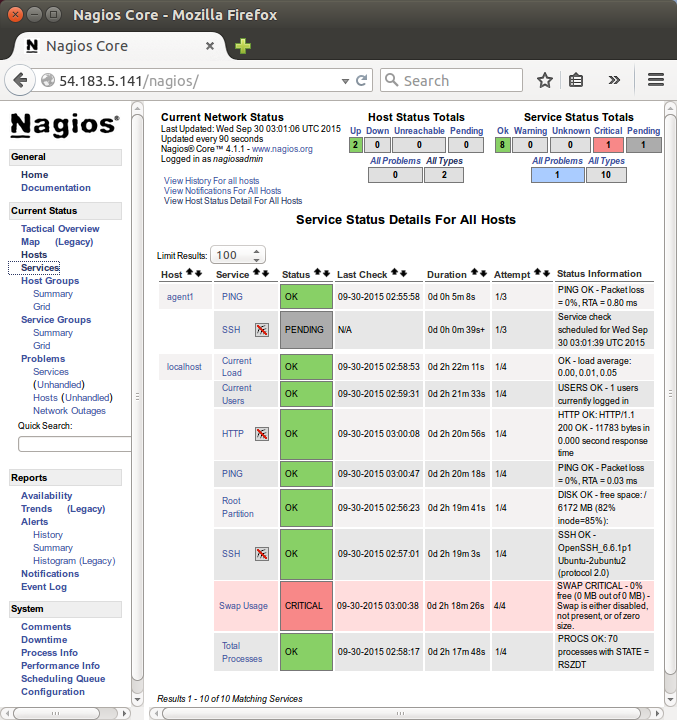
We'll add more services to monitor. We need to modify configuration file on Nagios server (/usr/local/nagios/etc/servers/agent1.cfg):
define host {
        use                             linux-server
        host_name                       agent1
        alias                           Nagios Agent 1
        address                         172.31.27.202
        max_check_attempts              5
        check_period                    24x7
        notification_interval           30
        notification_period             24x7
}

define service {
        use                             generic-service
        host_name                       agent1
        service_description             PING
        check_command                   check_ping!100.0,20%!500.0,60%
}

define service {
        use                             generic-service
        host_name                       agent1
        service_description             SSH
        check_command                   check_ssh
        notifications_enabled           0
}
Note that we added two additional services (PING ans SSH). Now, let's reload Nagios:
$ sudo service nagios reload
Running configuration check...
Reloading nagios configuration...
done
Ph.D. / Golden Gate Ave, San Francisco / Seoul National Univ / Carnegie Mellon / UC Berkeley / DevOps / Deep Learning / Visualization