Virtual Machine via Vagrant with Chef client provision

Chef
"Vagrant is free and open-source software for creating and configuring virtual development environments. It can be seen as a wrapper around virtualization software such as VirtualBox, KVM, VMware and around configuration management software such as Chef, Salt or Puppet." - wiki.
In this chapter, we will see how to use Vagrant to manage VMs using VirtualBox and Chef Client as the provisioner.
Actually, developing Chef cookbooks requires us to run our work-in-progress cookbooks multiple times on our nodes. To make sure they work, we need a clean, initial state of our nodes every time we run them. We can achieve this by using Virtual Machines (VM). But manually setting up and destroying VMs is tedious and breaks our development flow.
Hosted Chef is operated as a cloud service by Opscode. We can quickly set up and it gives us full control, using users and groups to control the access permissions to our Chef setup. We'll configure Knife, Chef's command-line tool to interact with Hosted Chef, so that we can start managing our nodes.
Provisioners in Vagrant allow us to automatically install software, alter configurations, and more on the machine as part of the vagrant up process.
This is useful since boxes typically aren't built perfectly for our use case. Of course, if we want to just use vagrant ssh and install the software by hand, that works. But by using the provisioning systems built-in to Vagrant, it automates the process so that it is repeatable. Most importantly, it requires no human interaction, so we can vagrant destroy and vagrant up and have a fully ready-to-go work environment with a single command. Powerful.
Vagrant gives us multiple options for provisioning the machine, from simple shell scripts to more complex, industry-standard configuration management systems.
The Chef Client provisioner allows us to provision the guest using Chef, specifically by connecting to an existing Chef Server and registering the Vagrant machine as a node within our infrastructure.
Download and install VirtualBox at https://www.virtualbox.org/wiki/Downloads
The Oracle public key for apt-secure can be downloaded here. After downloading the key file into ~/Downloads, we can add this key from the file which contains the key:
k@laptop:~/Downloads$ sudo apt-key add oracle_vbox.asc
OK
Now, we're ready to install VirtualBox:
k@laptop:~$ sudo dpkg -i virtualbox-4.3_4.3.20-96996~Ubuntu~raring_amd64.deb
Ubuntu/Debian users might want to install the dkms package to ensure that the VirtualBox host kernel modules (vboxdrv, vboxnetflt and vboxnetadp) are properly updated if the linux kernel version changes during the next apt-get upgrade.
k@laptop:~$ sudo apt-get install dkms
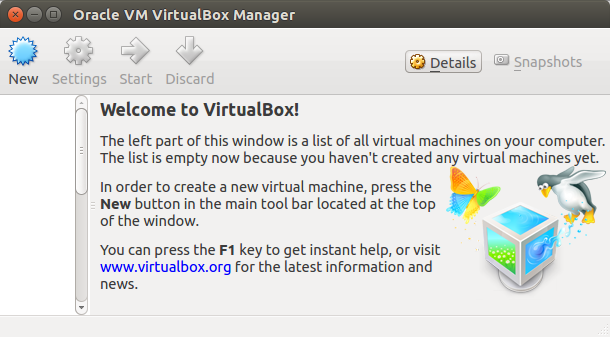
Let's check if it is installed:
k@laptop:~$ virtualbox

Get the appropriate installer or package from https://www.vagrantup.com/downloads.html.
Once the package is downloaded, the next step is installing it, making sure we have the right package name:
k@laptop:~/Downloads$ sudo dpkg -i vagrant_1.6.5_x86_64.deb

k@laptop:~$ vagrant -v
Vagrant 1.6.5
This will vagrant to our system path so that it is available in terminals.
k@laptop:~$ which vagrant
/usr/bin/vagrant
Install the Vagrant Omnibus plugin to enable Vagrant to install Chef Client on our VM by running the following commands:
k@laptop:~/chef-repo$ vagrant plugin install vagrant-omnibus
Installing the 'vagrant-omnibus' plugin. This can take a few minutes...
Installed the plugin 'vagrant-omnibus (1.4.1)'!
To view what plugins are installed into our Vagrant environment at any time, use the vagrant plugin list command. This will list the plugins that are installed along with their version:
k@laptop:~$ vagrant plugin list
vagrant-login (1.0.1, system)
vagrant-omnibus (1.4.1)
vagrant-share (1.1.2, system)
We're going to create a Vagrant-managed virtual machine to act as our Node. Vagrant manages each virtual machine as a "box." Opscode makes a number of Vagrant boxes available through it's bento project on github.com.
Let's create and boot a virtual node by using Vagrant:
- Visit https://github.com/opscode/bento and choose a Vagrant box for our VMs on. The Bento is a project that encapsulates Packer templates for building Vagrant baseboxes. These boxes are used internally at Chef Software, Inc. for testing Hosted Enterprise Chef, Private Enterprise Chef and open source cookbooks via test-kitchen.
We'll use opscode_ubuntu-14.04_chef-provisionerless.box in this example. Note that it does not include Chef Client. Vagrant can be instructed to install Chef at runtime using the vagrant-omnibus plugin which ensures the desired version of Chef is installed via the platform-specific Omnibus packages. - Create a file called ~/chef-repo/Vagrantfile:
Vagrant.configure("2") do |config|
  config.vm.box = "opscode_ubuntu-14.04"
  config.vm.box_url = "http://opscode-vm-bento.s3.amazonaws.com/vagrant/virtualbox/opscode_ubuntu-14.04_chef-provisionerless.box"

  config.omnibus.chef_version = :latest
  config.vm.provision :chef_client do |chef|
    chef.provisioning_path = "/etc/chef"
    chef.chef_server_url = "https://api.opscode.com/organizations/bogotobogo-chef"
    chef.validation_key_path = "~/chef-repo/.chef/bogotobogo-chef-validator.pem"
    chef.validation_client_name = "bogotobogo-chef-validator"
    chef.node_name = "server"
  end
  config.vm.provider :virtualbox do |vb|
    vb.gui = false
  end
end
The minimum required to use provision using Chef Client is to provide a URL to the Chef Server as well as the path to the validation key so that the node can register with the Chef Server. The node will register with the Chef Server specified. Note that the bogotobogo-chef is used for name of our organization on the Chef Server. The Omnibus Vagrant plugin automatically hooks into the Vagrant provisioning middleware. We specify the version of the Chef Omnibus package we want installed using the omnibus.chef_version config key. The version string should be a valid Chef release version or :latest as in our case. - Create our virtual node using Vagrant. Note that we need to run in the directory where the Vagrantfile is located.
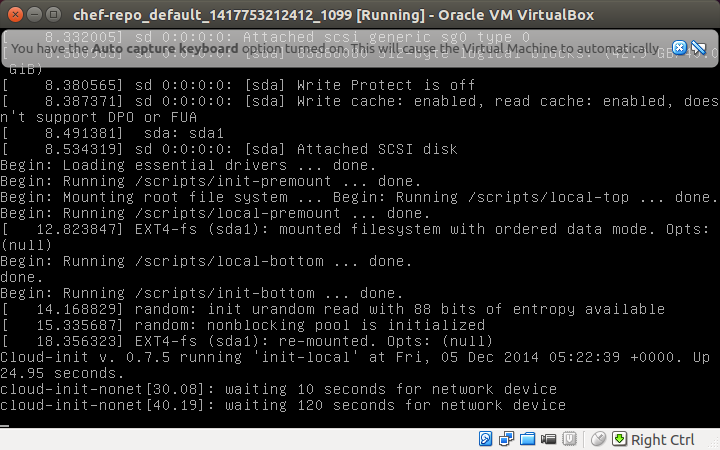
k@laptop:~/chef-repo$ vagrant up Bringing machine 'default' up with 'virtualbox' provider... ==> default: Box 'opscode_ubuntu-14.04' could not be found. Attempting to find and install... default: Box Provider: virtualbox default: Box Version: >= 0 ==> default: Adding box 'opscode_ubuntu-14.04' (v0) for provider: virtualbox default: Downloading: http://opscode-vm-bento.s3.amazonaws.com/vagrant/virtualbox/opscode_ubuntu-14.04_chef-provisionerless.box ==> default: Successfully added box 'opscode_ubuntu-14.04' (v0) for 'virtualbox'! ==> default: Importing base box 'opscode_ubuntu-14.04'... ... ==> default: Booting VM... ==> default: Waiting for machine to boot. This may take a few minutes... default: SSH address: 127.0.0.1:2222 default: SSH username: vagrant default: SSH auth method: private key default: Warning: Connection timeout. Retrying... default: Warning: Connection timeout. Retrying... default: Warning: Connection timeout. Retrying... default: Warning: Connection timeout. Retrying... default: Warning: Remote connection disconnect. Retrying... default: Warning: Remote connection disconnect. Retrying... default: Warning: Remote connection disconnect. Retrying... default: Warning: Remote connection disconnect. Retrying... default: Warning: Remote connection disconnect. Retrying... ==> default: Machine booted and ready! ==> default: Checking for guest additions in VM... ==> default: Mounting shared folders... default: /vagrant => /home/k/chef-repo ==> default: Machine already provisioned. Run `vagrant provision` or use the `--provision` ==> default: to force provisioning. Provisioners marked to run always will still run. - We're not going to do it now, but if we want to stop our VM, just run
the vagrant halt command:
k@laptop:~/chef-repo$ vagrant halt
- We can check the status of VirtualBox:
k@laptop:~/chef-repo$ vagrant status
Current machine states:

default                   running (virtualbox)

The VM is running. To stop this VM, you can run `vagrant halt` to
shut it down forcefully, or you can run `vagrant suspend` to simply
suspend the virtual machine. In either case, to restart it again,
simply run `vagrant up`.
- Log in to our virtual node using SSH:
k@laptop:~/chef-repo$ vagrant ssh
Welcome to Ubuntu 14.04.1 LTS (GNU/Linux 3.13.0-40-generic i686)

 * Documentation:  https://help.ubuntu.com/

 System information disabled due to load higher than 1.0

  Get cloud support with Ubuntu Advantage Cloud Guest:
    http://www.ubuntu.com/business/services/cloud

0 packages can be updated.
0 updates are security updates.


vagrant@vagrant-ubuntu-trusty-32:~$
The Vagrantfile is written in a Ruby Domain Specific Language (DSL) for configuring the Vagrant virtual machines. We booted a simple Ubuntu VM. Let's go through the Vagrantfile we're using step-by-step.
-
First, we create a config object. Vagrant will use this config object to configure the VM:
Vagrant.configure("2") do |config| ... end -
Inside the config block, we tell Vagrant which VM image to use to boot the node:
  config.vm.box = "opscode_ubuntu-14.04"
  config.vm.box_url = "http://opscode-vm-bento.s3.amazonaws.com/vagrant/virtualbox/opscode_ubuntu-14.04_chef-provisionerless.box"
We want to boot our VM using a so-called Bento Box provided by Opscode. -
As we want our VM to have Chef Client installed, we tell the Vagrant Omnibus plugin to use
the latest version of Chef Client:
config.omnibus.chef_version = :latest
-
After selecting the VM image to boot, we configure how to provision the box using Chef. The
Chef configuration is done inside a nested Ruby block:
config.vm.provision :chef_client do |chef|

end
-
Inside this chef block, we need to instruct Vagrant on how to hook up our virtual node to the
Chef Server. First, we need to tell Vagrant where to store all the Chef stuff on your node:
chef.provisioning_path = "/etc/chef"
-
Inside this chef block, we need to instruct Vagrant on how to hook up our virtual node to the
Chef Server. First, we need to tell Vagrant where to store all the Chef stuff on your node:
chef.provisioning_path = "/etc/chef"
-
Vagrant needs to know the API endpoint of our Chef Server. We need to use the name of the organization we created in our account on Hosted Chef.
chef.chef_server_url = "https://api.opscode.com/organizations/bogotobogo-chef"
-
While creating our organization on Hosted Chef, we downloaded our private key.
Tell Vagrant where to find this file:
chef.validation_key_path = ".chef/bogotobogo-chef-validator.pem"
Also, we need to tell Vagrant as which client it should validate itself against the Chef Server:chef.validation_client_name = "bogotobogo-chef-validator"
- Finally, we should tell Vagrant how to name our node:
chef.node_name = "server"
- UI is turned on so that we can see more info from the screen:

After configuring our Vagrantfile, all we need to do is run the basic Vagrant commands: we've already done vagrant up and vagrant ssh. Now, we want to do vagrant provision.
"The vagrant provision runs any configured provisioners against the running Vagrant managed machine. This command is a great way to quickly test any provisioners, and is especially useful for incremental development of shell scripts, Chef cookbooks, or Puppet modules. We can just make simple modifications to the provisioning scripts on our machine, run a vagrant provision, and check for the desired results. Rinse and repeat." - from Provision
In our case, it looks like this:
k@laptop:~/chef-repo$ vagrant provision
==> default: Installing Chef 11.16.4 Omnibus package...
==> default: Downloading Chef 11.16.4 for ubuntu...
==> default: downloading https://www.chef.io/chef/metadata?v=11.16.4&prerelease;=false&nightlies;=false&p;=ubuntu&pv;=14.04&m;=i686
==> default:   to file /tmp/install.sh.1675/metadata.txt
==> default: trying wget...
==> default: url	https://opscode-omnibus-packages.s3.amazonaws.com/ubuntu/13.04/i686/chef_11.16.4-1_i386.deb
==> default: md5	62516e53e11512500484b341377eefca
==> default: sha256	5e722abd69c7de49524e578744941f918fc7551af16871dae77f8ba8a213871a
==> default: downloaded metadata file looks valid...
==> default: downloading https://opscode-omnibus-packages.s3.amazonaws.com/ubuntu/13.04/i686/chef_11.16.4-1_i386.deb
==> default:   to file /tmp/install.sh.1675/chef_11.16.4-1_i386.deb
==> default: trying wget...
==> default: Comparing checksum with sha256sum...
==> default: Installing Chef 11.16.4
==> default: installing with dpkg...
==> default: (Reading database ... 61064 files and directories currently installed.)
==> default: Preparing to unpack .../chef_11.16.4-1_i386.deb ...
==> default:  * Stopping chef-client chef-client
==> default:    ...done.
==> default: Unpacking chef (11.16.4-1) over (11.8.2-2) ...
==> default: dpkg: warning: unable to delete old directory '/var/log/chef': Directory not empty
==> default: dpkg: warning: unable to delete old directory '/etc/chef': Directory not empty
==> default: Setting up chef (11.16.4-1) ...
==> default: Thank you for installing Chef!
==> default: Processing triggers for man-db (2.6.7.1-1ubuntu1) ...
==> default: Running provisioner: chef_client...
==> default: Creating folder to hold client key...
==> default: Uploading chef client validation key...
Generating chef JSON and uploading...
==> default: Warning: Chef run list is empty. This may not be what you want.
==> default: Running chef-client...
...
==> default: * * * * * * * * * * * * * * * * * * * * * * * * * * * * * * * * * * * * * * * *
==> default: SSL validation of HTTPS requests is disabled. HTTPS connections are still
==> default: encrypted, but chef is not able to detect forged replies or man in the middle
==> default: attacks.
==> default:
==> default: To fix this issue add an entry like this to your configuration file:
==> default:
==> default: ```
==> default:   # Verify all HTTPS connections (recommended)
==> default:   ssl_verify_mode :verify_peer
==> default:
==> default:   # OR, Verify only connections to chef-server
==> default:   verify_api_cert true
==> default: ```
==> default:
==> default: To check your SSL configuration, or troubleshoot errors, you can use the
==> default: `knife ssl check` command like so:
==> default:
==> default: ```
==> default:   knife ssl check -c /tmp/vagrant-chef-3/client.rb
==> default: ```
==> default:
...
k@laptop:~/chef-repo$
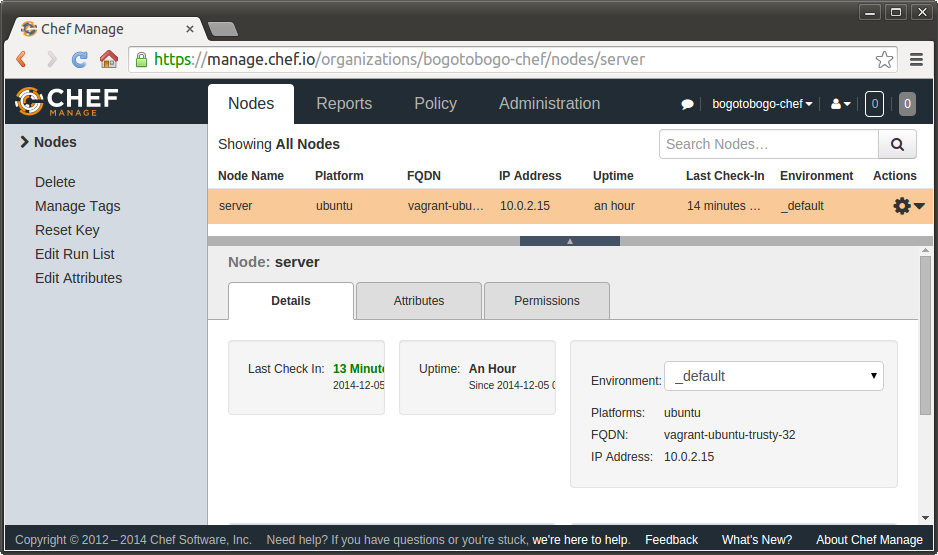
Since we're using Hosted Chef, we can get our node information and reports like this:

If we want to start from scratch again, we will have to destroy your VM as well as delete both the client and the node from our Chef Server by running the following commands.
The vagrant destroy command stops the running machine Vagrant is managing and destroys all resources that were created during the machine creation process. After running this command, our computer should be left at a clean state, as if we never created the guest machine in the first place.:
k@laptop:~/chef-repo$ VBoxManage list runningvms
"chef-repo_default_1417753212412_1099" {ba885834-0956-45e7-a15a-d6fbb7445aa6}

k@laptop:~/chef-repo$ vagrant destroy
    default: Are you sure you want to destroy the 'default' VM? [y/N] y
==> default: Forcing shutdown of VM...
==> default: Destroying VM and associated drives...
==> default: Running cleanup tasks for 'chef_client' provisioner...
The knife node delete node_name command is used to delete a node from the Chef server.
k@laptop:~/chef-repo$ sudo knife node delete server
[sudo] password for k:
Do you really want to delete server? (Y/N)y
Deleted node[server]
In our case, the Node_name is "server"
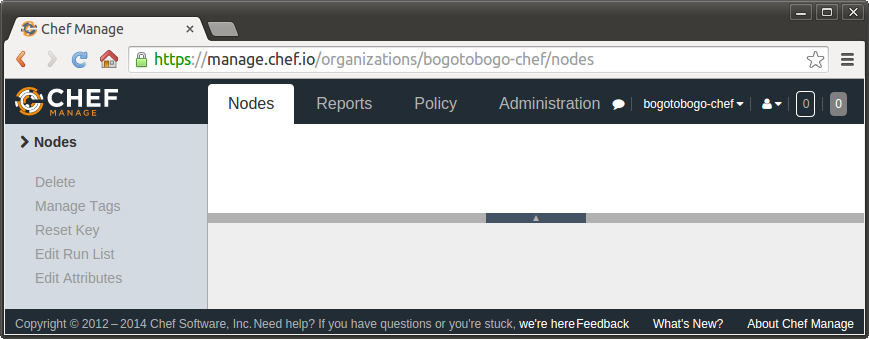
We can see we do not have any node now:

The knife client delete client_name command is used to delete a registered API client:
k@laptop:~/chef-repo$ sudo knife client delete server -y
Deleted client[server]
Chef
Ph.D. / Golden Gate Ave, San Francisco / Seoul National Univ / Carnegie Mellon / UC Berkeley / DevOps / Deep Learning / Visualization