OpenVPN Access Server 2 Install
In short, the VPN can be summarized by four things:
- It's a server-client technology.
- It's using tunneling.
- The user on the client side usually needs user name and password.
- VPN encrypts all data.
A VPN is a private network that uses a public network (Internet) to connect remote sites or users together. The VPN uses tunnel connections routed through the Internet from the business's private network to the remote site or employee.
To actually create the VPN tunnel, the local machine needs to be running a VPN client. By using a VPN, businesses ensure security - anyone intercepting the encrypted data can't read it.
When we connect to a VPN, we launch a VPN client on our computer (or click a link on a special website), log in with our credentials, and our computer exchanges trusted keys with a remote server.
Once both computers have verified each other's identity, all of our internet communication is encrypted and secured from eavesdropping.
The most important thing we need to know about a VPN: It secures our computer's internet connection to guarantee that all of the data we're sending and receiving is encrypted and safe from prying eyes. - from Why You Need A VPN (And How To Choose One)
OpenVPN Access Server is a popular tool that can be used to create complex, encrypted networks between physically distributed servers such as AWS instances.
The OpenVPN Access Server is a solution built on top of traditional OpenVPN that manages connections, users, and interfaces. It provides the underlying VPN instance, a web interface, and a web based client.
It uses the OpenSSL encryption library extensively, as well as the SSLv3/TLSv1 protocol.
If we want to connect AWS instances hosted in separate AWS regions, we may want to use OpenVPN.
In this article, we'll install and configure the OpenVPN Access Server on an AWS instance from AWS Marketplace .
From the Launch Instance menu of the EC2 dasboard, search for Open VPN Access Server from AWS Marketplace and launch the instance in the public subnet of VPC.
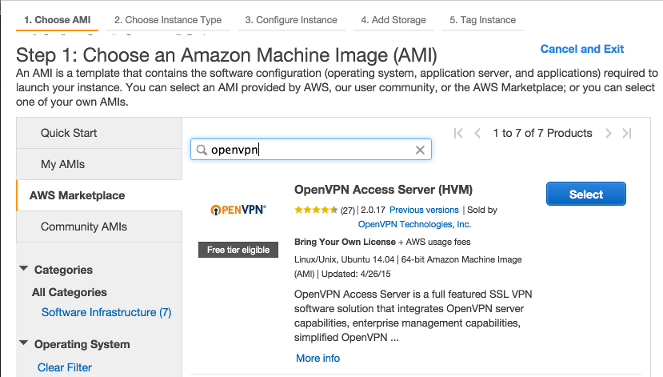

Make sure the security group associated with this instance has ports 22 (SSH), 443 (SSL), 943 (Admin Web UI), and 1194 (OpenVPN UDP port) open.
- 22 - SSH used to remotely administrate our appliance. It is recommended that we restrict this port to trusted IP addresses. If we do not want to do this, leave the source as 0.0.0.0/0. To restrict ports to a specific subnet, enter the port number, then the subnet in CIDR notation (e.g. 12.34.56.0/24). For single IP addresses, /32 will need to be appended at the end (e.g. 22.33.44.55/32 for IP address 22.33.44.55). Click the Add Rule button when we are done with the rule, repeat the process as needed.
- 443 - HTTPS used by OpenVPN Access Server for the Client Web Server. This is the interface used by our users to log on to the VPN server and retrieve their keying and installation information. It is recommended that we leave this open to the world (i.e. leaving the source as 0.0.0.0/0). The OpenVPN Admin Web UI by default is also enabled on this port, although this can be turned off in the settings. In multi-daemon mode, the OpenVPN TCP daemon shares this port alongside with the Client Web Server, and our clients will initiate TCP based VPN sessions under this port number.
- 943 - The port number used by the Admin Web UI. By default, the Admin Web UI is also served on port 443. For security reasons, we can turn this setting off and restrict the Admin Web UI port to trusted IP addresses only.
- 1194 - OpenVPN UDP port, leave source as 0.0.0.0/0 unless we want to restrict appliance access to certain IP addresses: This port is used by our clients to initiate UDP based VPN sessions to the VPN server. This is the preferred way for our clients to communicate and this port should be open to all of our clients. We may change this port number in the settings to a non-standard port in the Admin Web UI if desired.

We may also want to allocate an Elastic IP to this instance.

2.1.4 Usage Instructions for OpenVPN Access Server
To initially configure your instance, connect via SSH with the user openvpnas once the instance has launched or follow the steps outlined in the quick start guide to launch your instance with user-data parameters. Amazon Web Services EC2 Community Appliance Quick Start Guide.
Once you have completed the initial configuration, connect to the Admin interface by opening https://<Public_DNS>/admin/.
Now, we've just installed OpenVPN server, and it has the following 3 components.
-
OpenVPN Server:
The VPN server is the underlying component in OpenVPN Access Server that does all of the background work; routing, tunneling, encryption, user management, authentication etc. OpenVPN Access Server comes with a Web GUI that helps to manage the underlying components of the VPN server. -
Admin Web Interface:
The Admin Web Interface makes for an easier management interface in OpenVPN Access Server. In the Admin Web Interface an administrator can manage options such as layer 2 or layer 3 routing, user permissions, server network settings, authentication and web server certificates. By default an administrator can access the Admin Web Interface by visiting this address in a web browser: https://openvpnasserverip/admin (Please replace "openvpnasip" with the IP or hostname we allocated to our openvpn-as instance) -
Connect Client:
The Connect Client Interface is a component of OpenVPN Access Server that allows users to connect to the VPN directly through their web browser. The Connect Client also gives the user options to download their configuration files which can be userd on other OpenVPN clients.
Ref: Amazon EC2 Appliance (AMI) Quick Start GuideLast modified: 27 April 2015.
Login to the instance via SSH using the username openvpnas and the keypair we set for this instance.
$ ssh -i mykey.pem openvpnas@51.58.102.151
The authenticity of host '51.58.102.151 (51.58.102.151)' can't be established.
RSA key fingerprint is fa:54:e1:ed:f9:0b:ce:f4:0d:ce:c3:b1:a0:f1:f4:54.
Are you sure you want to continue connecting (yes/no)? yes
Warning: Permanently added '51.58.102.151' (RSA) to the list of known hosts.
Welcome to OpenVPN Access Server Appliance 2.0.17
...
The tool will start automatically. It will prompt us to answer a list of the questions below. We will pretty much hit the Enter key to take the default setting except the first question about the license agreement which we have to type yes to proceed.
- Please enter yes to indicate your agreement [no]: yes
- Will this be the primary Access Server node? yes
- Please specify the network interface and IP address to be used by the Admin Web UI: 1
- Please specify the port number for the Admin Web UI: 943
- Please specify the TCP port number for the OpenVPN Daemon: 443
- Should client traffic be routed by default through the VPN? yes
- Should client DNS traffic be routed by default through the VPN? yes
- Use local authentication via internal DB? yes
- Should private subnets be accessible to clients by default? yes
- Do you wish to login to the Admin UI as openvpn? yes
- Please specify your OpenVPN-AS license key (or leave blank to specify later):
Then, we get the following output:
Initializing OpenVPN...
Adding new user login...
useradd -s /sbin/nologin "openvpn"
Writing as configuration file...
Perform sa init...
Wiping any previous userdb...
Creating default profile...
Modifying default profile...
Adding new user to userdb...
Modifying new user as superuser in userdb...
Getting hostname...
Hostname: 51.58.102.151
Preparing web certificates...
Getting web user account...
Adding web group account...
Adding web group...
Adjusting license directory ownership...
Initializing confdb...
Generating init scripts...
Generating PAM config...
Generating init scripts auto command...
Starting openvpnas...

NOTE: Your system clock must be correct for OpenVPN Access Server
to perform correctly.  Please ensure that your time and date
are correct on this system.

Initial Configuration Complete!

You can now continue configuring OpenVPN Access Server by
directing your Web browser to this URL:

https://51.58.102.151:943/admin
Login as "openvpn" with the same password used to authenticate
to this UNIX host.

During normal operation, OpenVPN AS can be accessed via these URLs:

Admin  UI: https://51.58.102.151:943/admin
Client UI: https://51.58.102.151:943/


See the Release Notes for this release at:
   http://www.openvpn.net/access-server/rn/openvpn_as_2_0_17.html
Once the initial configuration is complete, we will need to set the password for the admin user. If we take the default admin user name, we will use passwd openvpn to set it.
$ sudo passwd openvpn
Enter new UNIX password:
Retype new UNIX password:
passwd: password updated successfully
Let's go to admin page: https://51.58.102.151:943/admin:
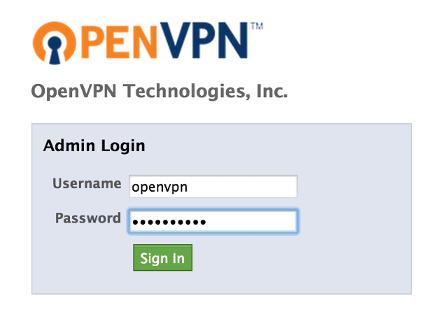
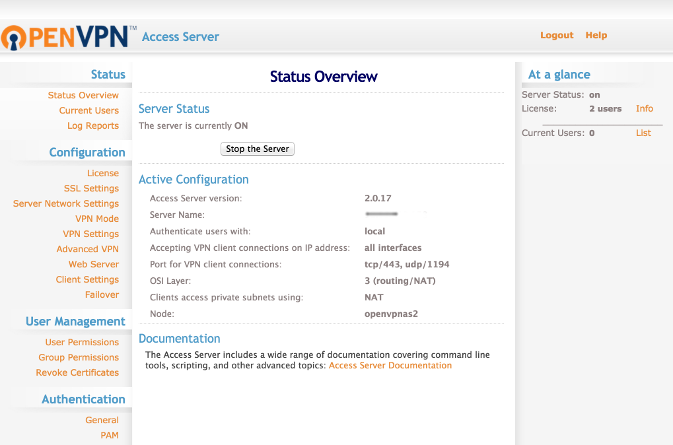
We get the following overview page:
Admin can do lots of things, and one of them is to set a password for a user:
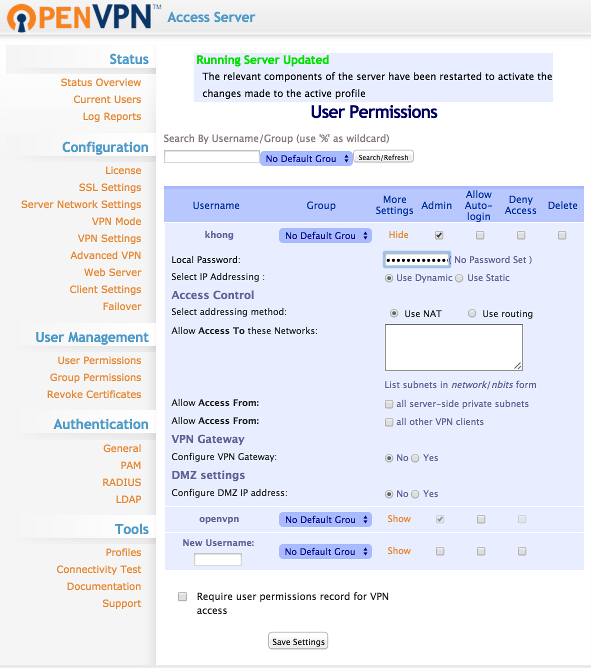

Now we can login with the account just created:
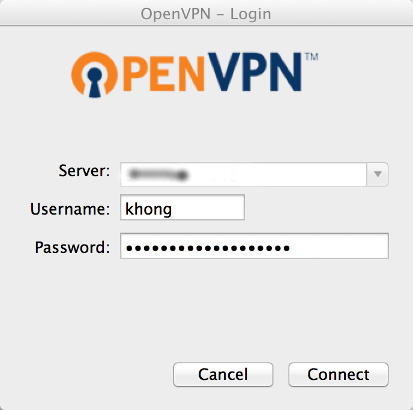
We can download client.ovpn by clicking "Connection profiles":
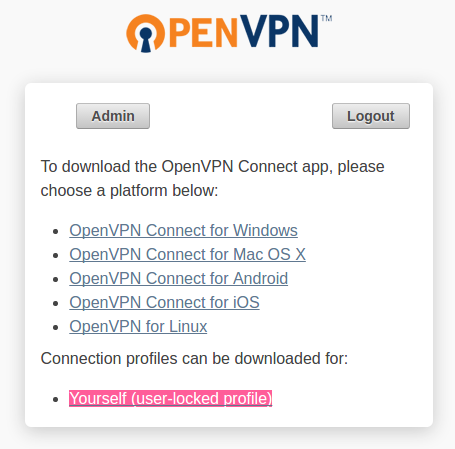
Let's copy the file to ~/.ssh/client.ovpn, and run OpenVPN client:
$ sudo openvpn --config ~/.ssh/client.ovpn
[sudo] password for k:
Mon Feb 20 17:20:38 2017 OpenVPN 2.3.10 x86_64-pc-linux-gnu [SSL (OpenSSL)] [LZO] [EPOLL] [PKCS11] [MH] [IPv6] built on Feb  2 2016
Mon Feb 20 17:20:38 2017 library versions: OpenSSL 1.0.2g  1 Mar 2016, LZO 2.08
Enter Auth Username: *******
Enter Auth Password: ******
...
Mon Feb 20 17:20:55 2017 do_ifconfig, tt->ipv6=0, tt->did_ifconfig_ipv6_setup=0
Mon Feb 20 17:20:55 2017 /sbin/ip link set dev tun0 up mtu 1500
Mon Feb 20 17:20:55 2017 /sbin/ip addr add dev tun0 172.27.232.3/21 broadcast 172.27.239.255
Mon Feb 20 17:21:00 2017 ROUTE remote_host is NOT LOCAL
Mon Feb 20 17:21:00 2017 /sbin/ip route add 54.193.72.33/32 via 192.168.1.254
Mon Feb 20 17:21:00 2017 /sbin/ip route add 172.27.224.0/20 metric 101 via 172.27.232.1
Mon Feb 20 17:21:00 2017 /sbin/ip route add 172.31.0.0/16 metric 101 via 172.27.232.1
Mon Feb 20 17:21:00 2017 Initialization Sequence Completed
While we're connected via OpenVPN client, let's try to ssh login into an AWS instance with a private instance:
$ ssh -i key-japan.pem ubuntu@172.31.11.56
The authenticity of host '172.31.11.56 (172.31.11.56)' can't be established.
ECDSA key fingerprint is SHA256:xj1YuZS74oDouByfh3rOynLdFP9pWqYweK4IwgnN234.
Are you sure you want to continue connecting (yes/no)? yes
Warning: Permanently added '172.31.11.56' (ECDSA) to the list of known hosts.
Welcome to Ubuntu 16.04.1 LTS (GNU/Linux 4.4.0-45-generic x86_64)

 * Documentation:  https://help.ubuntu.com
 * Management:     https://landscape.canonical.com
 * Support:        https://ubuntu.com/advantage

  Get cloud support with Ubuntu Advantage Cloud Guest:
    http://www.ubuntu.com/business/services/cloud

116 packages can be updated.
0 updates are security updates.


*** System restart required ***
Last login: Mon Feb 20 23:01:30 2017 from 108.239.135.40

ubuntu@ip-172-31-11-56:~$
AWS (Amazon Web Services)
- AWS : EKS (Elastic Container Service for Kubernetes)
- AWS : Creating a snapshot (cloning an image)
- AWS : Attaching Amazon EBS volume to an instance
- AWS : Adding swap space to an attached volume via mkswap and swapon
- AWS : Creating an EC2 instance and attaching Amazon EBS volume to the instance using Python boto module with User data
- AWS : Creating an instance to a new region by copying an AMI
- AWS : S3 (Simple Storage Service) 1
- AWS : S3 (Simple Storage Service) 2 - Creating and Deleting a Bucket
- AWS : S3 (Simple Storage Service) 3 - Bucket Versioning
- AWS : S3 (Simple Storage Service) 4 - Uploading a large file
- AWS : S3 (Simple Storage Service) 5 - Uploading folders/files recursively
- AWS : S3 (Simple Storage Service) 6 - Bucket Policy for File/Folder View/Download
- AWS : S3 (Simple Storage Service) 7 - How to Copy or Move Objects from one region to another
- AWS : S3 (Simple Storage Service) 8 - Archiving S3 Data to Glacier
- AWS : Creating a CloudFront distribution with an Amazon S3 origin
- AWS : Creating VPC with CloudFormation
- AWS : WAF (Web Application Firewall) with preconfigured CloudFormation template and Web ACL for CloudFront distribution
- AWS : CloudWatch & Logs with Lambda Function / S3
- AWS : Lambda Serverless Computing with EC2, CloudWatch Alarm, SNS
- AWS : Lambda and SNS - cross account
- AWS : CLI (Command Line Interface)
- AWS : CLI (ECS with ALB & autoscaling)
- AWS : ECS with cloudformation and json task definition
- AWS Application Load Balancer (ALB) and ECS with Flask app
- AWS : Load Balancing with HAProxy (High Availability Proxy)
- AWS : VirtualBox on EC2
- AWS : NTP setup on EC2
- AWS: jq with AWS
- AWS & OpenSSL : Creating / Installing a Server SSL Certificate
- AWS : OpenVPN Access Server 2 Install
- AWS : VPC (Virtual Private Cloud) 1 - netmask, subnets, default gateway, and CIDR
- AWS : VPC (Virtual Private Cloud) 2 - VPC Wizard
- AWS : VPC (Virtual Private Cloud) 3 - VPC Wizard with NAT
- DevOps / Sys Admin Q & A (VI) - AWS VPC setup (public/private subnets with NAT)
- AWS - OpenVPN Protocols : PPTP, L2TP/IPsec, and OpenVPN
- AWS : Autoscaling group (ASG)
- AWS : Setting up Autoscaling Alarms and Notifications via CLI and Cloudformation
- AWS : Adding a SSH User Account on Linux Instance
- AWS : Windows Servers - Remote Desktop Connections using RDP
- AWS : Scheduled stopping and starting an instance - python & cron
- AWS : Detecting stopped instance and sending an alert email using Mandrill smtp
- AWS : Elastic Beanstalk with NodeJS
- AWS : Elastic Beanstalk Inplace/Rolling Blue/Green Deploy
- AWS : Identity and Access Management (IAM) Roles for Amazon EC2
- AWS : Identity and Access Management (IAM) Policies, sts AssumeRole, and delegate access across AWS accounts
- AWS : Identity and Access Management (IAM) sts assume role via aws cli2
- AWS : Creating IAM Roles and associating them with EC2 Instances in CloudFormation
- AWS Identity and Access Management (IAM) Roles, SSO(Single Sign On), SAML(Security Assertion Markup Language), IdP(identity provider), STS(Security Token Service), and ADFS(Active Directory Federation Services)
- AWS : Amazon Route 53
- AWS : Amazon Route 53 - DNS (Domain Name Server) setup
- AWS : Amazon Route 53 - subdomain setup and virtual host on Nginx
- AWS Amazon Route 53 : Private Hosted Zone
- AWS : SNS (Simple Notification Service) example with ELB and CloudWatch
- AWS : Lambda with AWS CloudTrail
- AWS : SQS (Simple Queue Service) with NodeJS and AWS SDK
- AWS : Redshift data warehouse
- AWS : CloudFormation
- AWS : CloudFormation Bootstrap UserData/Metadata
- AWS : CloudFormation - Creating an ASG with rolling update
- AWS : Cloudformation Cross-stack reference
- AWS : OpsWorks
- AWS : Network Load Balancer (NLB) with Autoscaling group (ASG)
- AWS CodeDeploy : Deploy an Application from GitHub
- AWS EC2 Container Service (ECS)
- AWS EC2 Container Service (ECS) II
- AWS Hello World Lambda Function
- AWS Lambda Function Q & A
- AWS Node.js Lambda Function & API Gateway
- AWS API Gateway endpoint invoking Lambda function
- AWS API Gateway invoking Lambda function with Terraform
- AWS API Gateway invoking Lambda function with Terraform - Lambda Container
- Amazon Kinesis Streams
- AWS: Kinesis Data Firehose with Lambda and ElasticSearch
- Amazon DynamoDB
- Amazon DynamoDB with Lambda and CloudWatch
- Loading DynamoDB stream to AWS Elasticsearch service with Lambda
- Amazon ML (Machine Learning)
- Simple Systems Manager (SSM)
- AWS : RDS Connecting to a DB Instance Running the SQL Server Database Engine
- AWS : RDS Importing and Exporting SQL Server Data
- AWS : RDS PostgreSQL & pgAdmin III
- AWS : RDS PostgreSQL 2 - Creating/Deleting a Table
- AWS : MySQL Replication : Master-slave
- AWS : MySQL backup & restore
- AWS RDS : Cross-Region Read Replicas for MySQL and Snapshots for PostgreSQL
- AWS : Restoring Postgres on EC2 instance from S3 backup
- AWS : Q & A
- AWS : Security
- AWS : Security groups vs. network ACLs
- AWS : Scaling-Up
- AWS : Networking
- AWS : Single Sign-on (SSO) with Okta
- AWS : JIT (Just-in-Time) with Okta
Ph.D. / Golden Gate Ave, San Francisco / Seoul National Univ / Carnegie Mellon / UC Berkeley / DevOps / Deep Learning / Visualization