Puppet with Amazon EC2 : Install LAMP with Module

Puppet
In previous chapter (Puppet with Amazon EC2 : Install LAMP with manifest ('puppet apply')), we did not set up agent/master nodes. The manifest was not available to other agent nodes, and Puppet is not continuously checking that our server is in the state that the manifest described.
Now we want to convert the manifest that we developed into a module, so it can be used by our other Puppet nodes.
There are a variety of ways to install open source Puppet. We will use the debian package called puppetmaster-passenger, which is provided by Puppet Labs. The puppetmaster-passenger package includes the Puppet master plus production-ready web server (Passenger with Apache), which eliminates a few configuration steps compared to using the basic puppetmaster package.
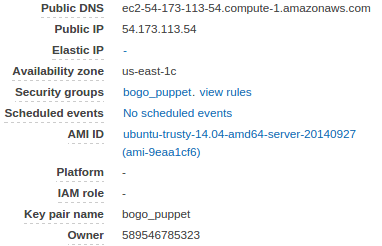
Our Puppet master node (private ip, 172.31.49.26) at Amazon ec2 looks like this:

Start from the directory where *.pem file is located, we need to login using ssh to our ec2 node:
$ ssh -i bogo_puppet.pem ubuntu@ec2-54-173-113-54.compute-1.amazonaws.com
Download the "puppetlabs-release" package:
$ cd ~
$ wget https://apt.puppetlabs.com/puppetlabs-release-trusty.deb
Install the package by running:
$ sudo dpkg -i puppetlabs-release-trusty.deb
Run
$ sudo apt-get update
to get the new list of available packages.
On our puppet master node, run:
$ sudo apt-get install puppetmaster
Let's create a basic module, based on the manifest that we developed earlier chapter. We will do this on the Puppet master node. To create a module, we must create a directory whose name matches our module name in Puppet's modules directory, and it must contain a directory called manifests, and that directory must contain an init.pp file. The init.pp file must only contain a Puppet class that matches the module name.
$ cd /etc/puppet/modules
$ sudo mkdir -p lamp/manifests
$ sudo vi lamp/manifests/init.pp
Here is the file, init.pp:
class lamp {
  # execute 'apt-get update'
  exec { 'apt-update':                    # exec resource named 'apt-update'
    command => '/usr/bin/apt-get update'  # command this resource will run
  }

  # install apache2 package
  package { 'apache2':
    require => Exec['apt-update'],        # require 'apt-update' before installing
    ensure => installed,
  }

  # ensure apache2 service is running
  service { 'apache2':
    ensure => running,
  }

  # install mysql-server package
  package { 'mysql-server':
    require => Exec['apt-update'],        # require 'apt-update' before installing
    ensure => installed,
  }

  # ensure mysql service is running
  service { 'mysql':
    ensure => running,
  }

  # install php5 package
  package { 'php5':
    require => Exec['apt-update'],        # require 'apt-update' before installing
    ensure => installed,
  }

  # ensure info.php file exists
  file { '/var/www/html/info.php':
    ensure => file,
    content => '<?php  phpinfo(); ?>',    # phpinfo code
    require => Package['apache2'],        # require 'apache2' package before creating
  }
}
Note that within this file, we add a block for a class called lamp to wrap the manifests we created earlier. The code within the class is will not be evaluated at this time, but it is available to be declared. Additionally, because it complies with the Puppet conventions for defining a module, this class can be accessed as a module by other manifests.
Now we have a basic lamp module set up. Let's configure our main manifest to use it to install a lamp stack on our node, lamp-agent.example.com (with private ip 172.31.49.26).
Let's edit the main manifest:
$ sudo vi /etc/puppet/manifests/site.pp
Add the following node blocks:
node default { }

node 'lamp-agent.example.com' {

}
A node block allows us to specify Puppet code that will only apply to certain agent nodes. The default node applies to every agent node that does not have a node block specified--we will leave it empty. The 'lamp-agent' node block will apply to our 'lamp-agent' Puppet agent node.
In the 'lamp-agent' node block, add the "include lamp" to use the "lamp" module that we just created:
node default { }

node 'lamp-agent.example.com' {
  include lamp
}
The next time our 'lamp-agent' Puppet agent node pulls its configuration from the master, it will evaluate the main manifest and apply the module that specifies a lamp stack setup.
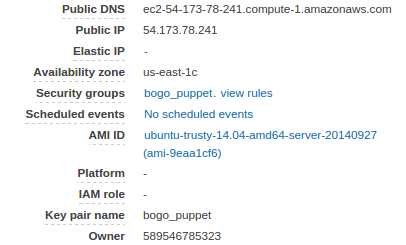
Our Puppet agent node (with host name lamp-agent which has private ip, 172.31.58.121) at Amazon ec2 looks like this:

Start from the directory where *.pem file is located, we need to login using ssh to our ec2 node:
$ ssh -i bogo_puppet.pem ubuntu@ec2-54-173-78-241.compute-1.amazonaws.com
Download the "puppetlabs-release" package:
$ cd ~
$ wget https://apt.puppetlabs.com/puppetlabs-release-trusty.deb
Install the package by running:
$ sudo dpkg -i puppetlabs-release-trusty.deb
Run
$ sudo apt-get update
to get the new list of available packages.
To install puppet agent, run:
$ sudo apt-get install puppet
We need to set hostnames and ip addresses of master and agent.
$ sudo /etc/hosts
Then, add the following two lines:
172.31.49.26 lamp-master.example.com
172.31.58.121 lamp-agent.example.com
Then, we need to set hostnames.
On master node:
$ sudo hostname lamp-master.example.com
On agent node:
$ sudo hostname lamp-agent.example.com
Edit /etc/puppet/puppet.conf, type in lamp-master.example.com as a server hostname.
$ sudo vi /etc/puppet/puppet.conf
We need to add 'server=...':
[main]
logdir=/var/log/puppet
vardir=/var/lib/puppet
ssldir=/var/lib/puppet/ssl
rundir=/var/run/puppet
factpath=$vardir/lib/facter

[agent]
server=lamp-master.example.com
The first time Puppet runs on an agent node, it will send a certificate signing request to the Puppet master. Before the master will be able to communicate and control the agent node, it must sign that particular agent node's certificate.
In this section, we will describe how to sign and check for signing requests:
On puppet master node:
$ ps aux|grep puppet
puppet    2968  0.0  4.2 331740 43576 ?        Ssl  02:27   0:00 /usr/bin/ruby /usr/bin/puppet master --verbose

$ sudo puppet master --verbose --no-daemonize
Info: Caching certificate for ca
Info: Creating a new SSL key for lamp-master.example.com
Info: csr_attributes file loading from /etc/puppet/csr_attributes.yaml
Info: Creating a new SSL certificate request for lamp-master.example.com
Info: Certificate Request fingerprint (SHA256): CA:78:01:01:D3:43:BF:CF:B5:41:DB:A3:5B:75:32:A7:C0:8A:C9:8F:F7:C0:3B:40:21:A1:20:F7:30:F5:3C:56
Notice: lamp-master.example.com has a waiting certificate request
Notice: Signed certificate request for lamp-master.example.com
Notice: Removing file Puppet::SSL::CertificateRequest lamp-master.example.com at '/var/lib/puppet/ssl/ca/requests/lamp-master.example.com.pem'
Notice: Removing file Puppet::SSL::CertificateRequest lamp-master.example.com at '/var/lib/puppet/ssl/certificate_requests/lamp-master.example.com.pem'
Notice: Starting Puppet master version 3.7.3
^CNotice: Caught INT; calling stop
On the Puppet master, run the following command to list all unsigned certificate requests:
$ sudo puppet cert list
If we just set up our first agent node, we will see one request. It will look something like the following, with the agent node's FQDN as the hostname:
"lamp-agent.example.com" (SHA256) EE:EE:0E:10:35:C1:34:2C:A5:D5:FC:D9:18:EB:59:62:4B:E1:8C:31:E5:83:20:CC:F3:43:DD:21:31:29:91:60
Note that there is no + in front of it. This indicates that it has not been signed yet.
As mentioned in previous sections, in an agent/master deployment, an admin must approve a certificate request for each agent node before that node can fetch configurations. Agent nodes will request certificates the first time they attempt to run.
To sign a certificate request, use the puppet cert sign command, with the hostname of the certificate we want to sign. For example, to sign 'lamp-agent.example.com', we would use the following command:
$ sudo puppet cert sign lamp-agent.example.com
Notice: Signed certificate request for lamp-agent.example.com
Notice: Removing file Puppet::SSL::CertificateRequest lamp-agent.example.com at '/var/lib/puppet/ssl/ca/requests/lamp-agent.example.com.pem'
As we can see from the output, now the certificate request from our Puppet agent has been signed:
$ sudo puppet cert list -all
+ "lamp-agent.example.com"  (SHA256) B1:70:1B:92:53:D8:7F:6C:58:E1:59:7F:B9:BB:0A:AB:36:EA:CD:17:5D:D4:BA:BF:CE:B2:BE:48:B8:38:E1:DD
The Puppet master can now communicate and control the node that the signed certificate belongs to.
The next time our Puppet agent node (lamp-agent) pulls its configuration from the master, it will evaluate the main manifest and apply the module that specifies a lamp stack setup.
However, if we want to try it out immediately, we can run the following command on the 'lamp-agent' agent node:
$ hostname
lamp-agent.example.com

$ sudo puppet agent --test
Info: Caching certificate for lamp-agent.example.com
Info: Caching certificate_revocation_list for ca
Info: Caching certificate for lamp-agent.example.com
Info: Retrieving pluginfacts
Info: Retrieving plugin
Info: Caching catalog for lamp-agent.example.com
Info: Applying configuration version '1415506032'
Notice: /Stage[main]/Lamp/Exec[apt-update]/returns: executed successfully
Notice: /Stage[main]/Lamp/Package[php5]/ensure: ensure changed 'purged' to 'present'
Error: /Stage[main]/Lamp/Service[mysql]: Could not evaluate: Could not find init script or upstart conf file for 'mysql'
Notice: /Stage[main]/Lamp/Package[mysql-server]/ensure: ensure changed 'purged' to 'present'
Notice: /Stage[main]/Lamp/File[/var/www/html/info.php]/ensure: defined content as '{md5}d9c0c977ee96604e48b81d795236619a'
Info: Creating state file /var/lib/puppet/state/state.yaml
Notice: Finished catalog run in 35.77 seconds
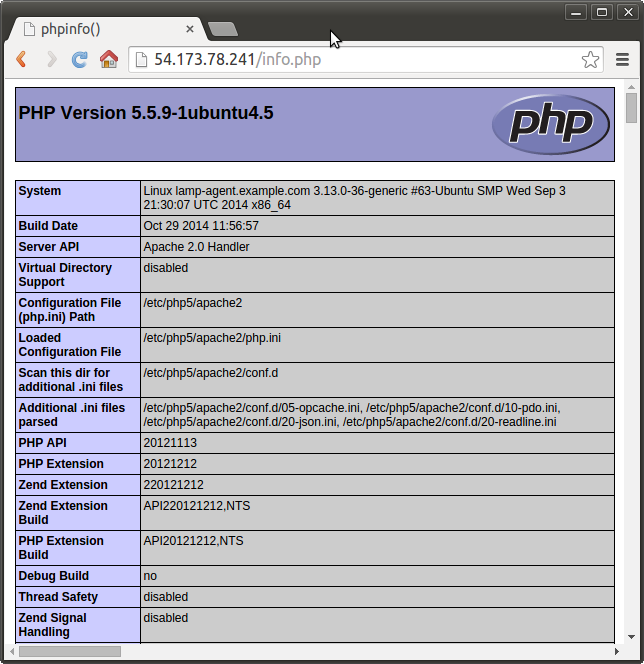
Using puplic ip for lamp-agent.example.com, we can check lamp has been installed on our agent node:

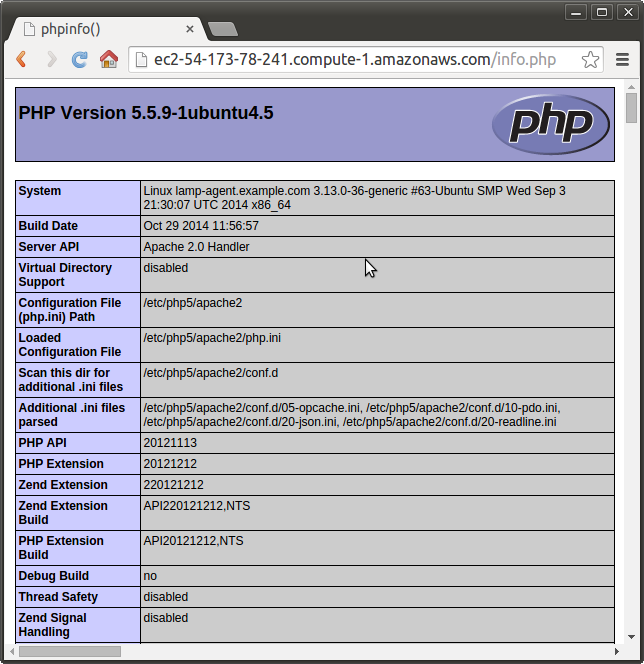
Note that we can use EC2's public dns as well:

Puppet
Ph.D. / Golden Gate Ave, San Francisco / Seoul National Univ / Carnegie Mellon / UC Berkeley / DevOps / Deep Learning / Visualization