Wireshark introduction (Ubuntu 16.04)
Wireshark is a network packet analyzer that captures network packets and displays that packet data as detailed as possible.
Let's install Wireshark on Ubuntu 16.04:
$ sudo apt-get install wireshark

$ wireshark --version
Wireshark 2.0.2 (SVN Rev Unknown from unknown)
...
Built using gcc 5.3.1 20160407.
We need to run Wireshark or TShark on an account with sufficient privileges to capture, or need to give the account on which we're running Wireshark or TShark sufficient privileges to capture. The way this is done differs from operating system to operating system.
To be secure (at least in a way), it is recommended that even an administrator should always run in an account with (limited) user privileges, and only start processes that really need the administrator privileges. The Security page provides explanations why this is a good idea.
Wireshark has implemented Privilege Separation which means that the Wireshark GUI (or the tshark CLI) can run as a normal user while the dumpcap capture utility runs as root. This can be achieved by installing dumpcap setuid root. The advantage of this solution is that while dumpcap is run as root the vast majority of Wireshark's code is run as a normal user (where it can do much less damage).
We may get the following when we fire up wireshark:
couldn't run /usr/bin/dumpcap in child process: Permission Denied.
We need to add user "k" to "wireshark" group:
$ sudo usermod -a -G wireshark k
We may want to check the permissions on dumpcap:
$ ls -la /usr/bin/dumpcap
-rwxr-xr-- 1 root wireshark 88272 Apr  8  2016 /usr/bin/dumpcap
$ sudo setcap cap_net_raw,cap_net_admin=eip /usr/bin/dumpcap

$ sudo dpkg-reconfigure wireshark-common

Select "Yes" and then restart machine and open wireshark. It will work.
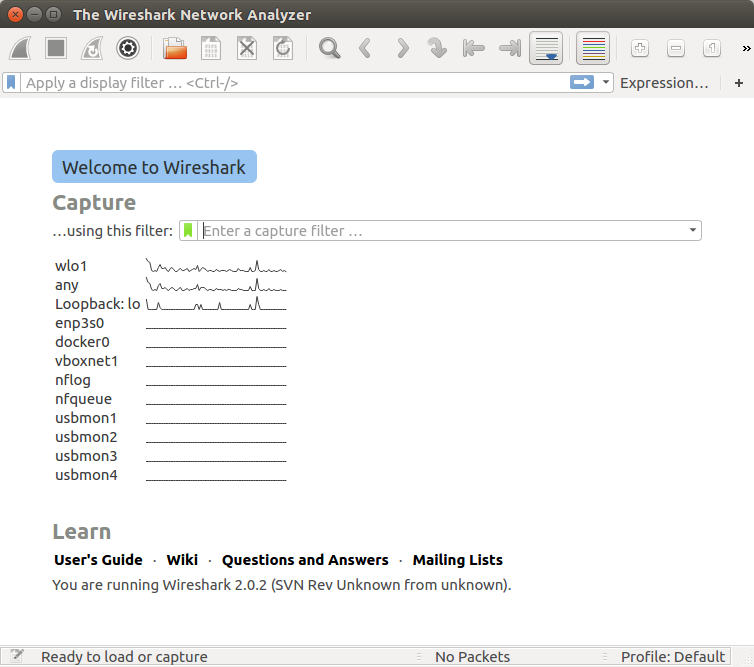
The following methods can be used to start capturing packets with Wireshark:
- We can double-click on an interface in the main window.
- We can get an overview of the available interfaces using the "Capture Interfaces" dialog box (Capture -> Options...). We can start a capture from this dialog box using the "Start" button.
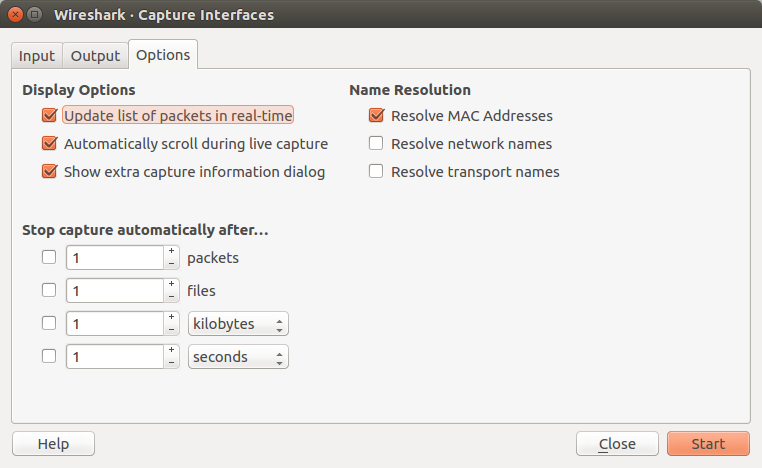
- We can immediately start a capture using our current settings by selecting "Capture" -> "Start" or by cliking the first toolbar button.

- If we already know the name of the capture interface we can start Wireshark from the command line:
$ wireshark -i eth0 -k
This will start Wireshark capturing on interface eth0.
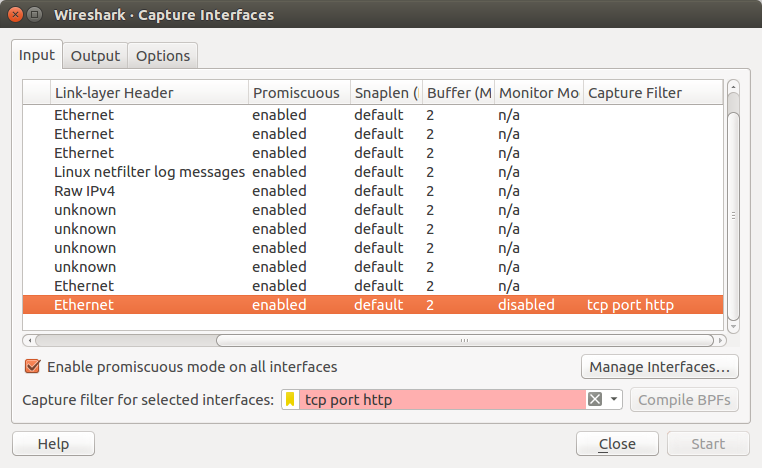
We have two filters: display and capture.
The display filter is what we see and the capture filter is related to logging.
Display filter:
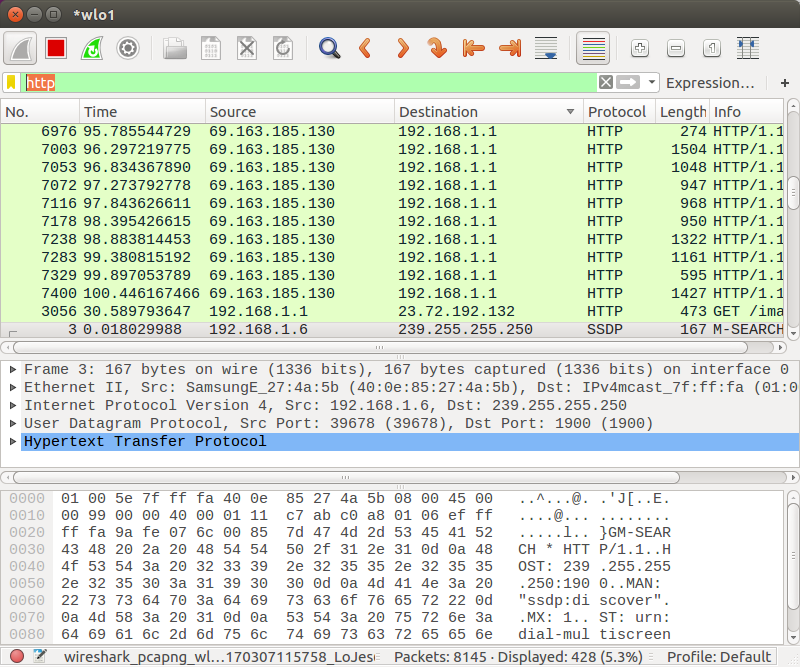
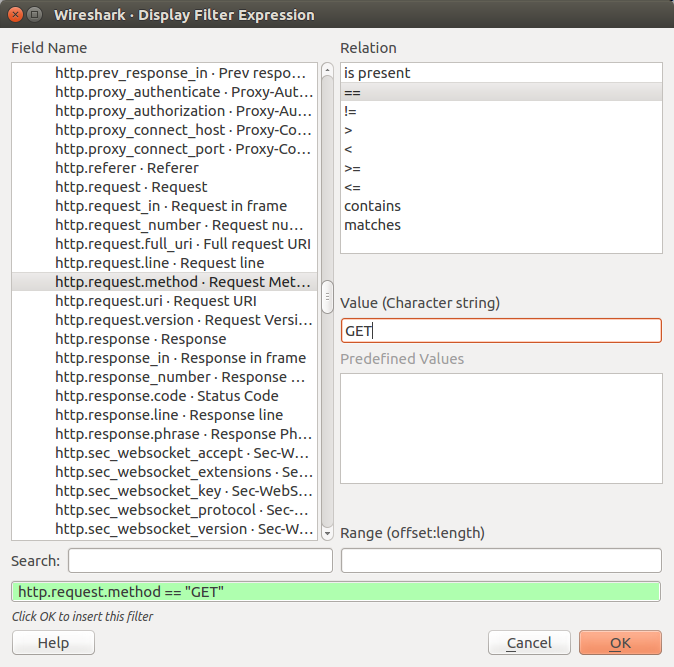
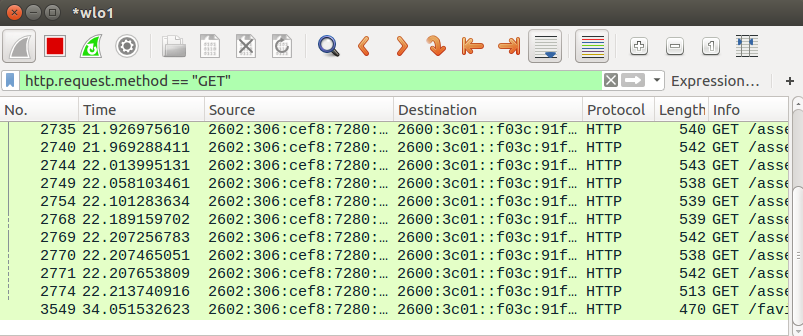
We can use more detailed filter via "Expression..." button, in this case, we're going to use a filter, http.request.method == "GET":
Now we display only the GET method:
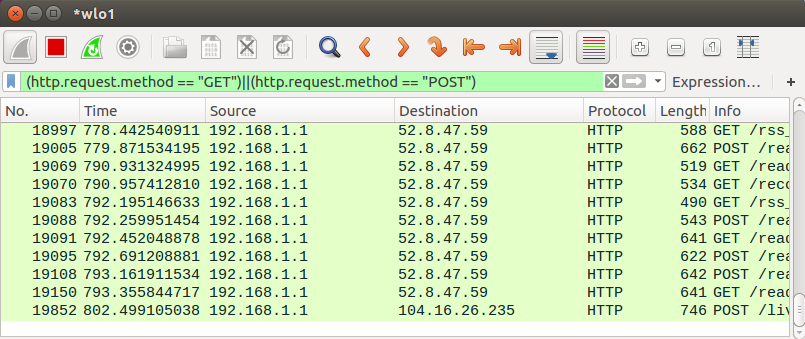
Note that we can display both of the GET and POST methods:
Capture filter:
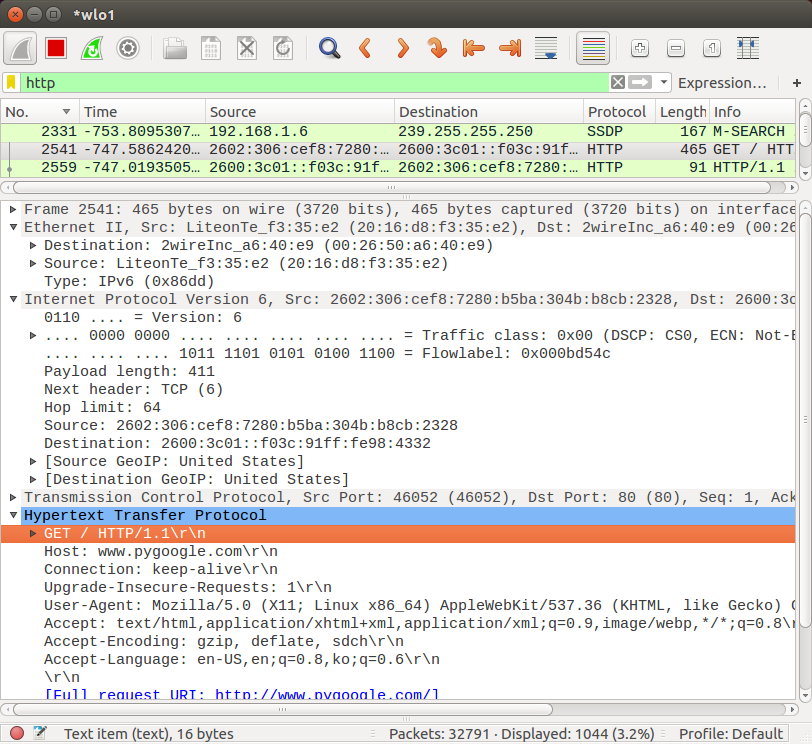
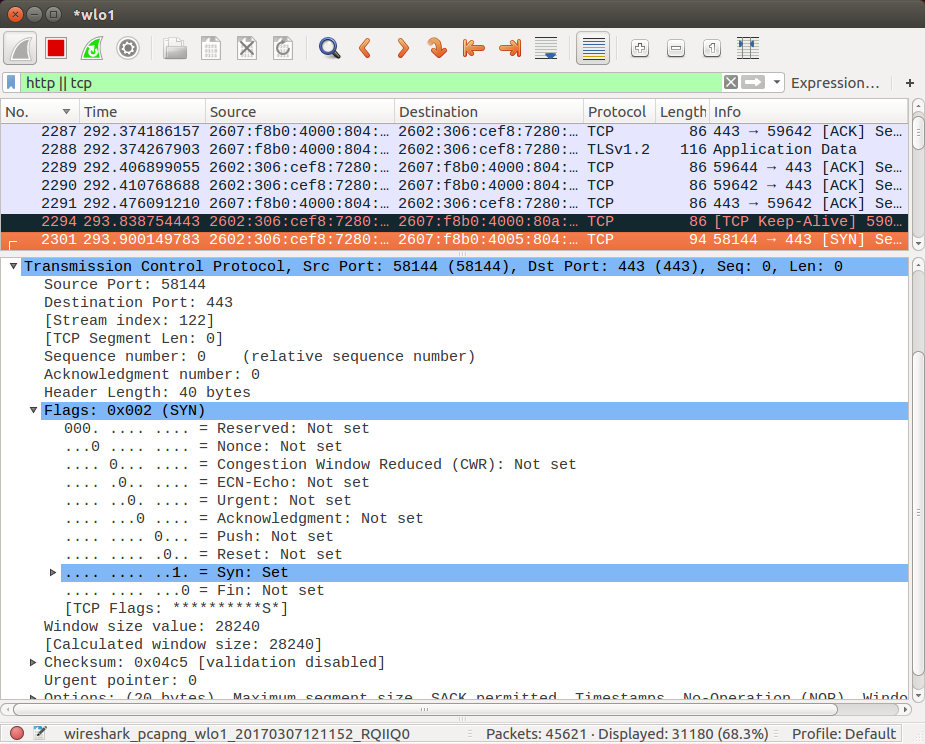
Note also we can get detailed info (ISO layers) in the middle section of the screen for a specific packet:
For instance, we can see SYN flag is set during three-way handshake:
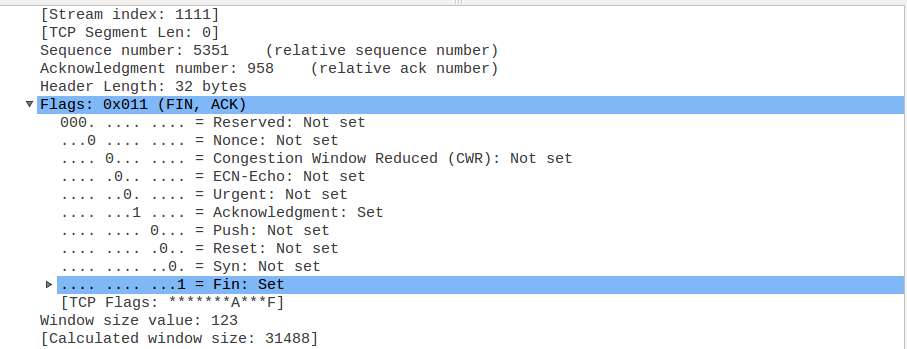
And the FIN/ACK flags as well during the tear down process:
DevOps
DevOps / Sys Admin Q & A
Linux - system, cmds & shell
- Linux Tips - links, vmstats, rsync
- Linux Tips 2 - ctrl a, curl r, tail -f, umask
- Linux - bash I
- Linux - bash II
- Linux - Uncompressing 7z file
- Linux - sed I (substitution: sed 's///', sed -i)
- Linux - sed II (file spacing, numbering, text conversion and substitution)
- Linux - sed III (selective printing of certain lines, selective definition of certain lines)
- Linux - 7 File types : Regular, Directory, Block file, Character device file, Pipe file, Symbolic link file, and Socket file
- Linux shell programming - introduction
- Linux shell programming - variables and functions (readonly, unset, and functions)
- Linux shell programming - special shell variables
- Linux shell programming : arrays - three different ways of declaring arrays & looping with $*/$@
- Linux shell programming : operations on array
- Linux shell programming : variables & commands substitution
- Linux shell programming : metacharacters & quotes
- Linux shell programming : input/output redirection & here document
- Linux shell programming : loop control - for, while, break, and break n
- Linux shell programming : string
- Linux shell programming : for-loop
- Linux shell programming : if/elif/else/fi
- Linux shell programming : Test
- Managing User Account - useradd, usermod, and userdel
- Linux Secure Shell (SSH) I : key generation, private key and public key
- Linux Secure Shell (SSH) II : ssh-agent & scp
- Linux Secure Shell (SSH) III : SSH Tunnel as Proxy - Dynamic Port Forwarding (SOCKS Proxy)
- Linux Secure Shell (SSH) IV : Local port forwarding (outgoing ssh tunnel)
- Linux Secure Shell (SSH) V : Reverse SSH Tunnel (remote port forwarding / incoming ssh tunnel) /)
- Linux Processes and Signals
- Linux Drivers 1
- tcpdump
- Linux Debugging using gdb
- Embedded Systems Programming I - Introduction
- Embedded Systems Programming II - gcc ARM Toolchain and Simple Code on Ubuntu/Fedora
- LXC (Linux Container) Install and Run
- Linux IPTables
- Hadoop - 1. Setting up on Ubuntu for Single-Node Cluster
- Hadoop - 2. Runing on Ubuntu for Single-Node Cluster
- ownCloud 7 install
- Ubuntu 14.04 guest on Mac OSX host using VirtualBox I
- Ubuntu 14.04 guest on Mac OSX host using VirtualBox II
- Windows 8 guest on Mac OSX host using VirtualBox I
- Ubuntu Package Management System (apt-get vs dpkg)
- RPM Packaging
- How to Make a Self-Signed SSL Certificate
- Linux Q & A
- DevOps / Sys Admin questions
Ph.D. / Golden Gate Ave, San Francisco / Seoul National Univ / Carnegie Mellon / UC Berkeley / DevOps / Deep Learning / Visualization