Zabbix 3 install on Ubuntu 14.04 & adding hosts / items / graphs
We'll install Zabbix server and client software on a server and only the client software on agent machines.
References:
- Zabbix Documentation 3.0
- How To Install Zabbix on Ubuntu & Configure it to Monitor Multiple VPS Servers
Zabbix is designed for real-time monitoring of servers and network devices. It uses MySQL, PostgreSQL, SQLite, Oracle or IBM DB2 to store data.
Its backend is written in C and the web frontend is written in PHP.
Install the repository configuration package. This package contains apt configuration files.
$ sudo wget http://repo.zabbix.com/zabbix/3.0/ubuntu/pool/main/z/zabbix-release/zabbix-release_3.0-1+trusty_all.deb
$ sudo dpkg -i zabbix-release_3.0-1+trusty_all.deb
$ sudo apt-get update
Install Zabbix server and web frontend with mysql database:
$ sudo apt-get install zabbix-server-mysql zabbix-frontend-php
Installing Zabbix agent only case:
$ sudo apt-get install zabbix-agent
Now we want to create zabbix database and user on MySQL.
Log into MySQL:
mysql> mysql -u root -p

mysql> create database zabbix;
mysql> create user 'zabbix'@'localhost' identified by 'zabbix';
mysql> grant all privileges on zabbix.* to 'zabbix'@'localhost';
mysql> flush privileges;
Since we are now done with the initial MySQL configuration, let's go into the package directory and unzip the SQL files that will define our database environment:
$ cd /usr/share/zabbix-server-mysql/
$ ls
changelog.Debian.gz  copyright  create.sql.gz
We can import the initial schema, images, and data files that Zabbix needs to function:
$ zcat create.sql.gz | mysql -uroot zabbix
Let's configure the packages we just installed.
$ ls /etc/zabbix
apache.conf  web  zabbix_server.conf
Edit the main Zabbix server configuration file, /etc/zabbix/zabbix_server.conf for database config:
DBHost=localhost
DBName=zabbix
DBUser=zabbix
DBPassword=zabbix
Apache configuration file for Zabbix frontend is located in /etc/apache2/conf.d/zabbix or /etc/apache2/conf-enabled/zabbix.conf. Some PHP settings are already configured.
We want to adjust some values for the php processing of our monitoring data in /etc/php5/apache2/php.ini:
php_value max_execution_time 300
php_value memory_limit 128M
php_value post_max_size 16M
php_value upload_max_filesize 2M
php_value max_input_time 300

date.timezone = "US/Pacific"
Copy the Zabbix-specific php file into the configuration directory:
$ sudo cp /usr/share/doc/zabbix-frontend-php/examples/zabbix.conf.php.example /etc/zabbix/zabbix.conf.php
Then, edit the following values that we used to set up the database earlier:
$DB['DATABASE'] = 'zabbix';
$DB['USER'] = 'zabbix';
$DB['PASSWORD'] = 'zabbix'
Now, we're almost ready to use Apache for Zabbix:
$ ls -la /etc/apache2/conf-available/zabbix.conf
lrwxrwxrwx 1 root root 23 Jun  6 18:10 /etc/apache2/conf-available/zabbix.conf -> /etc/zabbix/apache.conf
Restart the Apache and Zabbix servers for the changes to take effect:
sudo a2enconf zabbix.conf
sudo a2enmod alias
sudo service zabbix-server restart
sudo service apache2 restart
Zabbix will be available on HTTP port 80 by default. Open a browser and navigate to http://yourdomain.com/zabbix or http://server-ip/zabbix.
Here is the Zabbix "Welcome" screen, we can move along by selecting "Next" since we've already setup things:
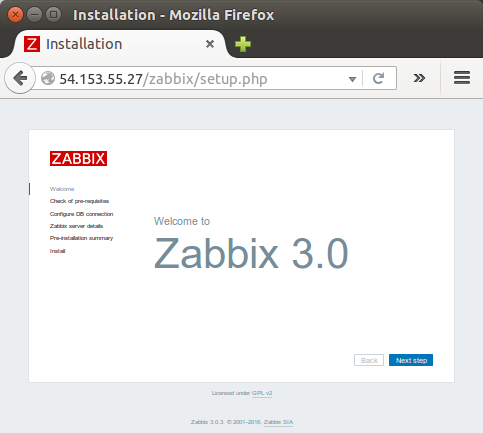
For more info : Zabbix Documentation 3.0.
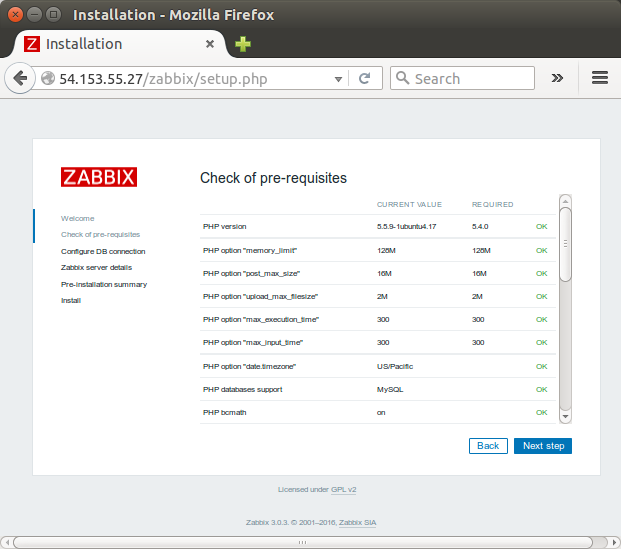
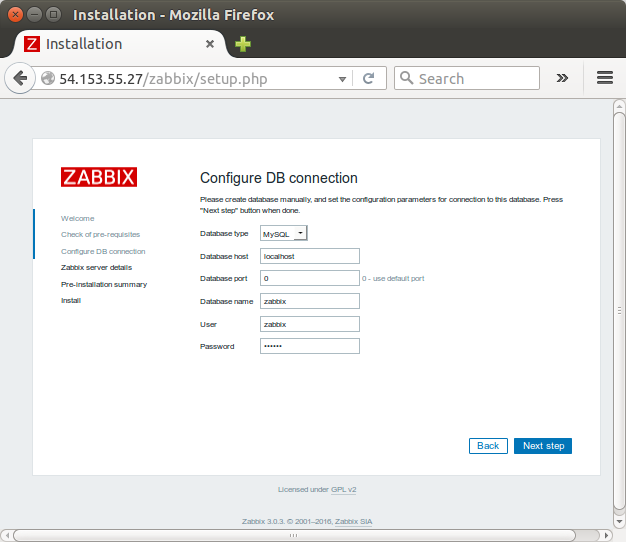
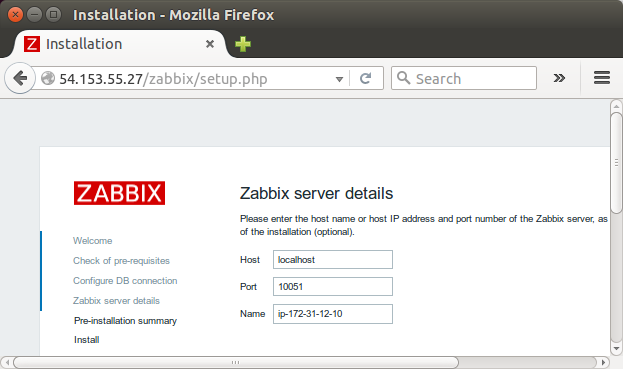
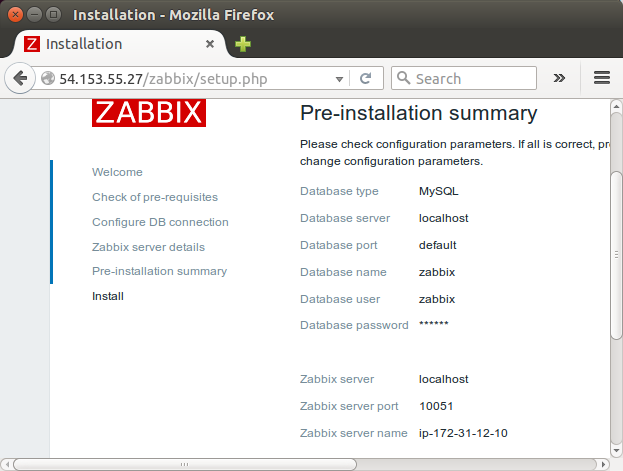
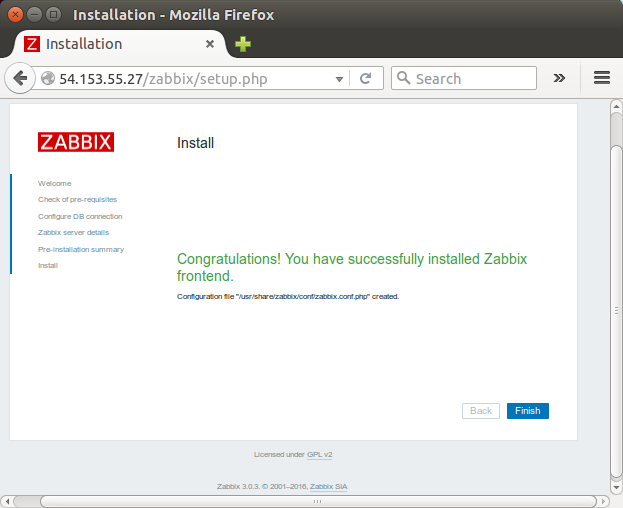
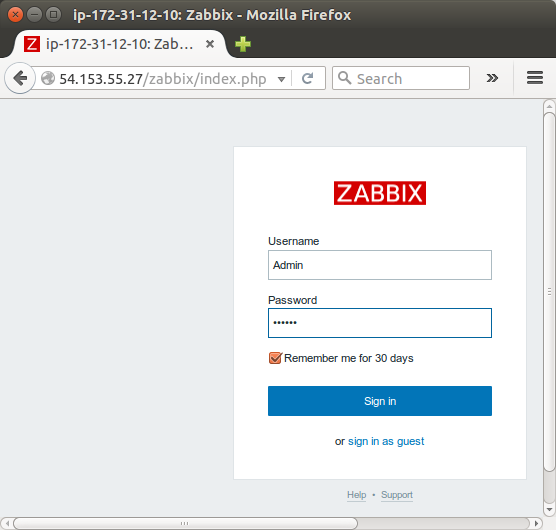
When logged in, we will see 'Dash Board:
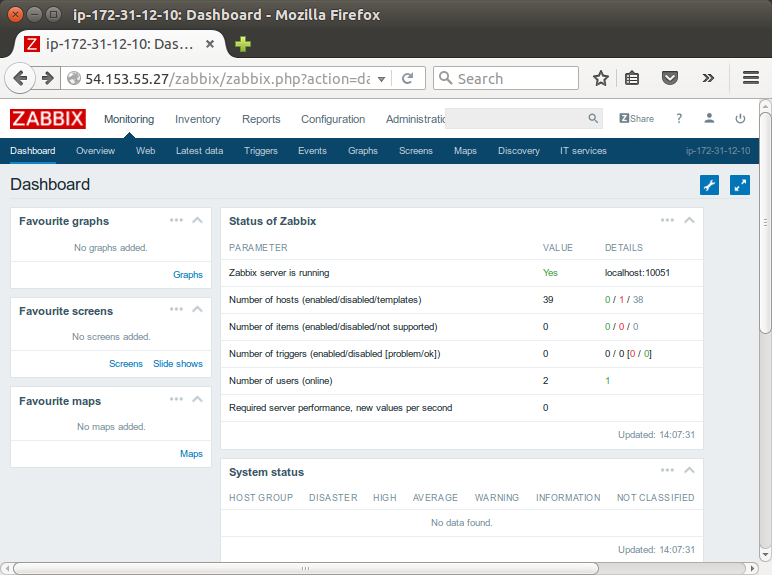
Note that since we are logged in a Admin, the Configuration and Administration menus are granted.
Zabbix agent is deployed on a monitoring target to actively monitor local resources and applications.
$ sudo wget http://repo.zabbix.com/zabbix/3.0/ubuntu/pool/main/z/zabbix-release/zabbix-release_3.0-1+trusty_all.deb
$ sudo dpkg -i zabbix-release_3.0-1+trusty_all.deb
$ sudo apt-get update
$ sudo apt-get install zabbix-agent
Then, modify agent configuration file (/etc/zabbix/zabbix_agentd.conf):
#Server=127.0.0.1
Server=172.31.12.10
Hostname=ip-172-31-4-244
Note that if we're installing both the Zabbix agent and the server on a same machine, we can use 127.0.0.1 as a server ip.
Restart Zabbix agent:
$ sudo service zabbix-agent restart
Ref : Zabbix Documentation 3.0.
In this section we will learn how to set up a new host.
Typical Zabbix hosts are the devices we wish to monitor (servers, workstations, switches, etc).
Creating hosts is one of the first monitoring tasks in Zabbix. For example, if we want to monitor some parameters on a server "x", we must first create a host called, say, "Server X" and then you can look to add monitoring items to it.
Note that hosts are organized into host groups.
To add a new host, click on "Configuration" -> "Hosts" -> "Create host".
The bare minimum to enter the given form is:
- Host name
- Groups - Select one or several groups from the right hand side
- IP address - Enter the IP address of the host.
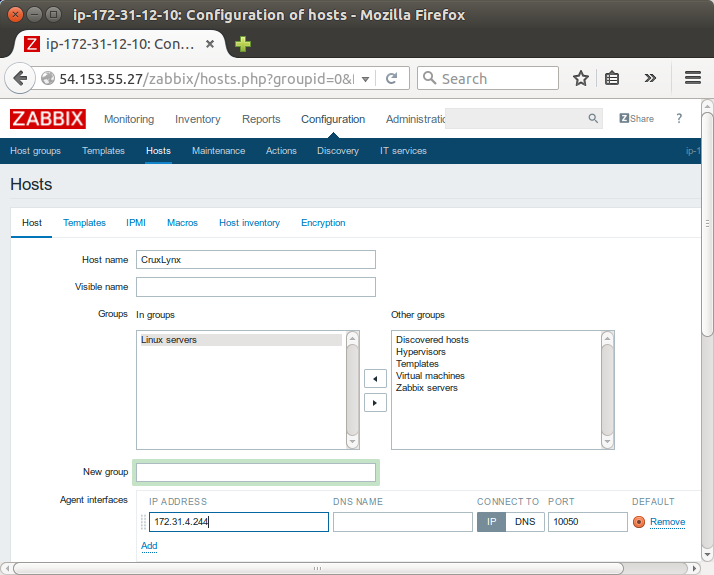
After adding a couple of more hosts:
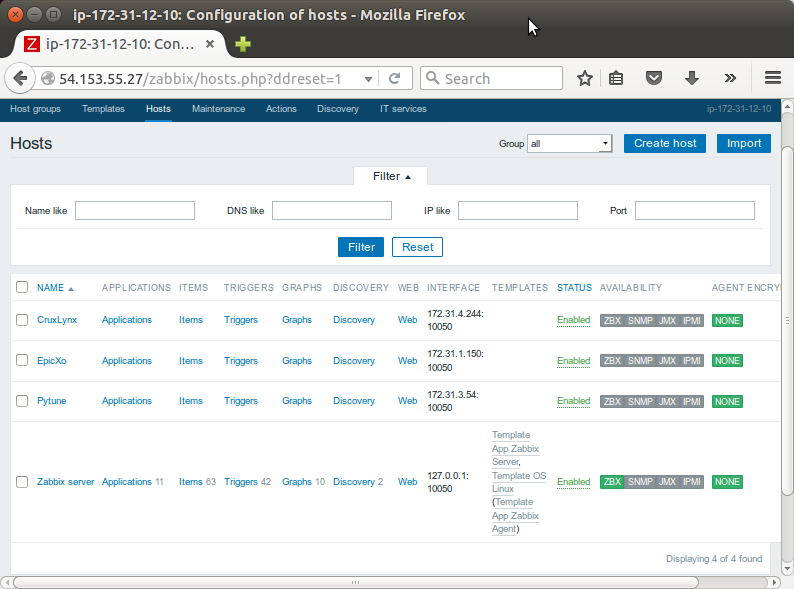
Note that we do not have any monitoring iterms unlike the Zabbix server host which has 53 iterm. So, we may want to add items to those hosts (Creating an item
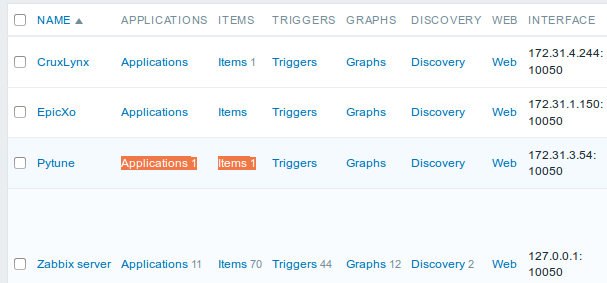
As a show case, I followed the official guide. Unlike the given sample, we need to type in "Application", in my case, it is "Memory". Now we can seee it's been added to PyTune host:
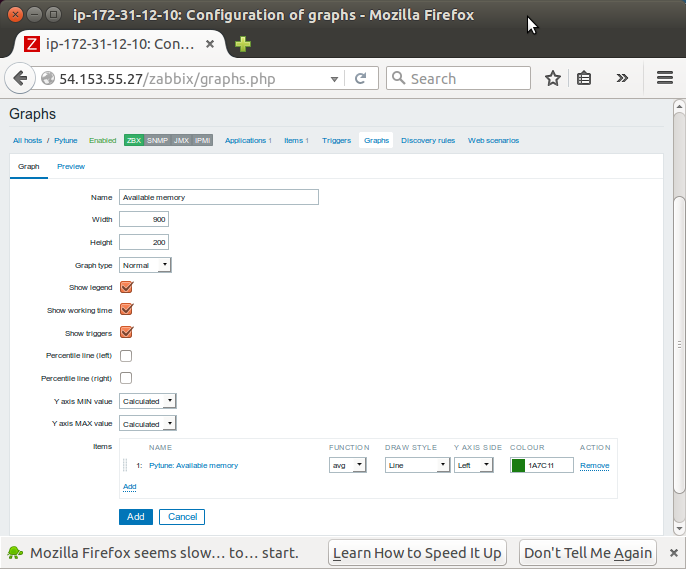
We may want to add a graph to the item just added: go to Graphs, then add "items" and then click "Add" button:
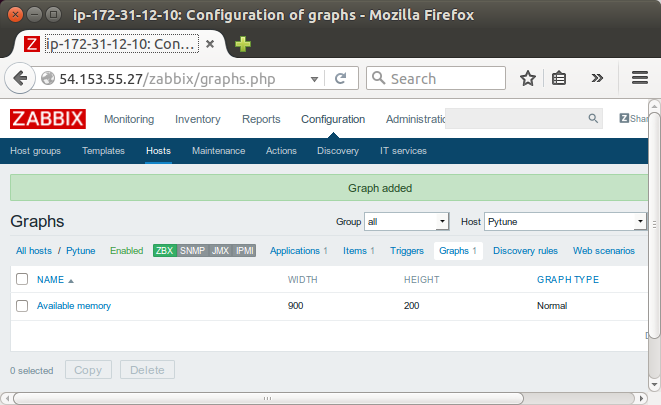
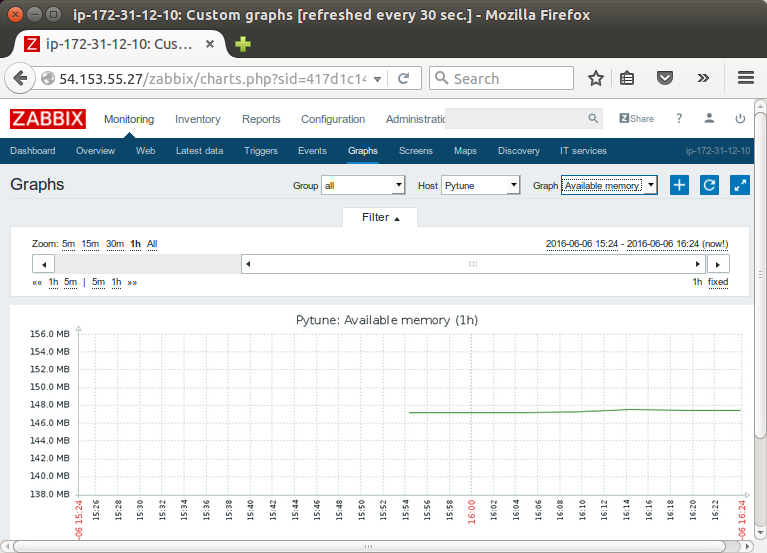
Just for a reference, here is a sample for adding an item to monitor a specific process:
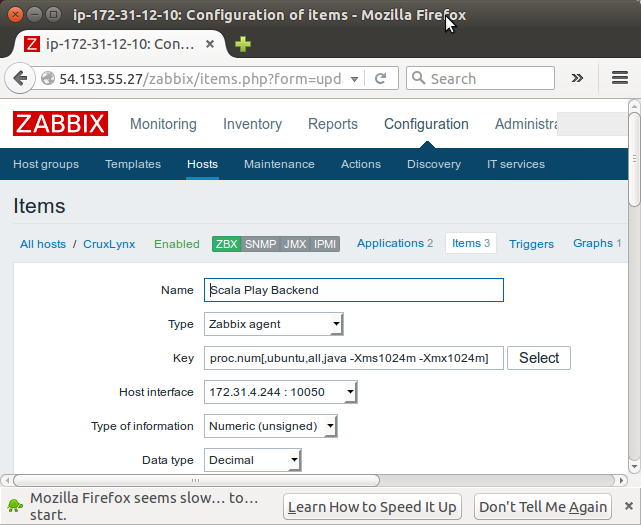
The critical infomation is in the parameters in Key.
The first parameter is the process name, we don't have to fill in, the second parameter is the process of running the username, the third for the state of a process which can be all (default), run, sleep, zomb. Lastly, the fourth parameter is used to specify the process name contains characters which is a filter.
DevOps
DevOps / Sys Admin Q & A
Linux - system, cmds & shell
- Linux Tips - links, vmstats, rsync
- Linux Tips 2 - ctrl a, curl r, tail -f, umask
- Linux - bash I
- Linux - bash II
- Linux - Uncompressing 7z file
- Linux - sed I (substitution: sed 's///', sed -i)
- Linux - sed II (file spacing, numbering, text conversion and substitution)
- Linux - sed III (selective printing of certain lines, selective definition of certain lines)
- Linux - 7 File types : Regular, Directory, Block file, Character device file, Pipe file, Symbolic link file, and Socket file
- Linux shell programming - introduction
- Linux shell programming - variables and functions (readonly, unset, and functions)
- Linux shell programming - special shell variables
- Linux shell programming : arrays - three different ways of declaring arrays & looping with $*/$@
- Linux shell programming : operations on array
- Linux shell programming : variables & commands substitution
- Linux shell programming : metacharacters & quotes
- Linux shell programming : input/output redirection & here document
- Linux shell programming : loop control - for, while, break, and break n
- Linux shell programming : string
- Linux shell programming : for-loop
- Linux shell programming : if/elif/else/fi
- Linux shell programming : Test
- Managing User Account - useradd, usermod, and userdel
- Linux Secure Shell (SSH) I : key generation, private key and public key
- Linux Secure Shell (SSH) II : ssh-agent & scp
- Linux Secure Shell (SSH) III : SSH Tunnel as Proxy - Dynamic Port Forwarding (SOCKS Proxy)
- Linux Secure Shell (SSH) IV : Local port forwarding (outgoing ssh tunnel)
- Linux Secure Shell (SSH) V : Reverse SSH Tunnel (remote port forwarding / incoming ssh tunnel) /)
- Linux Processes and Signals
- Linux Drivers 1
- tcpdump
- Linux Debugging using gdb
- Embedded Systems Programming I - Introduction
- Embedded Systems Programming II - gcc ARM Toolchain and Simple Code on Ubuntu/Fedora
- LXC (Linux Container) Install and Run
- Linux IPTables
- Hadoop - 1. Setting up on Ubuntu for Single-Node Cluster
- Hadoop - 2. Runing on Ubuntu for Single-Node Cluster
- ownCloud 7 install
- Ubuntu 14.04 guest on Mac OSX host using VirtualBox I
- Ubuntu 14.04 guest on Mac OSX host using VirtualBox II
- Windows 8 guest on Mac OSX host using VirtualBox I
- Ubuntu Package Management System (apt-get vs dpkg)
- RPM Packaging
- How to Make a Self-Signed SSL Certificate
- Linux Q & A
- DevOps / Sys Admin questions
Ph.D. / Golden Gate Ave, San Francisco / Seoul National Univ / Carnegie Mellon / UC Berkeley / DevOps / Deep Learning / Visualization