Puppet basic tasks with master/agent nodes on EC2 nodes

Puppet
In this chapter, we'll continue from the previous two chapters:
- Puppet master post install tasks - master's names and certificates setup,
- Puppet agent post install tasks - configure agent, hostnames, and sign request .
Since our infrastructure is set up to be managed with Puppet, we will learn how to do a few basic tasks to get us started.
Puppet gathers facts about each of its nodes with a tool called Facter. Facter gathers basic facts about nodes (systems) such as hardware details, network settings, OS type and version, IP addresses, MAC addresses, SSH keys and more. These facts are then made available in our Puppet manifests as variables.
"Puppet discovers the system information via a utility called Facter, and compiles the Puppet manifests into a system-specific catalog containing resources and resource dependency, which are applied against the target systems." - wiki
It is possible to add custom facts if we need other facts to perform our configurations.
Facter is Puppet's cross-platform system profiling library. It discovers and reports per-node facts, which are available in our Puppet manifests as variables.
$ facter
architecture => amd64
augeasversion => 1.2.0
blockdevice_xvda_size => 8589934592
blockdevices => xvda
domain => example.com
facterversion => 2.4.4
filesystems => ext2,ext3,ext4,iso9660,vfat
fqdn => puppet.example.com
hardwareisa => x86_64
hardwaremodel => x86_64
hostname => puppet
id => ubuntu
interfaces => eth0,lo
ipaddress => 172.31.12.201
ipaddress_eth0 => 172.31.12.201
ipaddress_lo => 127.0.0.1
is_virtual => true
kernel => Linux
kernelmajversion => 3.13
kernelrelease => 3.13.0-48-generic
kernelversion => 3.13.0
...
Puppet programs are called manifests, and they use the .pp file extension.
Puppet always starts compiling with either a single manifest file or a directory of manifests that get treated like a single file. This main starting point is called the main manifest or site manifest.
The puppet agent periodically checks in with the puppet master (typically every 30 minutes). During this time, it will send facts about itself to the master, and pull a current catalog--a compiled list of resources and their desired states that are relevant to the agent, determined by the main manifest. The agent node will then attempt to make the appropriate changes to achieve its desired state. This cycle will continue as long as the Puppet master is running and communicating with the agent nodes.
On the master:
$ sudo vi /etc/puppet/manifests/site.pp
Now add the following lines to describe a file resource:
file {'/tmp/example-ip':                                            # resource type file and filename
  ensure  => present,                                               # make sure it exists
  mode    => 0644,                                                  # file permissions
  content => "Here is my Public IP Address: ${ipaddress_eth0}.\n",  # note the ipaddress_eth0 fact
}
This will make ensure that all agent nodes will have a file at /tmp/example-ip, with -rw-r--r-- permissions, and text that contains the node's public IP address.
We can either wait until the agent checks in with the master automatically, or we can run the following on the agent:
$ cat /tmp/example-ip
cat: /tmp/example-ip: No such file or directory

$ sudo puppet agent --test
Info: Retrieving pluginfacts
Info: Retrieving plugin
Info: Caching catalog for agent.us-west-1.compute.internal
Info: Applying configuration version '1442187876'
Notice: /Stage[main]/Main/File[/tmp/example-ip]/ensure: created
Notice: Finished catalog run in 0.02 seconds
Then run the 'cat' command again to print the file:
$ cat /tmp/example-ip
Then, we should see output that looks like the following (with that node's IP address):
Here is my Public IP Address: 172.31.12.202.
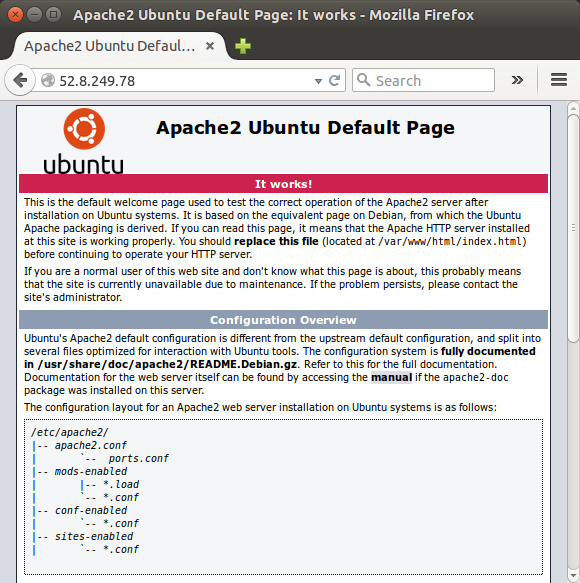
Just for reference, if we type in public ip address of our Puppet master node where Apache has already been installed, we get this:

Now we want to install Apache to our agent node, agent.localdomain using a module with master's manifest.

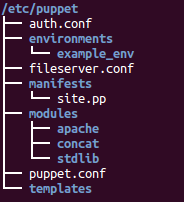
On the Puppet master, install the puppetlabs-apache module from forgeapi:
$ sudo puppet module install puppetlabs-apache

Edit site.pp on master:
$ sudo vi /etc/puppet/manifests/site.pp
Now add the following lines to install Apache on out agent node, agent.localdomain:
node 'agent' {
  class { 'apache': }             # use apache module
  apache::vhost { 'puppet.localdomain':  # define vhost resource
    port    => '80',
    docroot => '/var/www/html'
  }
}
Now, the next time Puppet updates agent.localdomain, it will install the Apache package, and configure a virtual host called "localdomain", listening on port 80, and with a document root /var/www/html.
On agent.localdomain, run the following command:
$ sudo puppet agent --test
...
Info: /etc/apache2/mods-enabled: Scheduling refresh of Class[Apache::Service]
Info: Class[Apache::Service]: Scheduling refresh of Service[httpd]
Notice: /Stage[main]/Apache::Service/Service[httpd]: Triggered 'refresh' from 56 events
Notice: Finished catalog run in 10.06 seconds
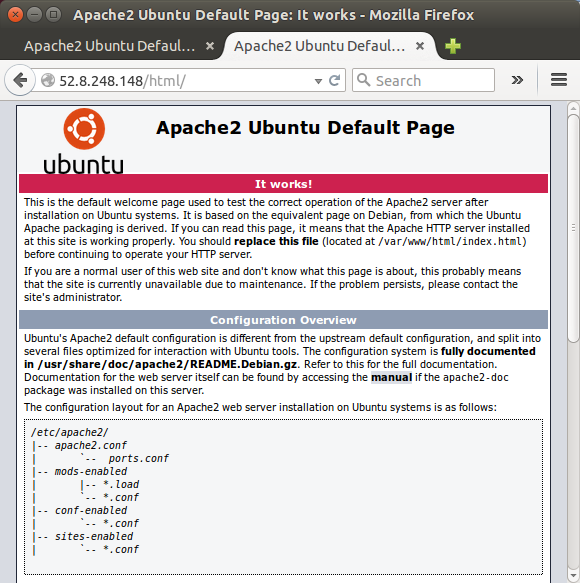
Now, Apache was installed. Once it is complete, go to agent.localdomain's public IP address(52.8.248.148). Then, we should see the default Apache welcome page:

We can initiate the check for a particular agent node manually, by running the following command on the agent node:
On Puppet master node:
$ sudo puppet master
Then, on Puppet agent node:
$ puppet agent --test
Running this will apply the main manifest to the agent running the test. We may see output like the following:
Info: Caching certificate for puppetagent.example.com
Info: Caching certificate_revocation_list for ca
Info: Caching certificate for puppetagent.example.com
Info: Retrieving pluginfacts
Info: Retrieving plugin
Info: Caching catalog for puppetagent.example.com
Info: Applying configuration version '1415423250'
Info: Creating state file /var/lib/puppet/state/state.yaml
This command is useful for seeing how the main manifest (/etc/puppet/manifests/site.pp) will affect a single server immediately.
The puppet apply command allows us to execute manifests that are not related to the main manifest, on demand. It only applies the manifest to the node that we run the apply from. Here is an example:
$ sudo puppet apply /etc/puppet/modules/test/init.pp
Running manifests this way is useful if we want to test a new manifest on an agent node, or if we just want to run a manifest once (e.g. to initialize an agent node to a desired state).
Puppet apply does not use the manifest setting or environment-specific manifests; it always uses the manifest given on the CLI.
Puppet
Ph.D. / Golden Gate Ave, San Francisco / Seoul National Univ / Carnegie Mellon / UC Berkeley / DevOps / Deep Learning / Visualization