Ubuntu 14.04 guest on Mac OSX host using VirtualBox II - 2018

Continued from Ubuntu 14.04 guest on Mac OSX host using VirtualBox I .
We'll setup Virtualbox Guest Additions, networks, and SSH.
We may want to install the Virtualbox Guest Additions to enable features like shared folders, etc. Via guest additions, we can access local files in our host machine.
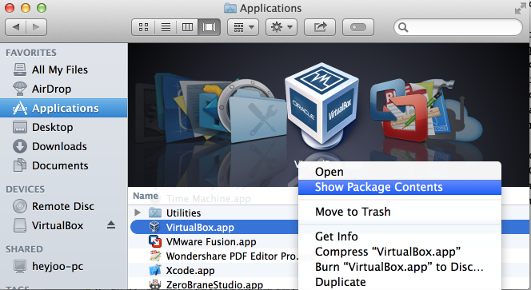
- In Mac OS X, open Finder and browse to Applications folder.
- Right-click on the Virtualbox icon and select "Show Package Contents"
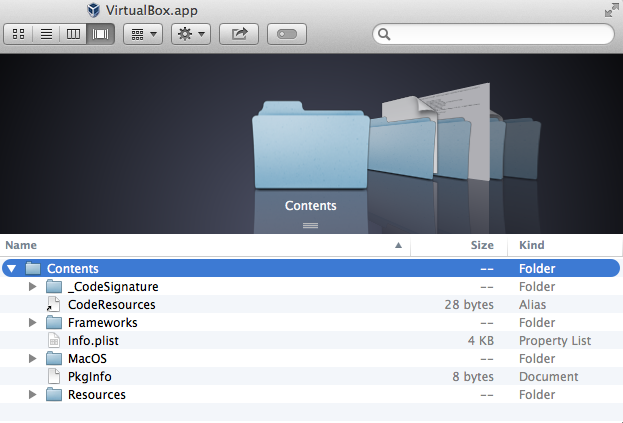
- Click the folder "Contents" and then on "MacOS"
- Now we're in the MacOS folder of the application Virtualbox.
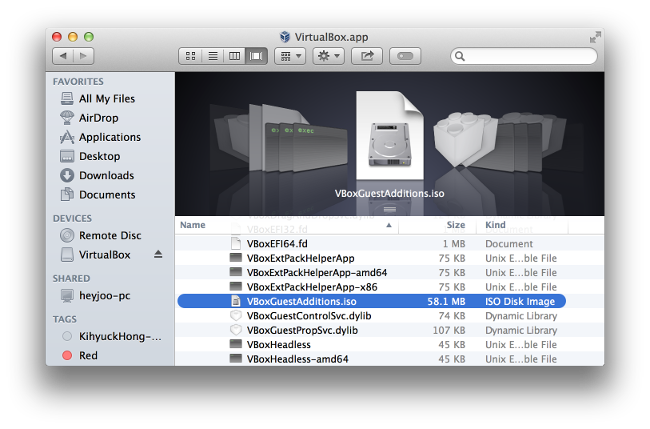
- Search the file VBoxGuestAdditions.iso and copy it to Mac's desktop
- Now close all Finder windows and head back to the running Virtualbox application.
- Ubuntu should be rebooted.
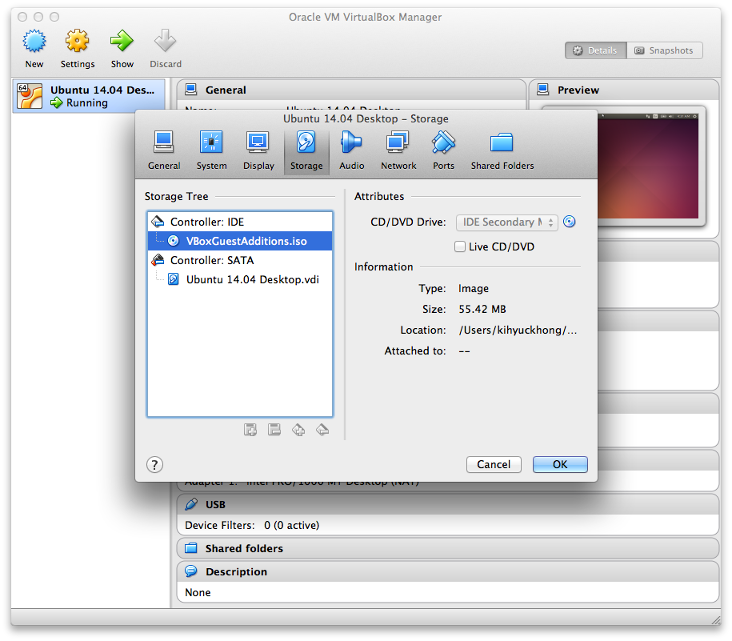
- Browse to "Storage" and click on the empty disc under Controller:IDE. On the right side of the window is a small CD icon.
Click on it and select the VBoxGuestAdditions.iso on desktop and click on "Open" and then on "OK". It is now mounted as a CD on our Ubuntu guest. - Run the following lines of command:
$ sudo apt-get install dkms -y
$ cd /media
$ sudo mkdir vbox
$ sudo mount /dev/sr0 vbox/
$ cd vbox/
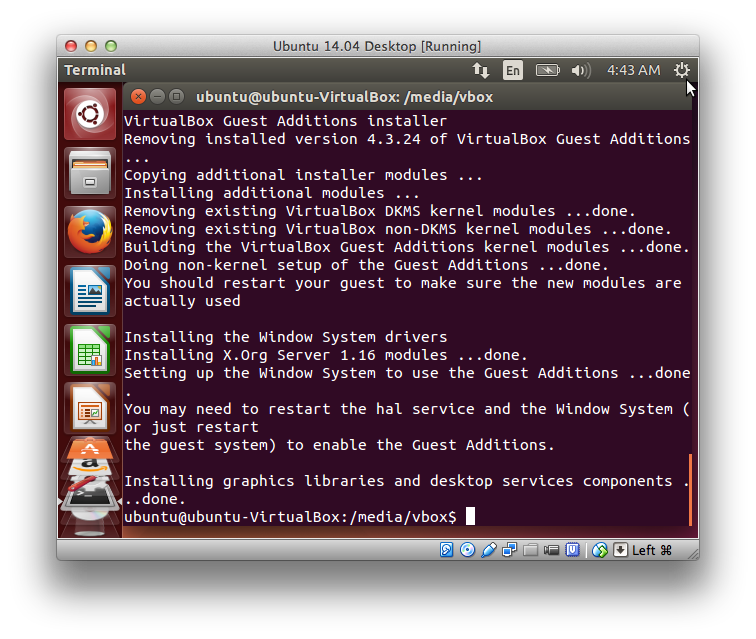
$ sudo sh ./VBoxLinuxAdditions.run
- Guest Additions is installed now.
Now we want to setup the networks so that we can SSH from our Mac OS X into the Ubuntu. Our Ubuntu will be able to reach the Internet and see other Virtualbox machines as well.
- To enable static IP addresses on our VirtualBox VMs, we'll first need to setup a Host-only network. The Host-only network is a virtual network provided by VirtualBox that is visible only to the Host OS and its virtual machines. This can be used to create a network containing the host and a set of virtual machines, without the need for the host's physical network interface. Instead, a virtual network interface (similar to a loopback interface) is created on the host, providing connectivity among virtual machines and the host.
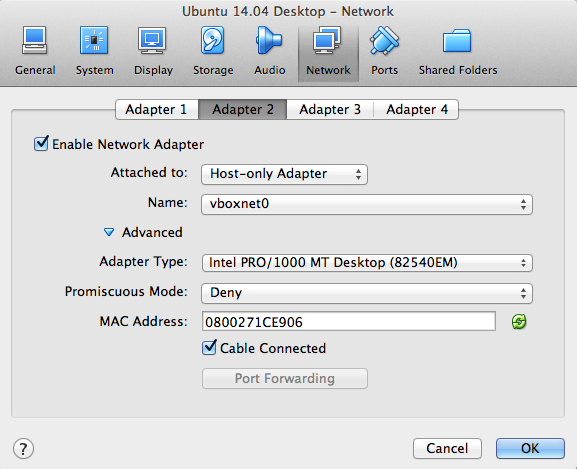
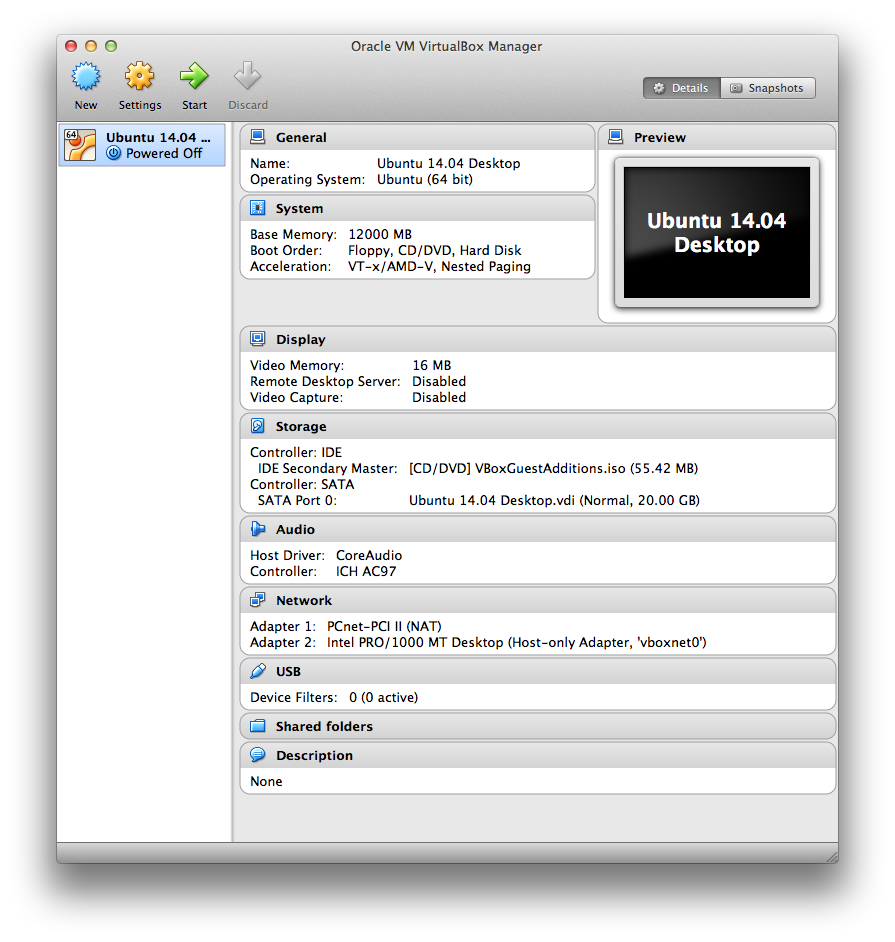
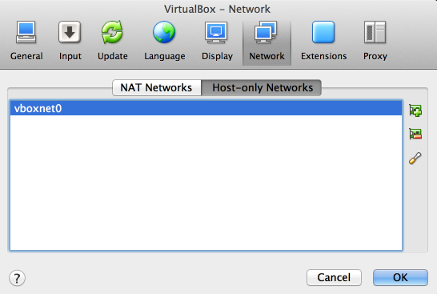
In main Preferences of Virtualbox, under Network, add the Host-only network vboxnet0. - In the network settings for the virtual machine, set up adapters via VirtualBox Manager. Note that we need to shutdown our guest OS:
$ sudo shutdown -h now
- Adapter 1 is NAT - for Internet connectivity
When a guest machine is set-up in this mode, then outside world will never be able to communicate with the Guest machine directly. When the guest machine sends an IP packet to some remote machine, VirtualBox's NAT Engine will receive the packet and extracts the TCP/IP segments, and change the IP address to the IP address of the HOST machine. So, the outside world only see the IP address of the Host machine. When a reply is sent, then it will be received by the HOST machine and resend to the Guest Machine. - Adapter 2 is Host-only using vboxnet0 for the network we configured in Step 1
It is a hybrid of Bridged and Internal networking. In this mode, the Guest machine can talk to each other and also with the Host machine. It will look like, all machines (including Host and Guest Machines), are connected to a physical network switch. The guest machine cannot communicate with the outside world, since they are not connected via a physical interface.
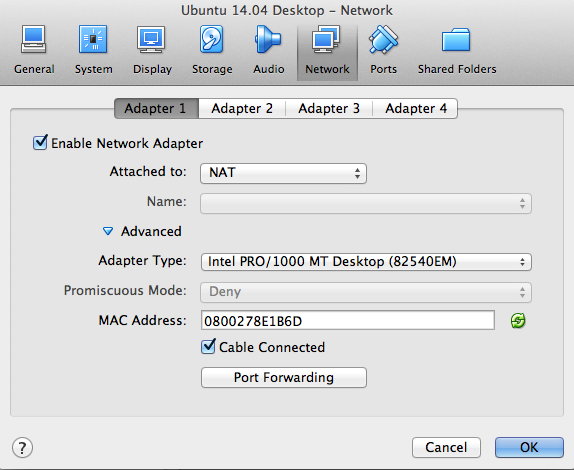
- Adapter 1 is NAT - for Internet connectivity
- Reboot
$ sudo rm /etc/udev/rules.d/70-persistent-net.rules
$ sudo reboot
- We can see our adapters under /sys/class/net. In our case, the adapters are named eth0 and eth1 (and lo, the loopback interface).
- In Ubuntu guest, open the network settings:
$ sudo vim /etc/network/interfaces
- Paste the following text into the file and save it:
# The loopback network interface
auto lo
iface lo inet loopback

# The primary network interface
auto eth0
iface eth0 inet dhcp

# The secondary network interface (static IP)
auto eth1
iface eth1 inet static
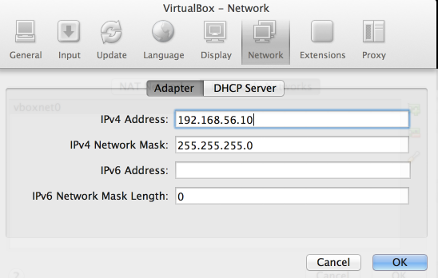
    address 192.168.56.10
    netmask 255.255.255.0
Note that eth1 has no default gateway specified while eth0 will get a default gateway from dhcp.
Now we want to access our ~/Documents/SharedVM folder of Mac OSX inside of Ubuntu.
Since the Virtualbox's console is not so convenient, we want to access the Guest OS via SSH.
- We need to shutdown Ubuntu VM and open the Preferences of the Ubuntu VM
- Go to "Shared Folder" and click on "+"
- In the first line of the popup select the folder (~/Documents) on our Mac which we want to see in Ubuntu. In the second line of the popup enter the name (SharedVM)
- Activate the second checkbox "Auto-mount"
- Click "OK" and start the Ubuntu VM
- Now our Ubuntu can see ~/Documents/SharedVM via /mount/sf_SharedVM
Ph.D. / Golden Gate Ave, San Francisco / Seoul National Univ / Carnegie Mellon / UC Berkeley / DevOps / Deep Learning / Visualization